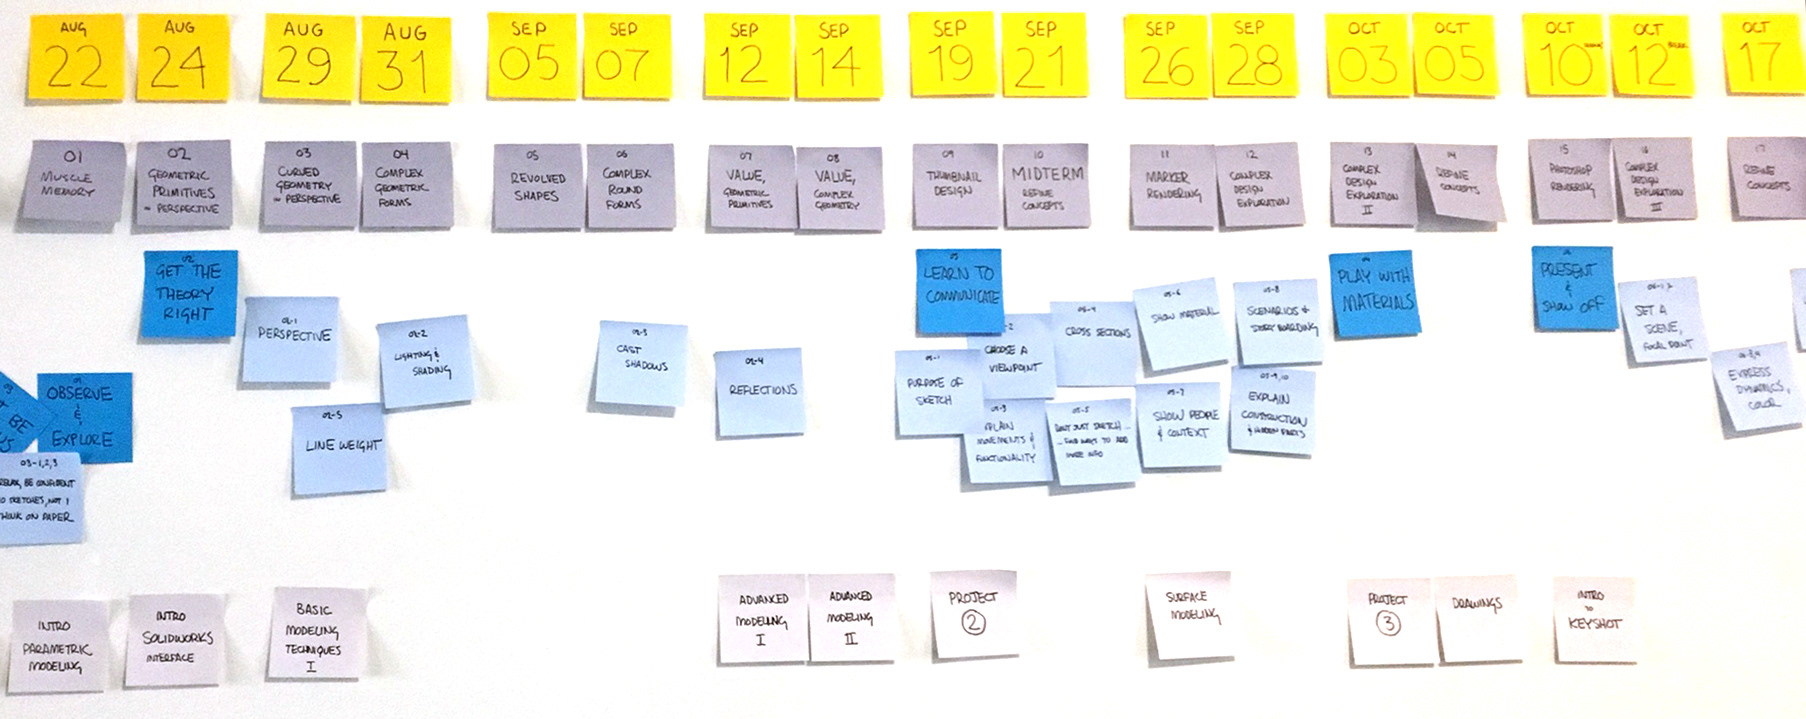
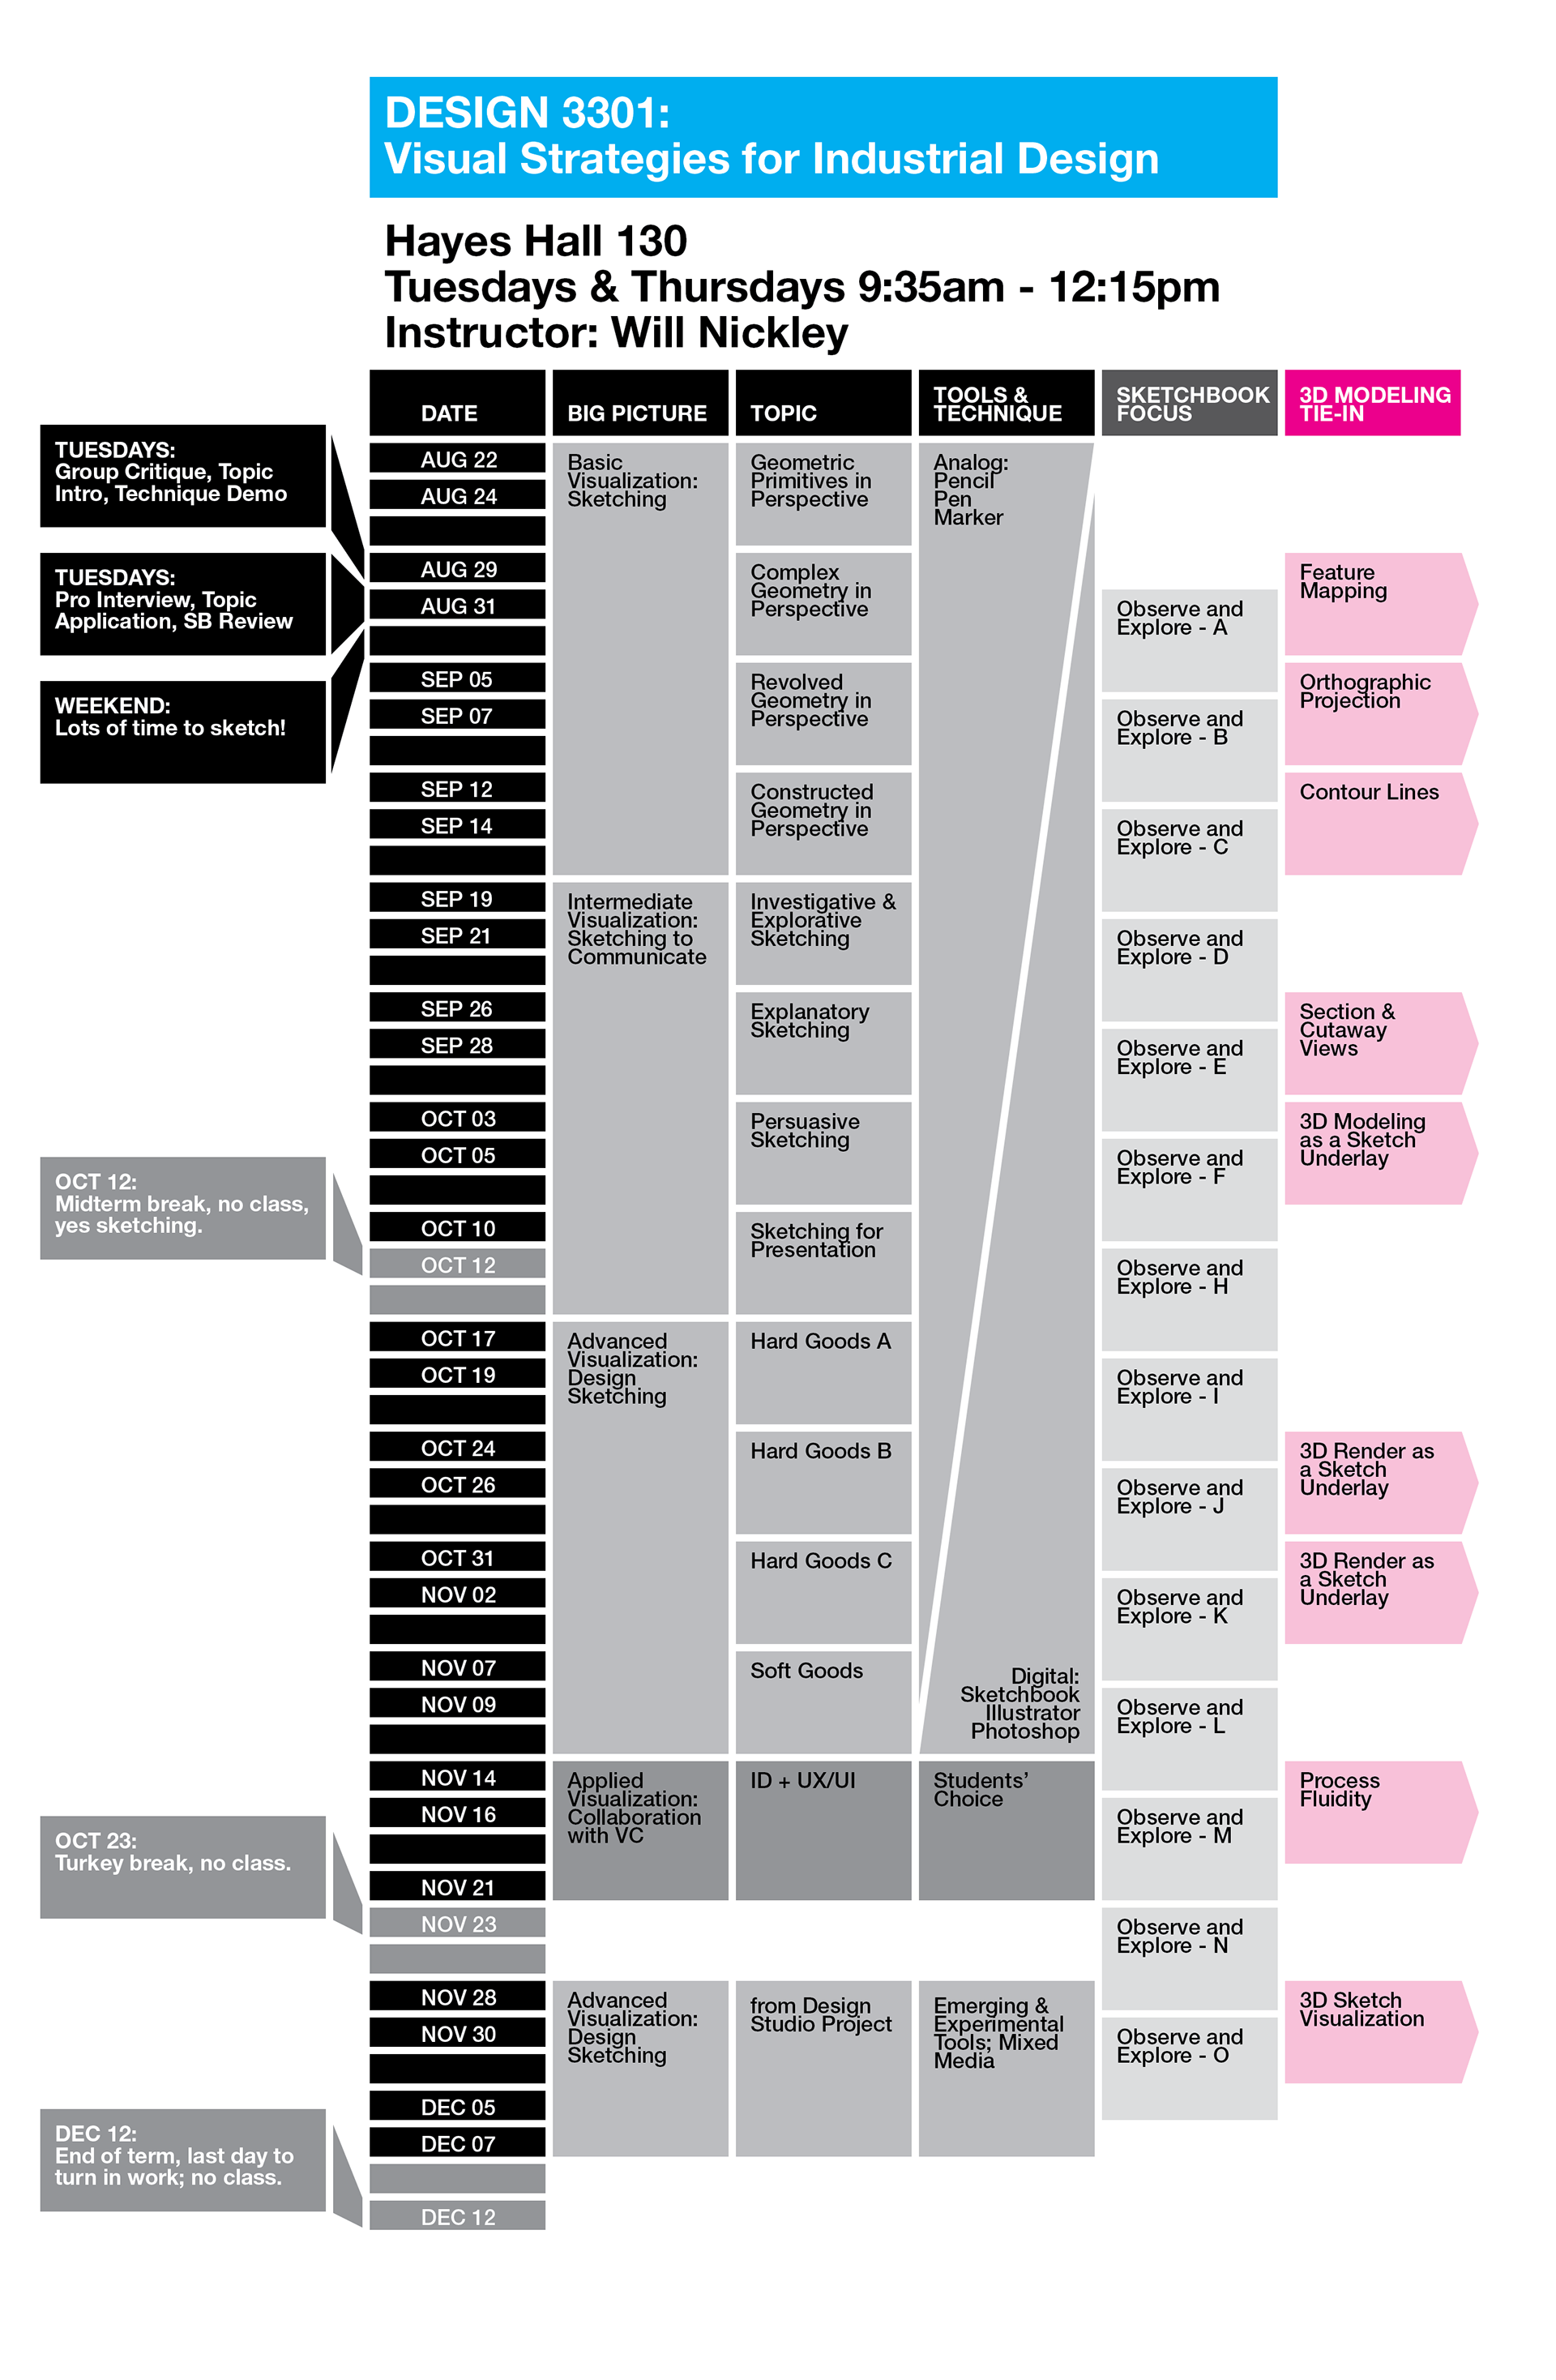
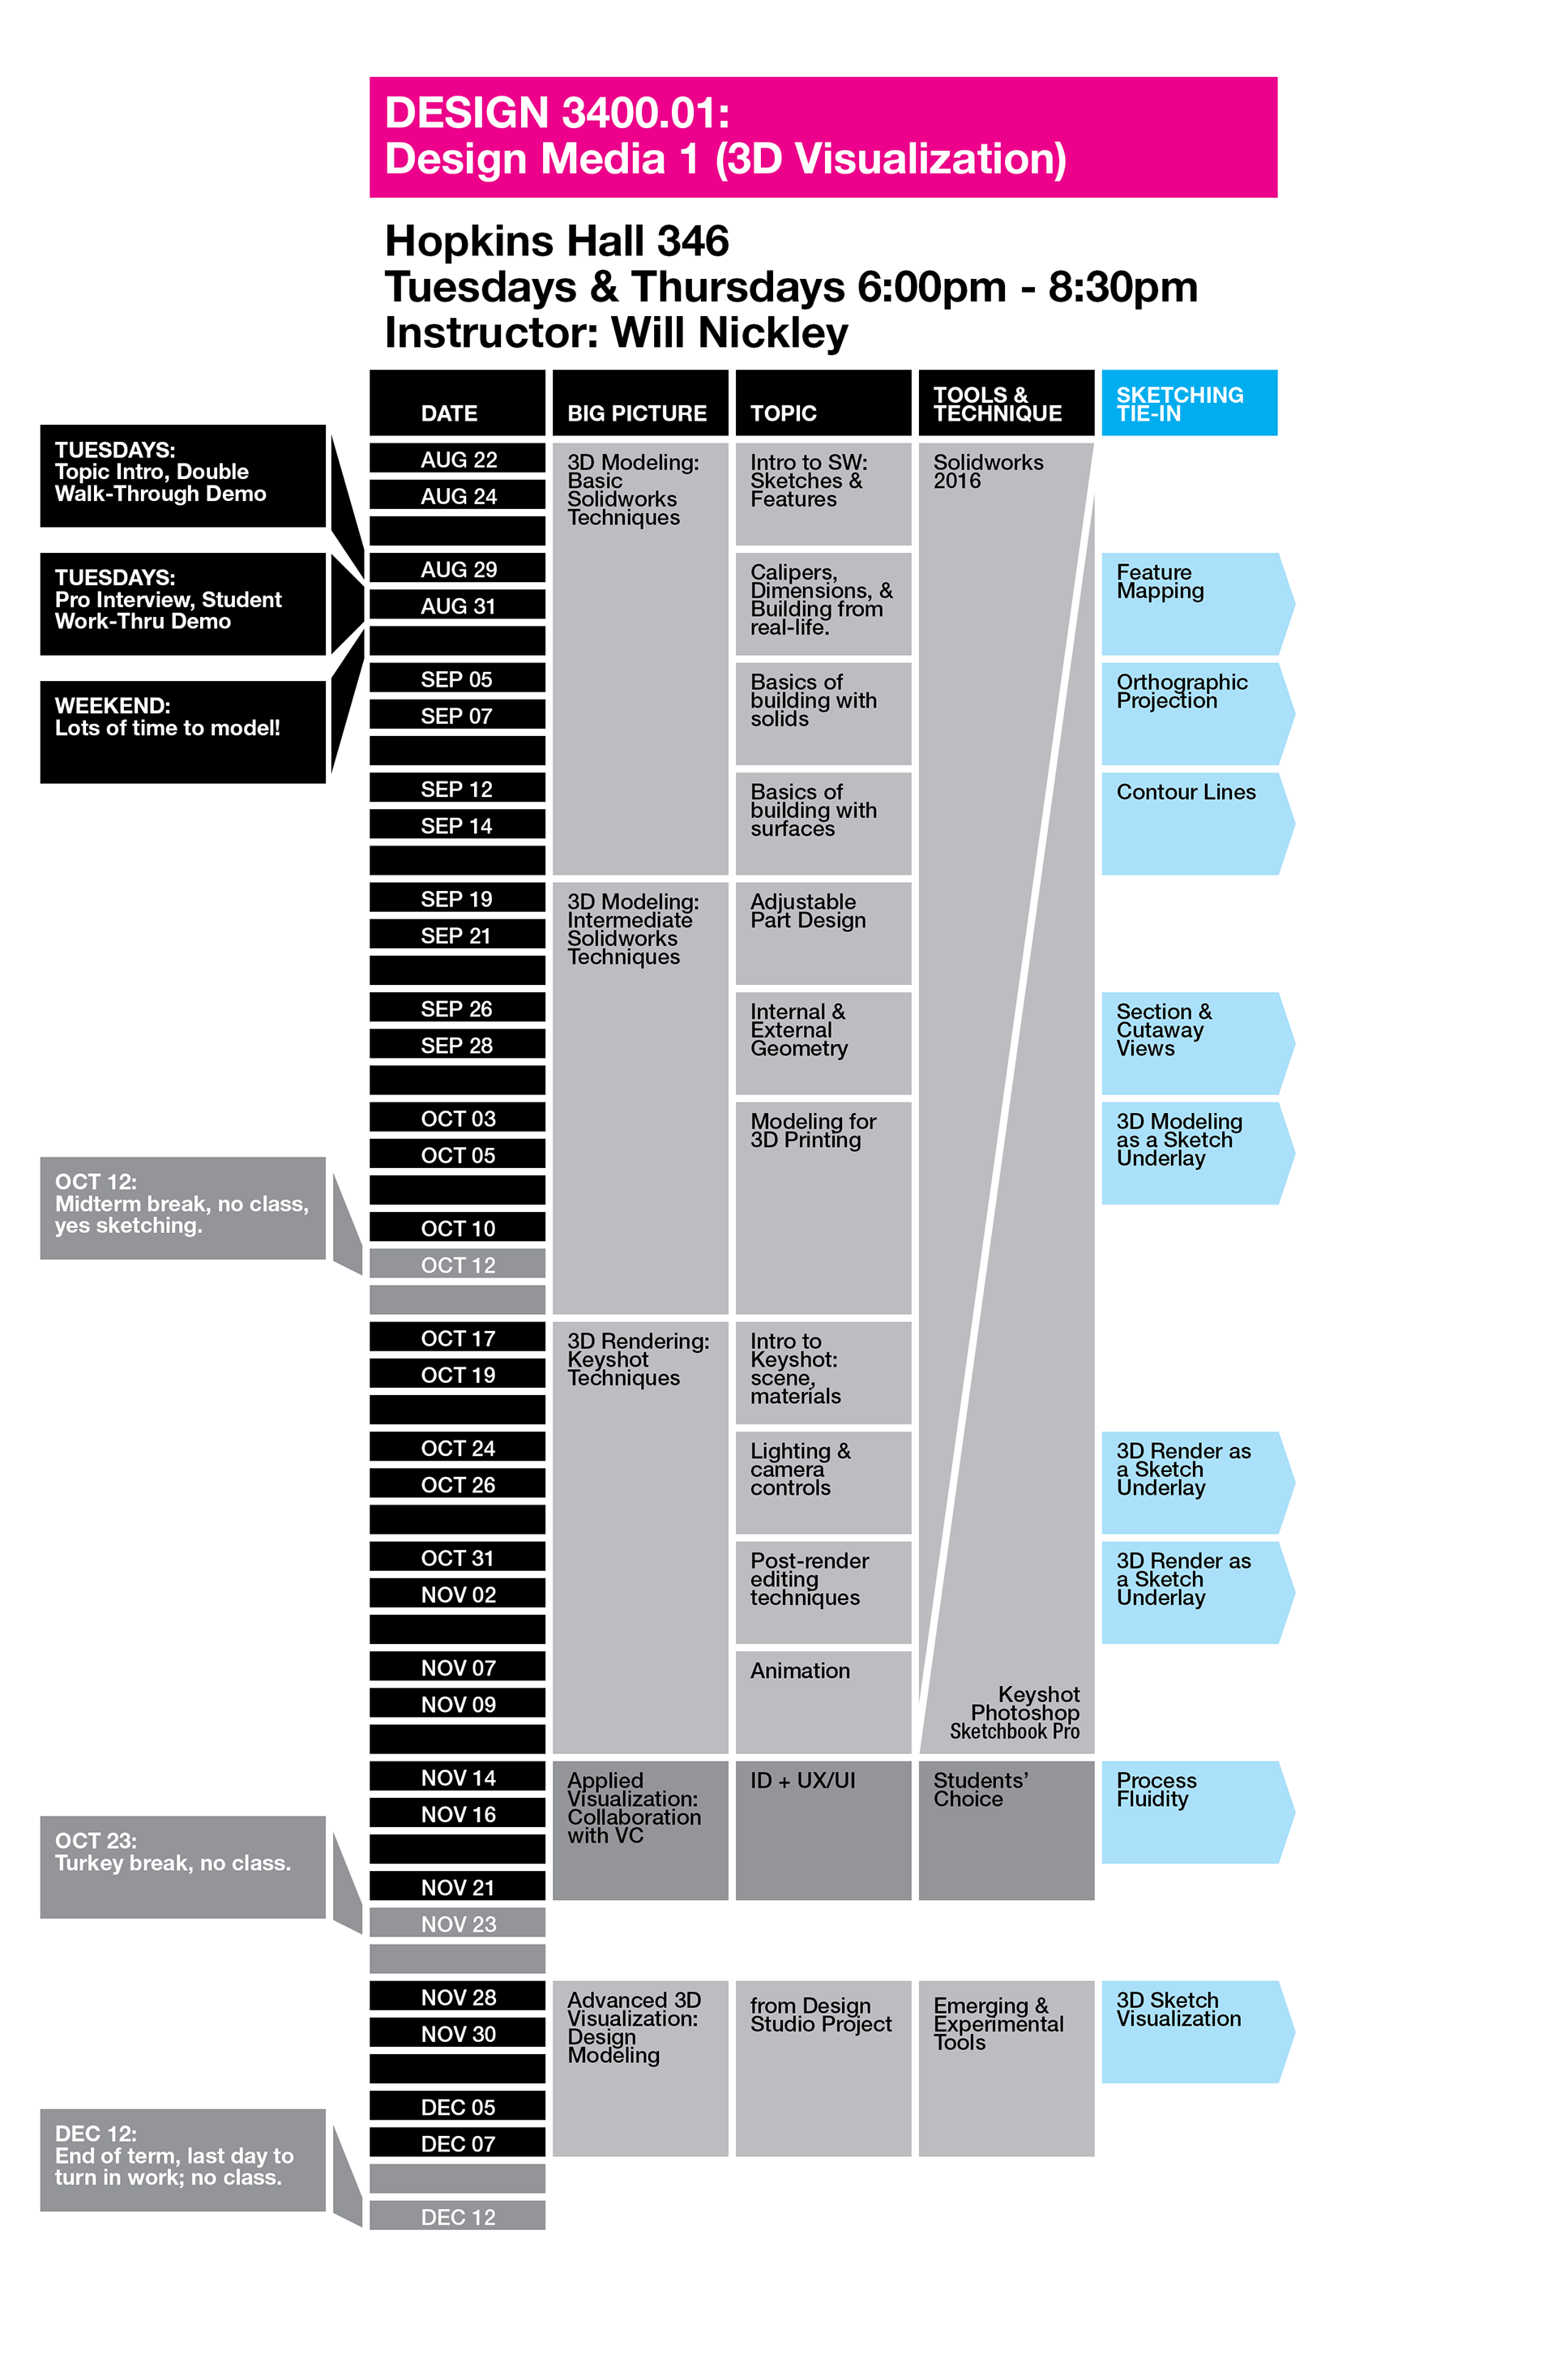
During the 2017/2018 academic school year, I drew on my professional design experiences to develop and teach three unique sophomore level industrial design courses for the Department of Design at The Ohio State University.
Known as the "sketching" and "Solidworks" classes, my understanding of sketching and modeling in practice is that they're rarely separated for long, and include a variety of technologies! My approach to delivering course material was to prioritize students' understanding of when and why to use a particular sketching technique or 3D modeling tool within the context of a multi-week design effort instead of emphasizing technique or execution. I did my best to integrate many tools and designerly ways of making into each project, allowing students to form their own "tool-chains" on their journey from idea to final presentation.
The following examples are entirely student work, and I think their progress and resulting work as sophomores speak volumes about their ability to adapt tools and techniques to match projects of their own choice, playing to their strengths and interests.
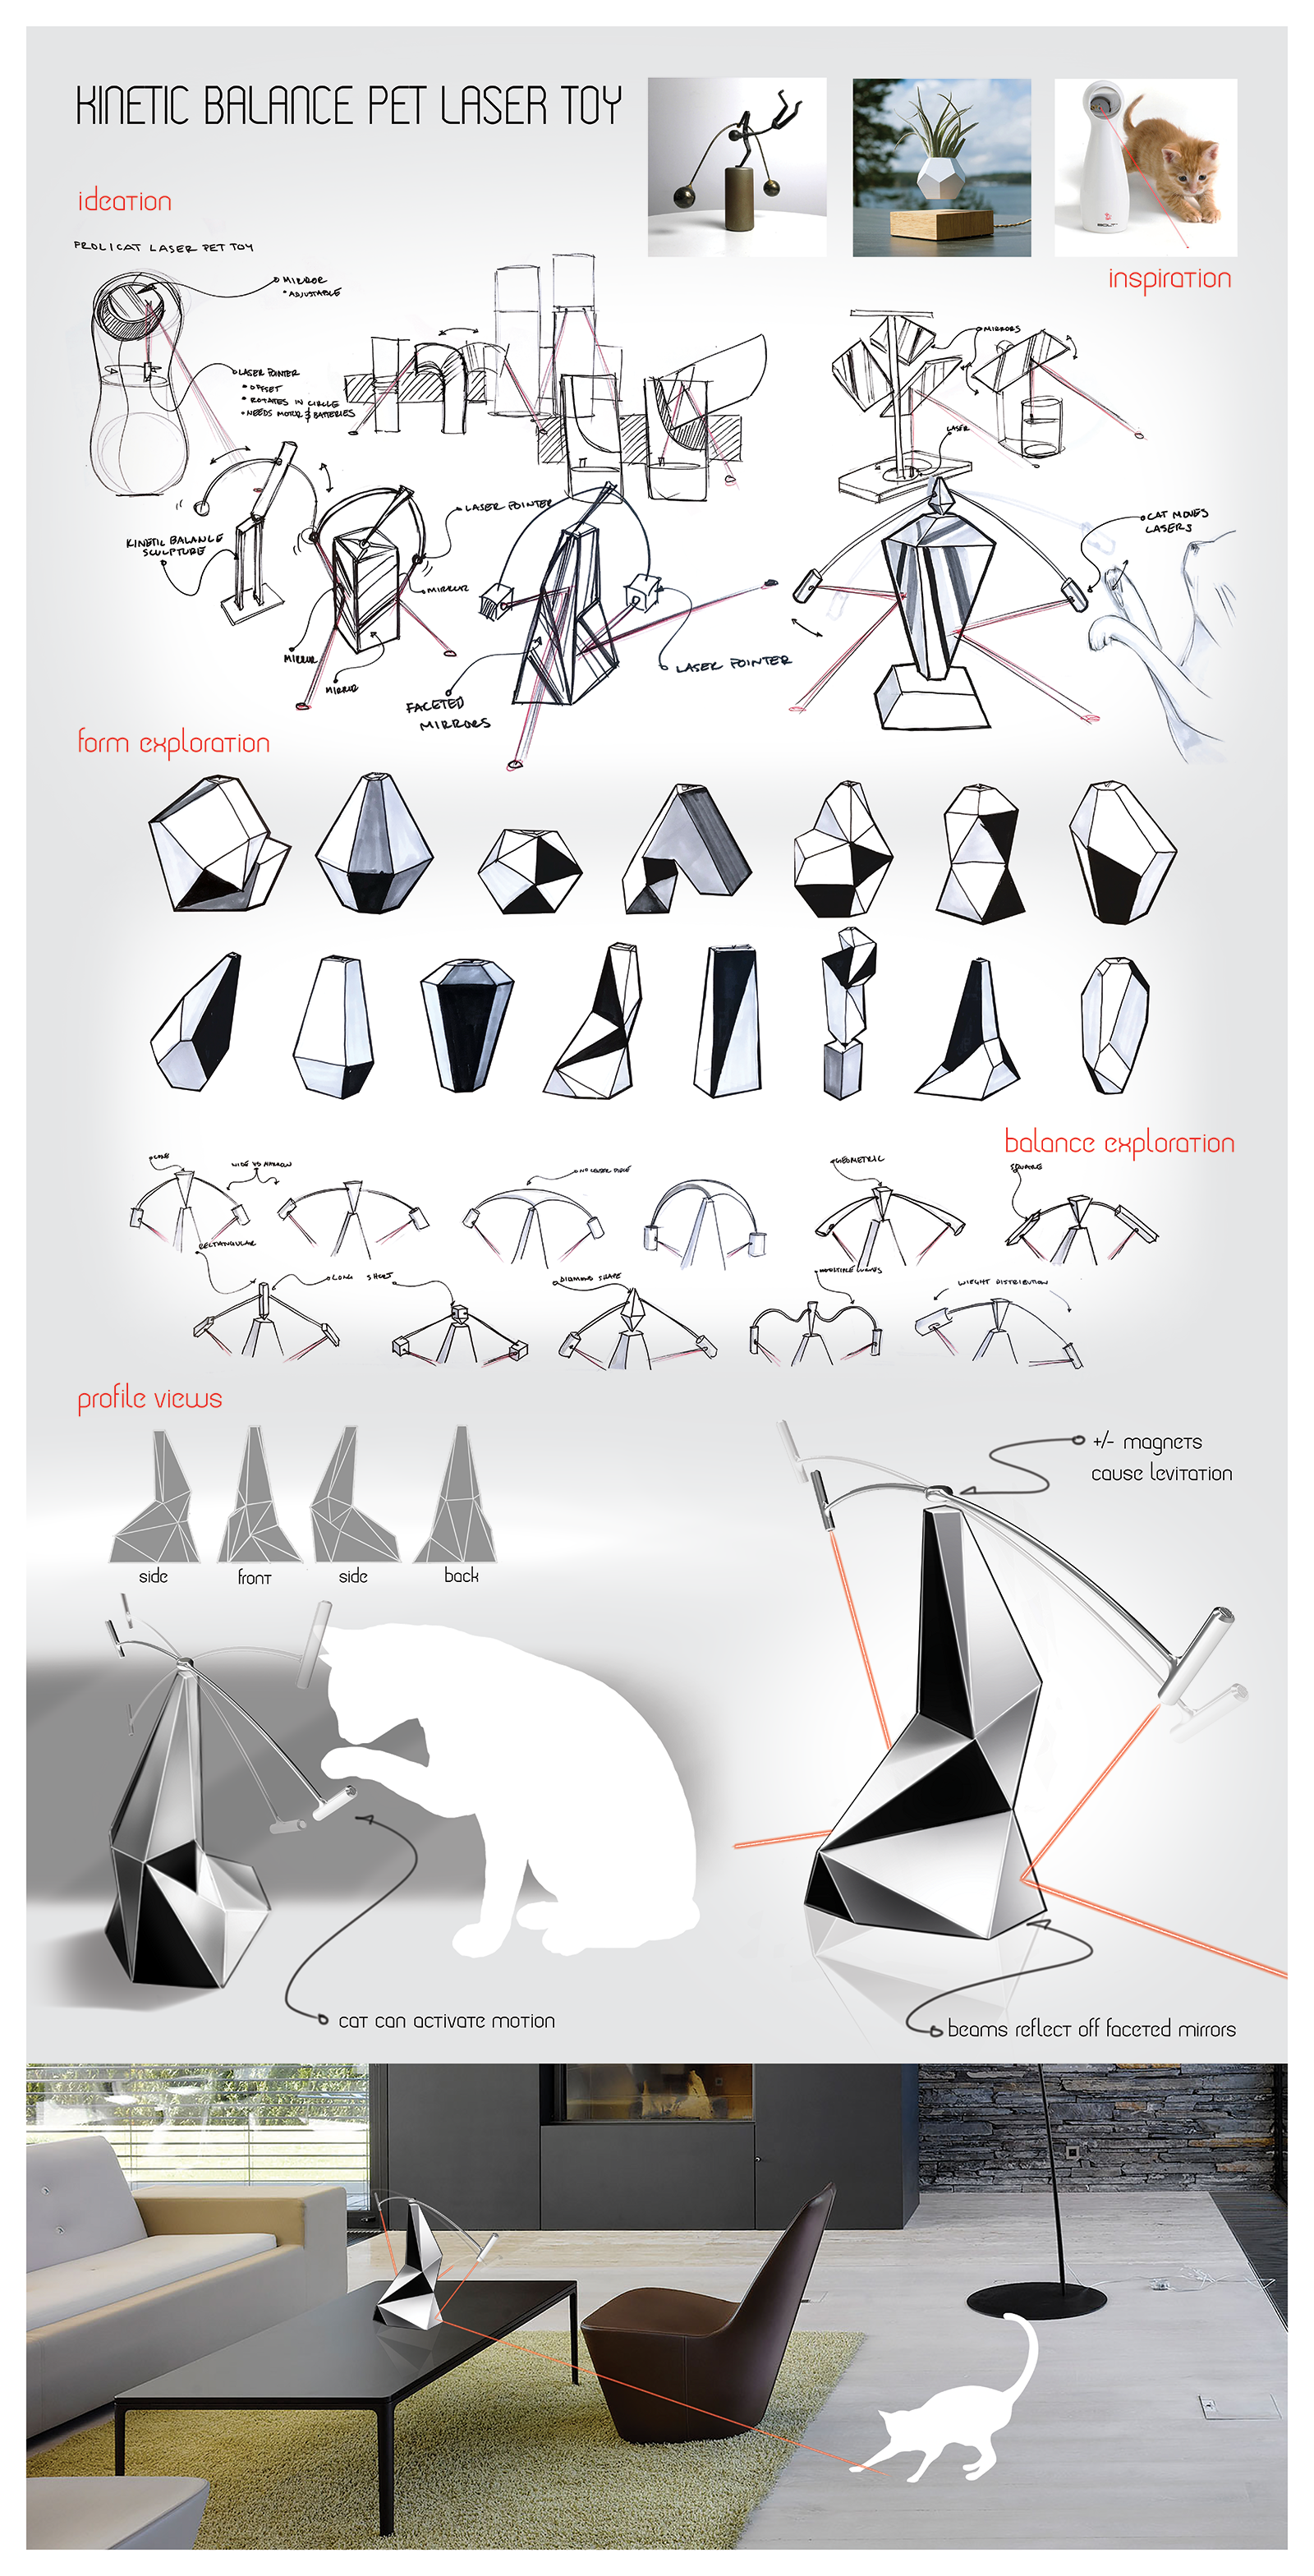
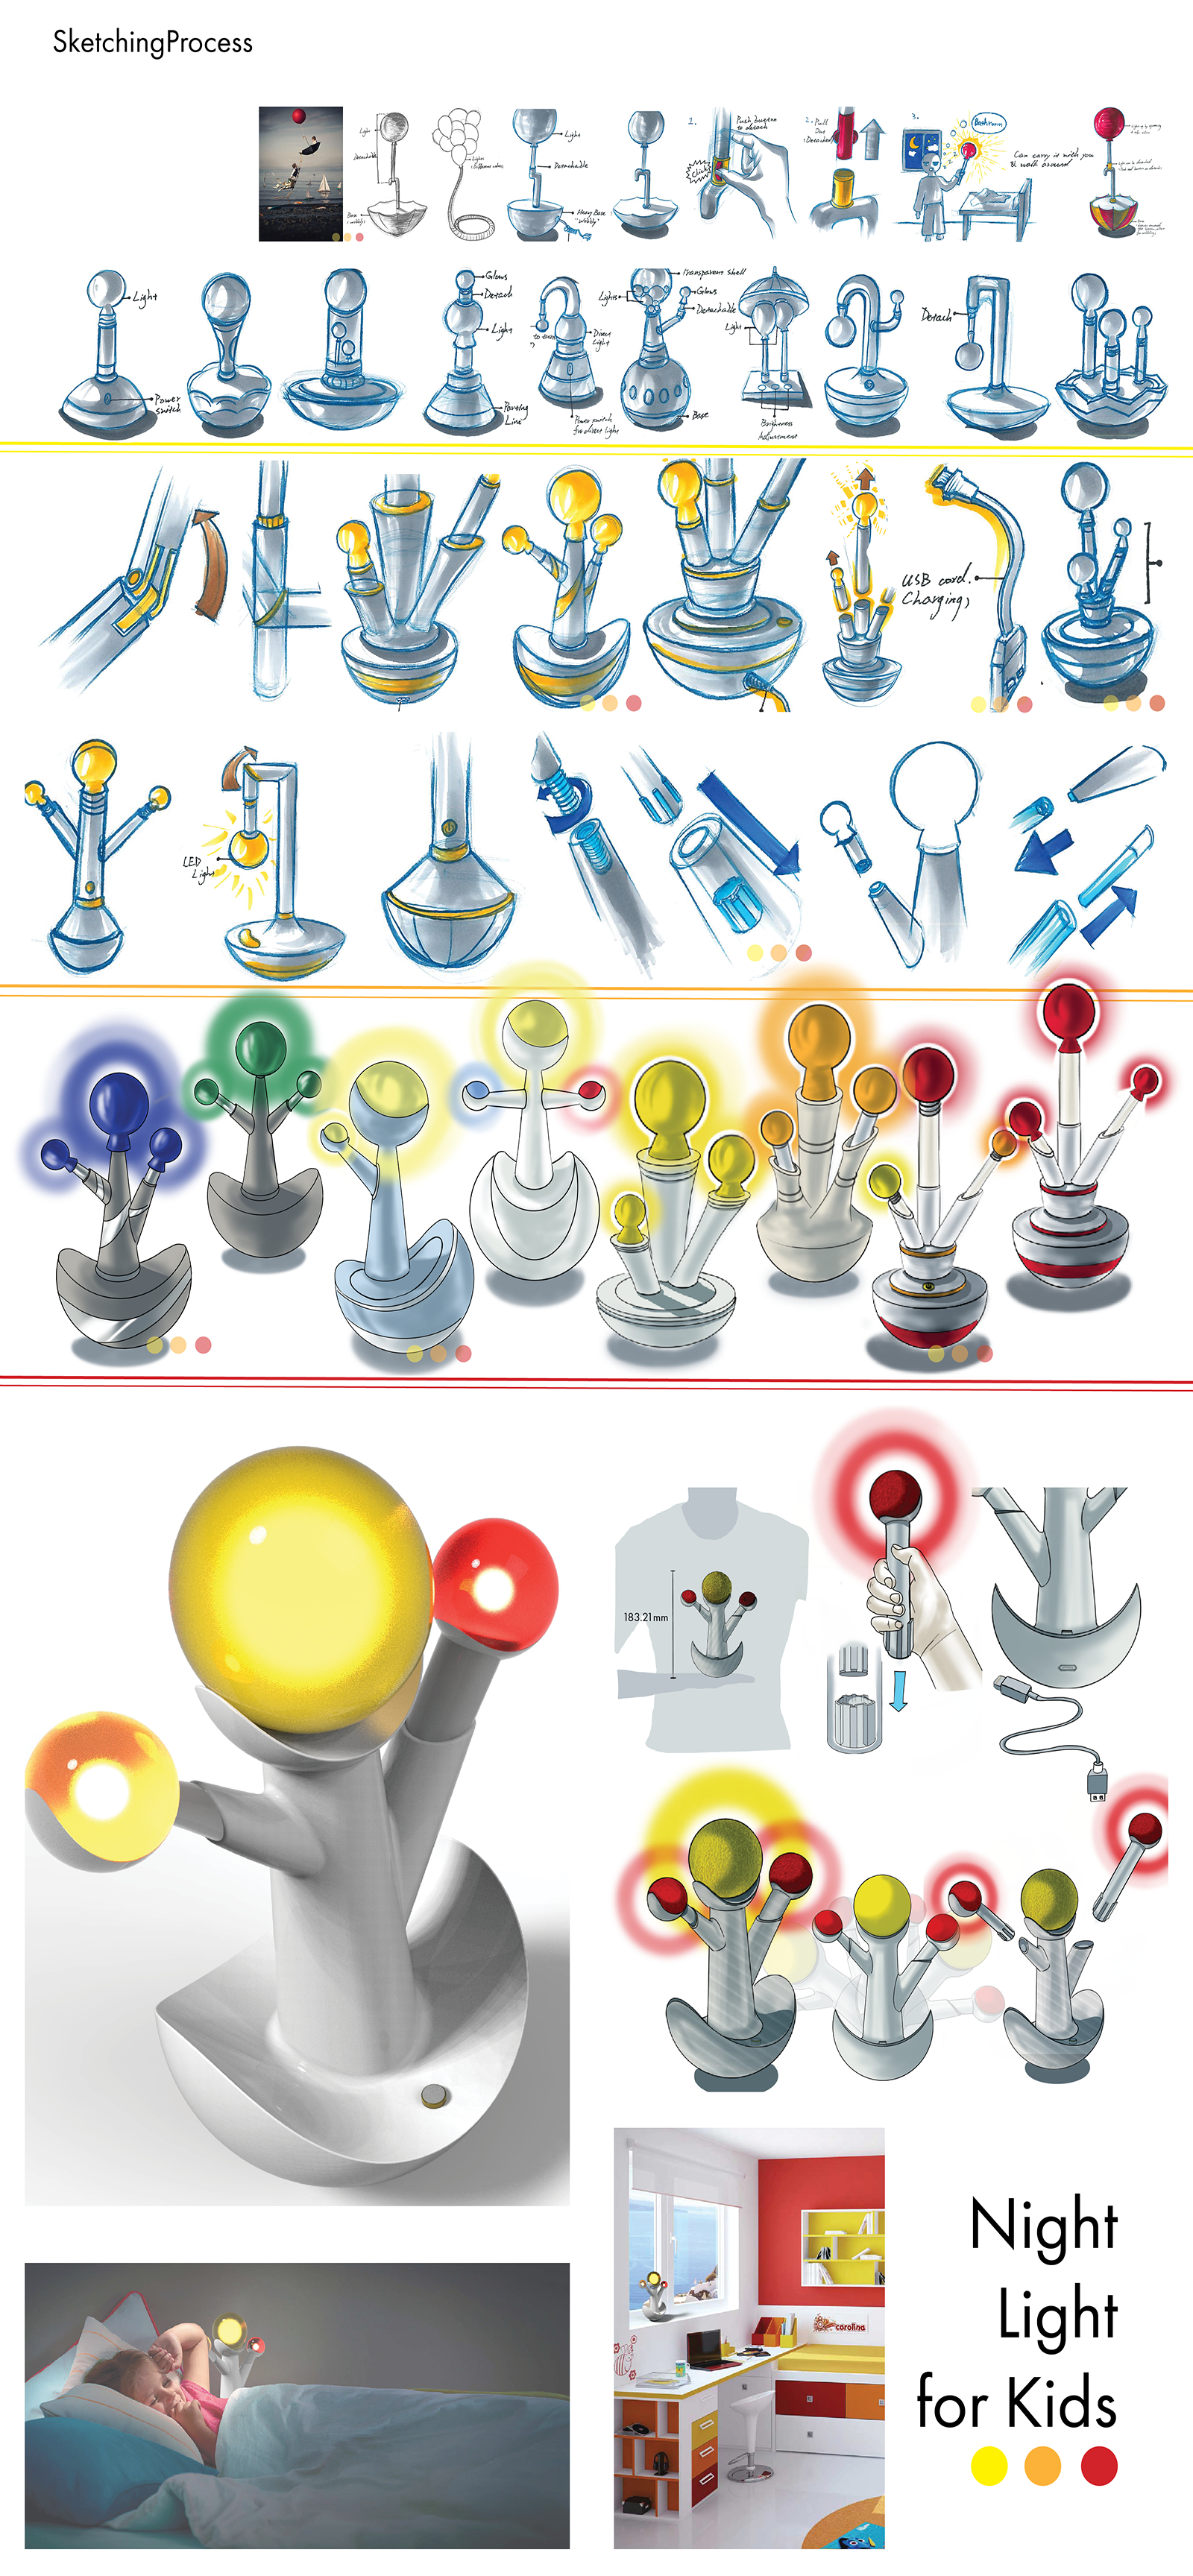
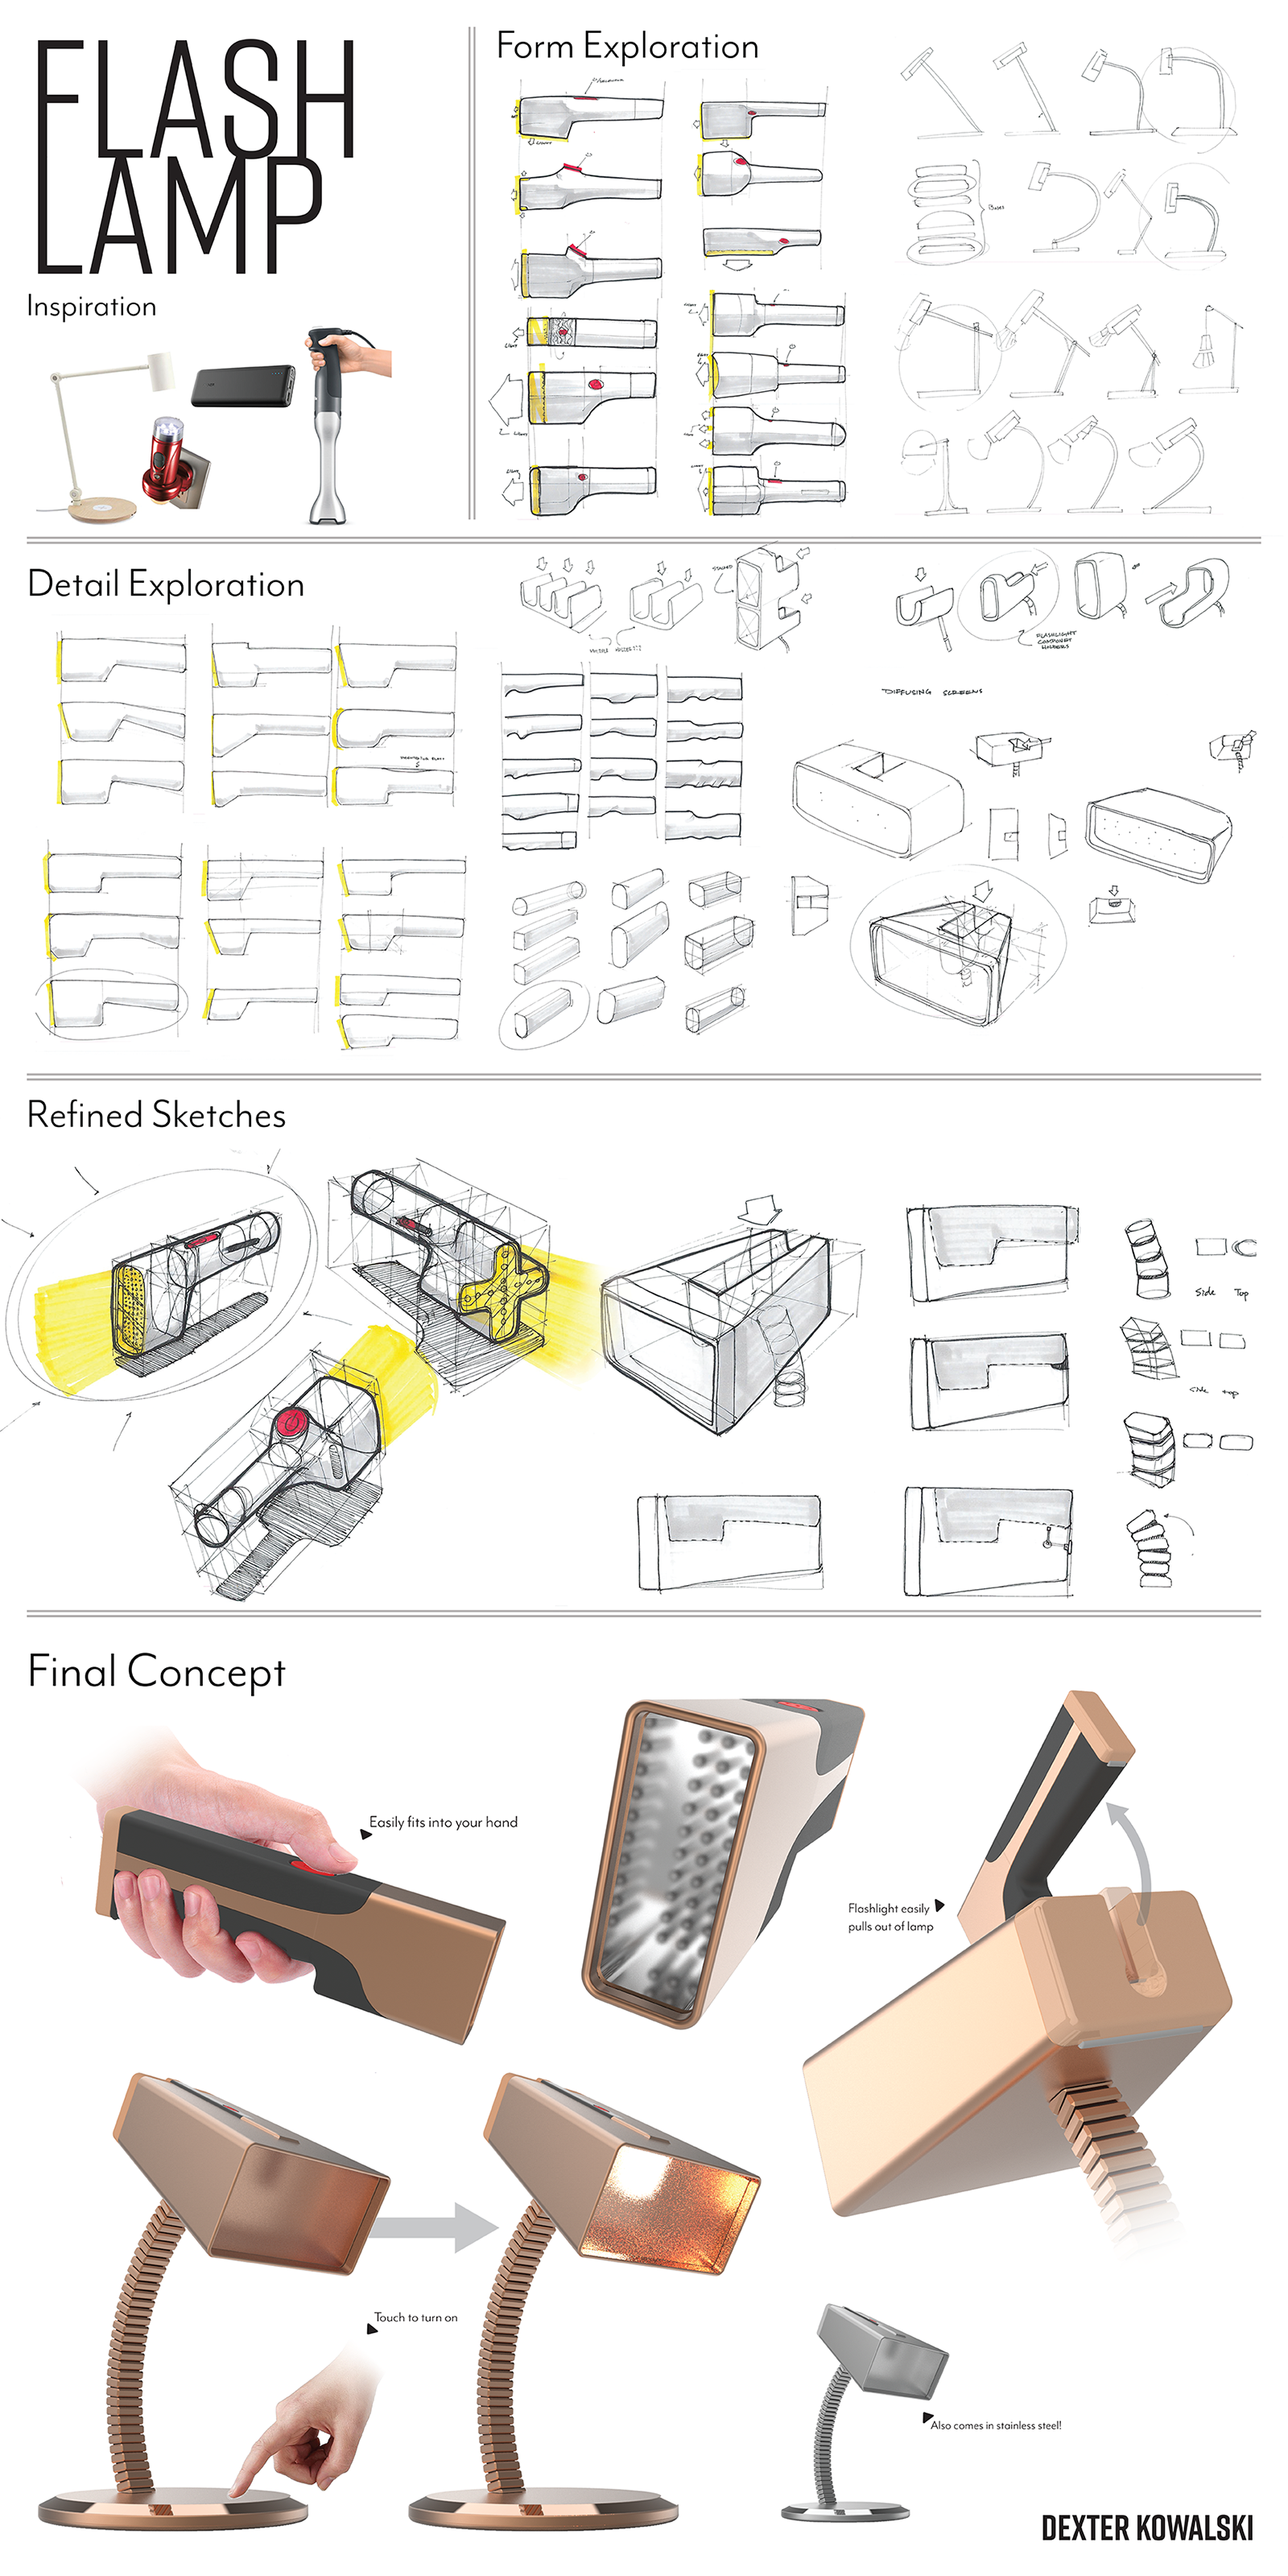
Final Project: Lighting Solution
The Brief: design a custom lighting solution from the ground up, present in a large format poster
The Learning Objective: apply a wide range of skill and knowledge from both 3301 (sketching) and 3400.01 (solidworks) classes; build a development and visualization plan based on their own project, tool preferences
The Tools: analog sketching tools from pencil to Copic marker, digital sketching in Sketchbook Pro and Photoshop, layout in Illustrator and InDesign, 3D modeling in Solidworks, 3D rendering in Keyshot
Timeline: 3 weeks
(the following are examples of student work)
The third visualization class in the 2017/2018 school year continued focus on 3D visualization tools and techniques. Having learned basics the previous semester, my students spent their second semester focused on 3D visualization as applied in design making through a series of sketch/model/prototype challenges.
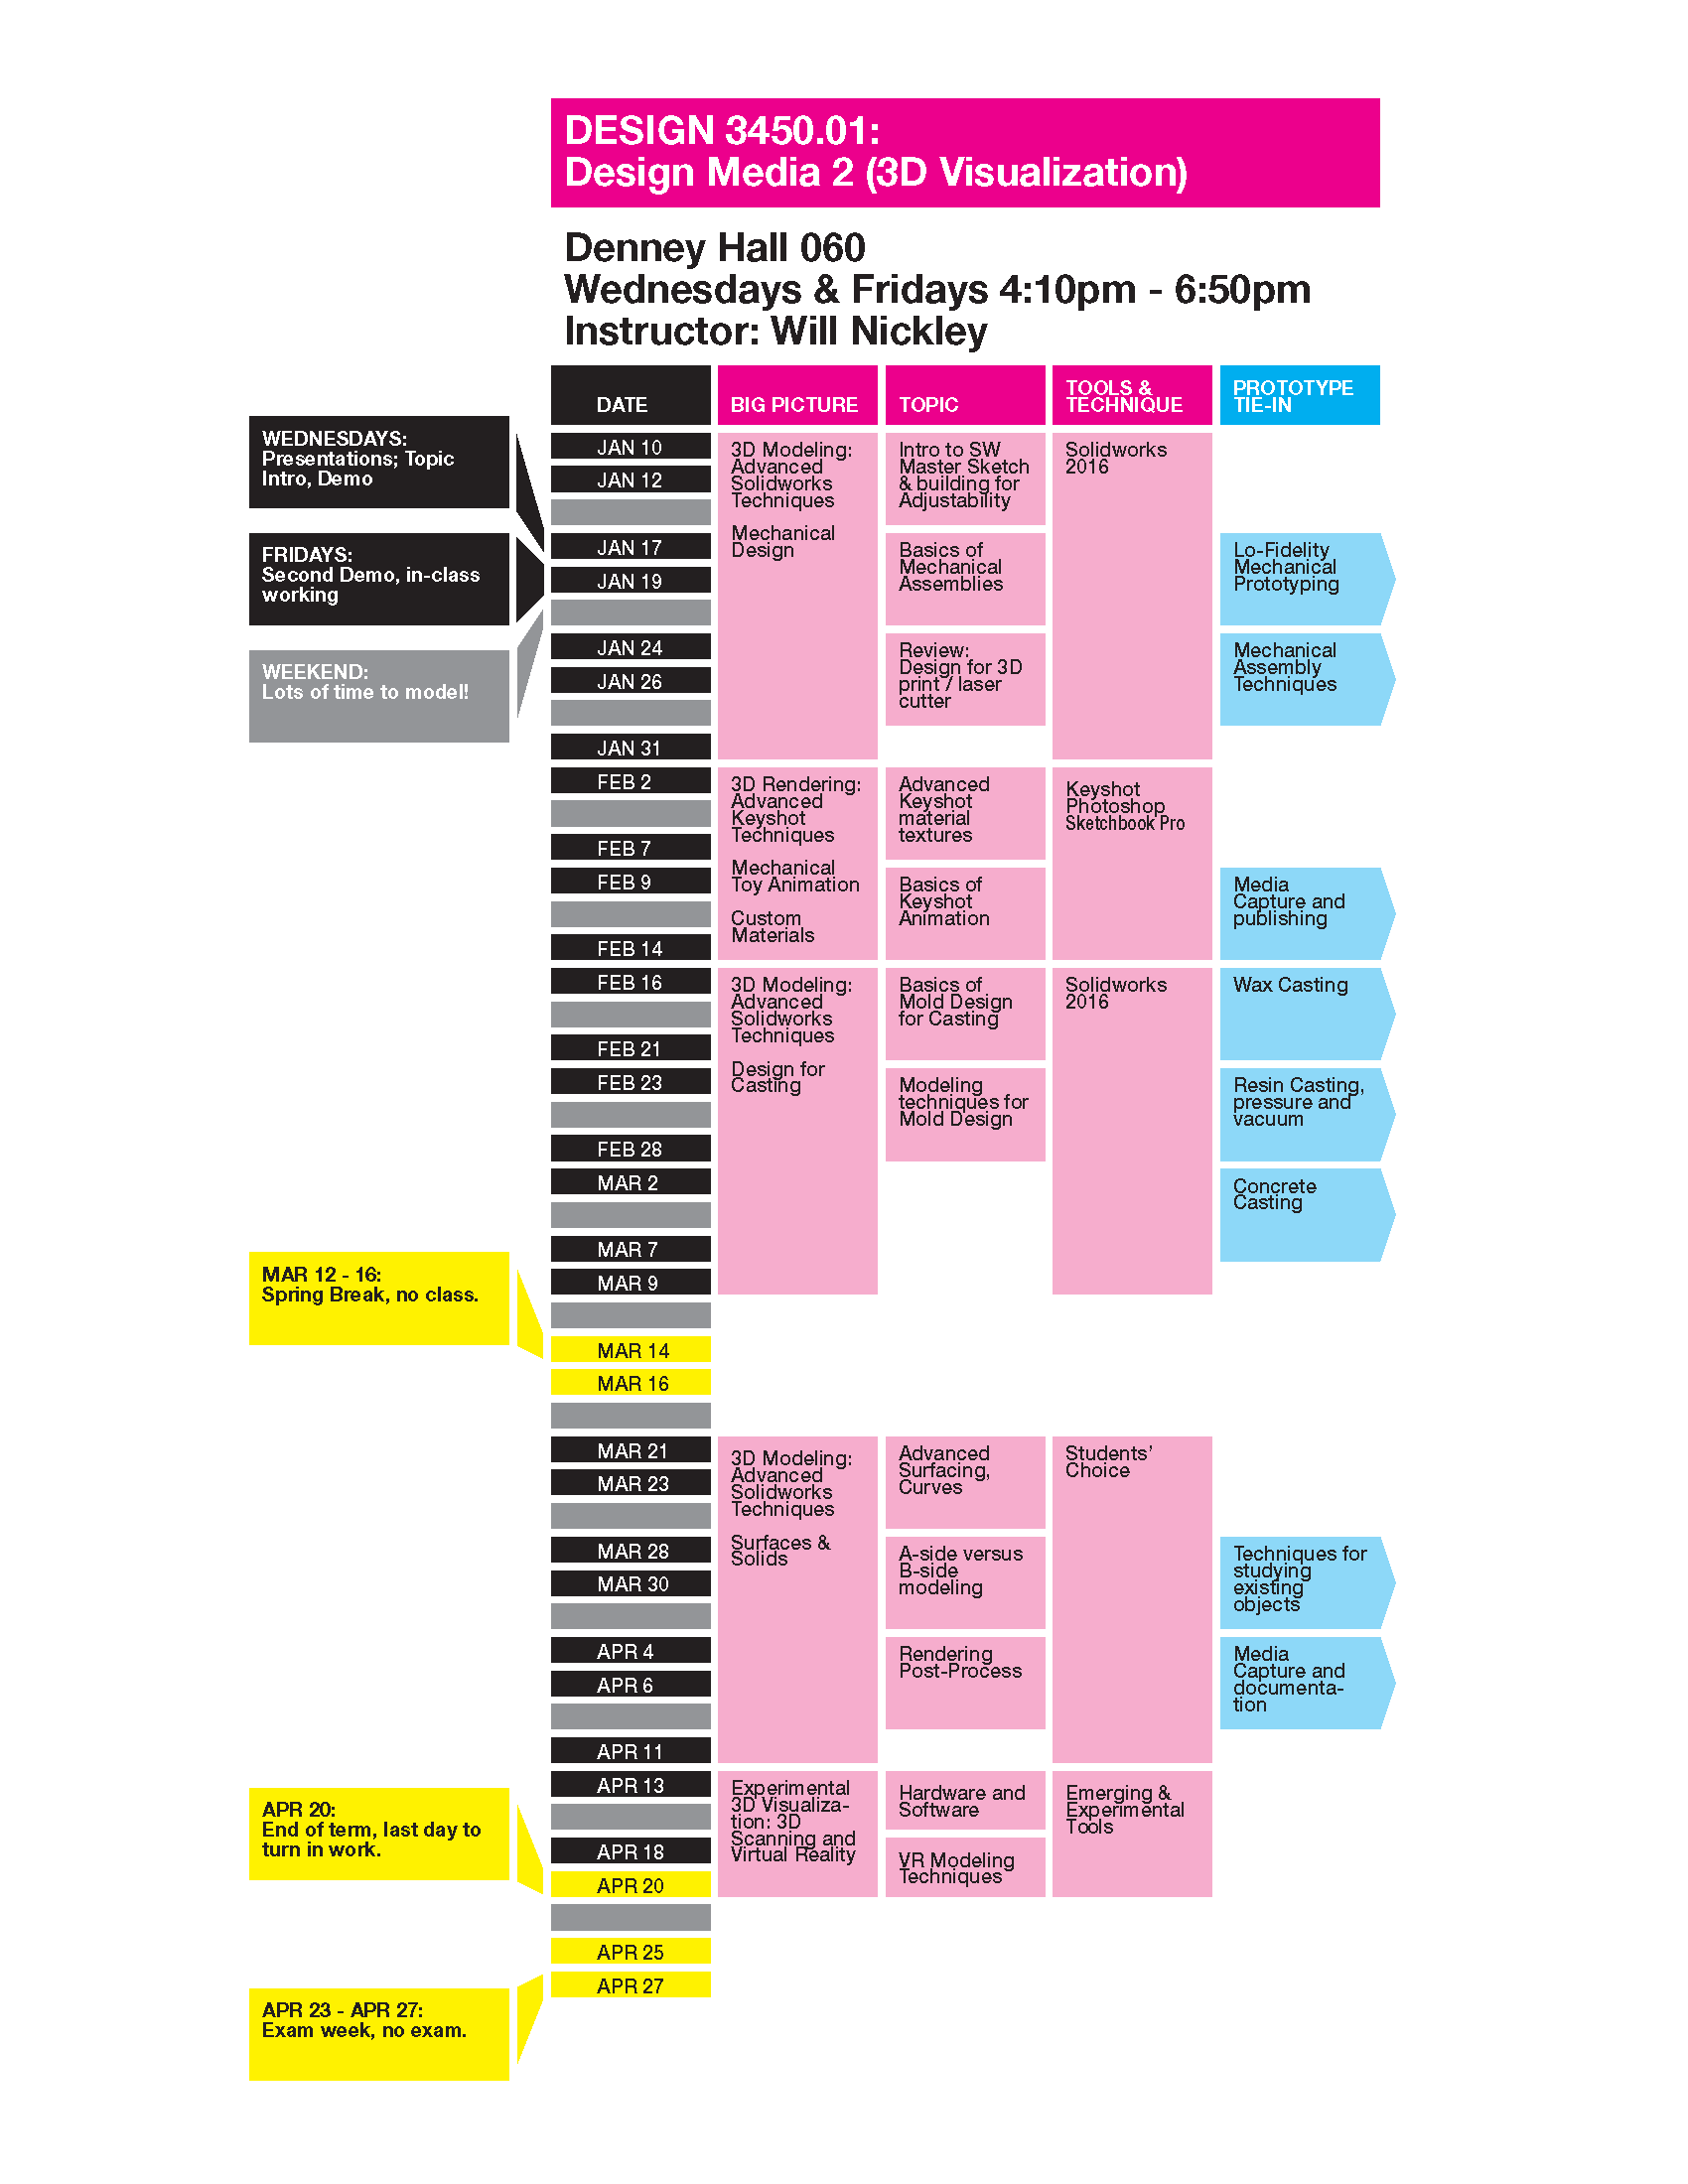
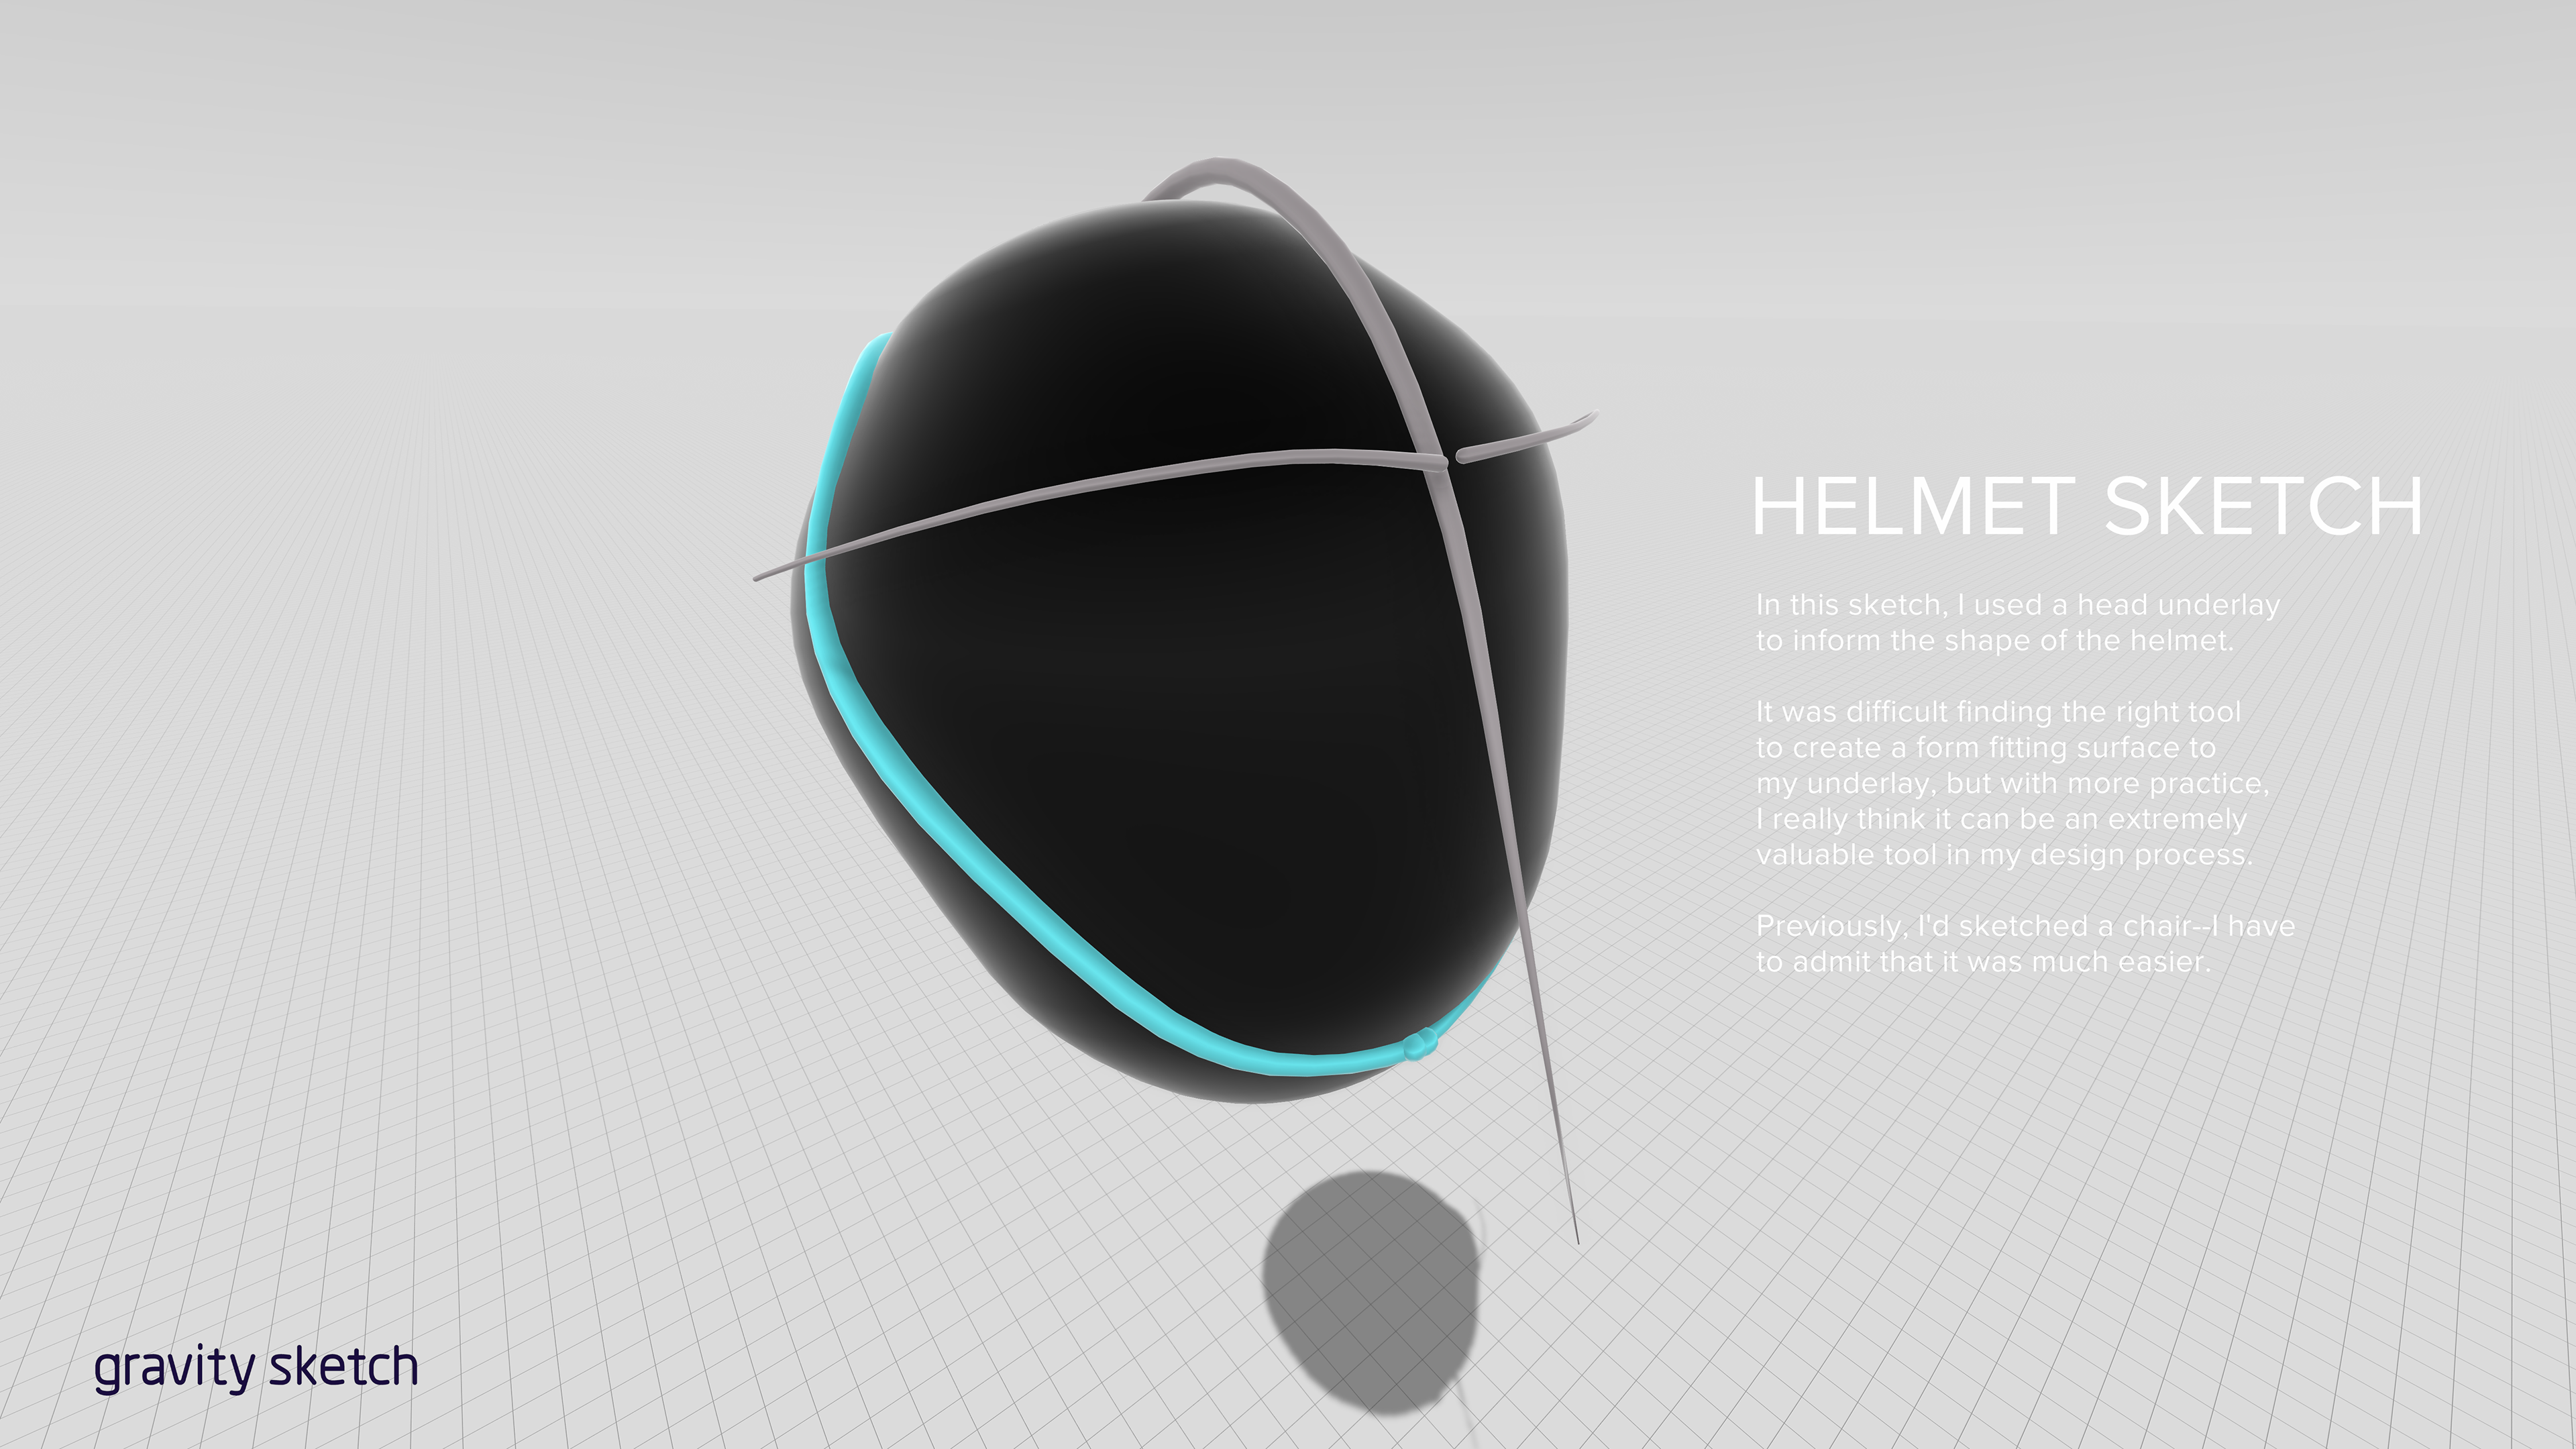
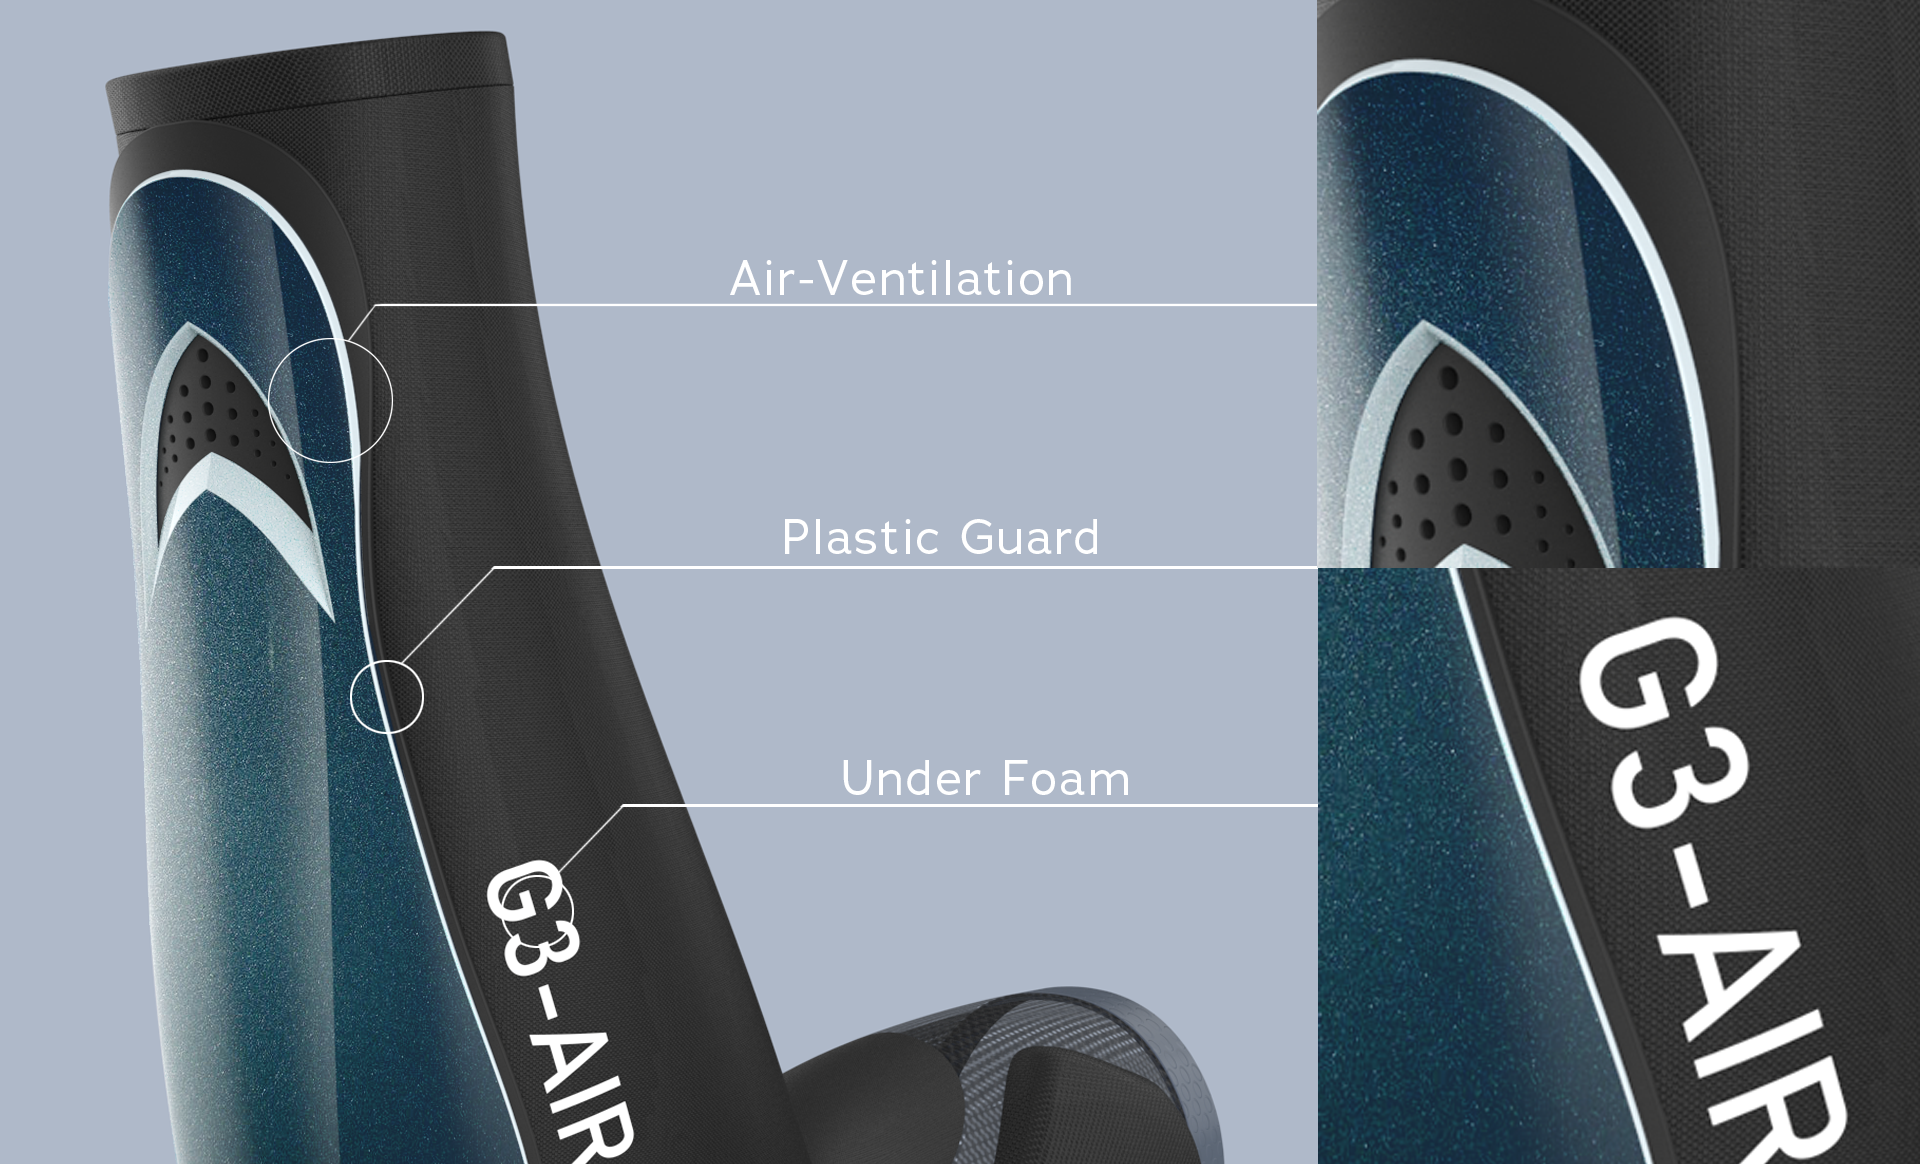
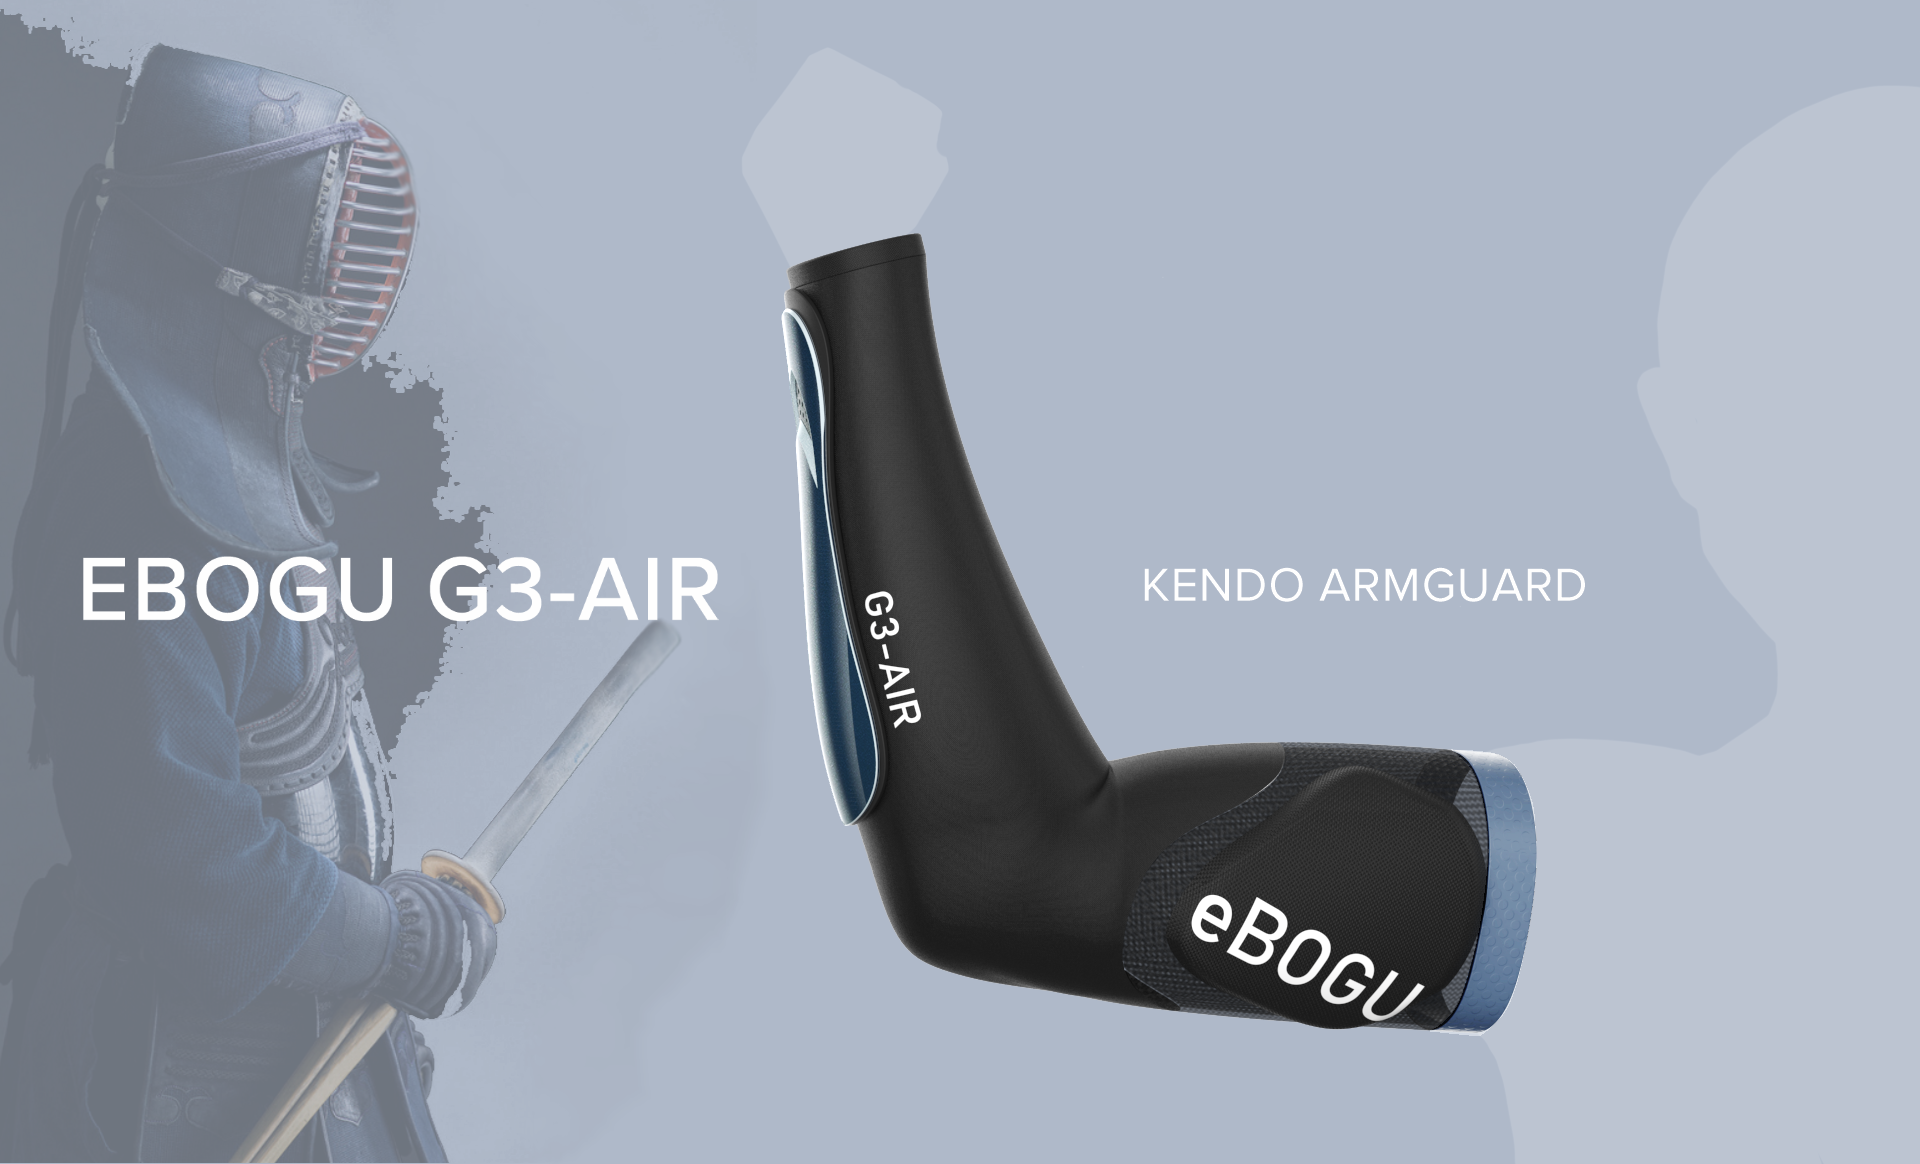
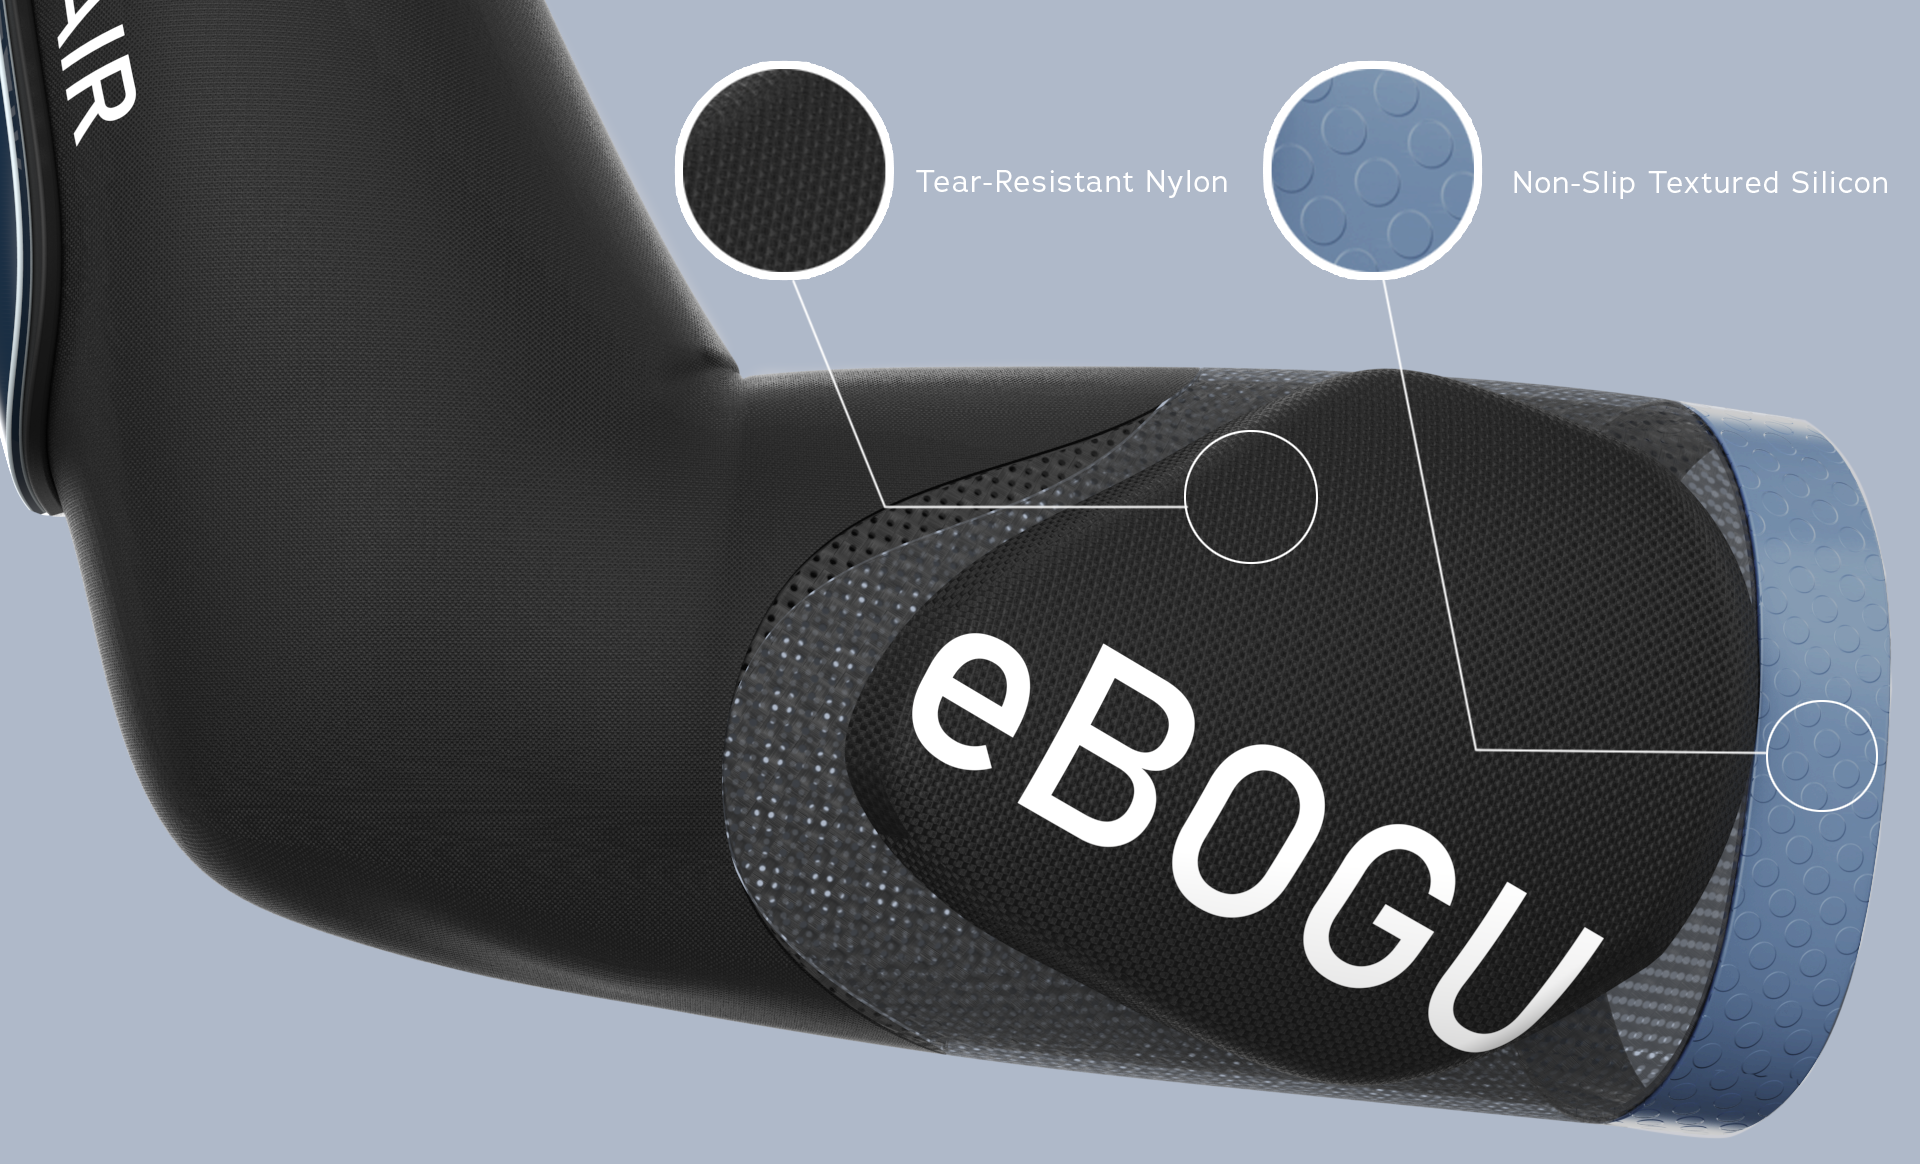
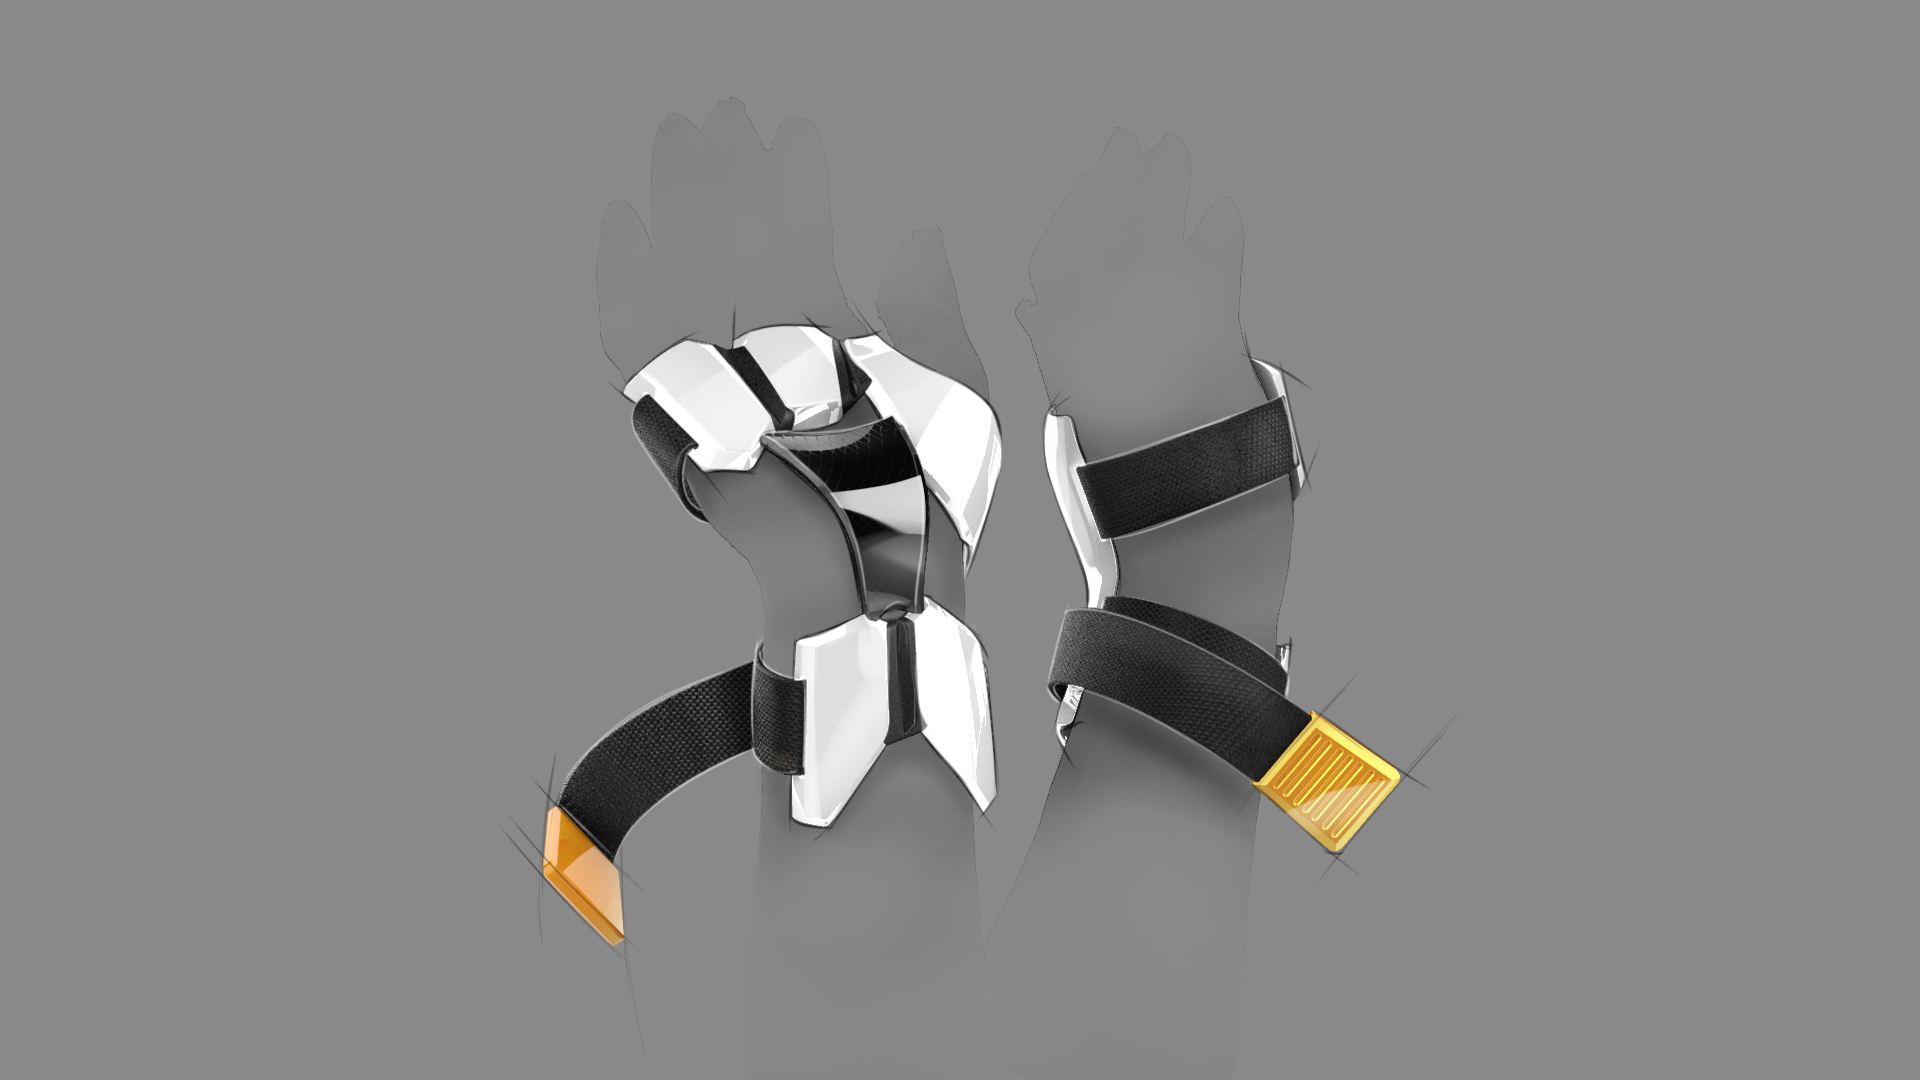
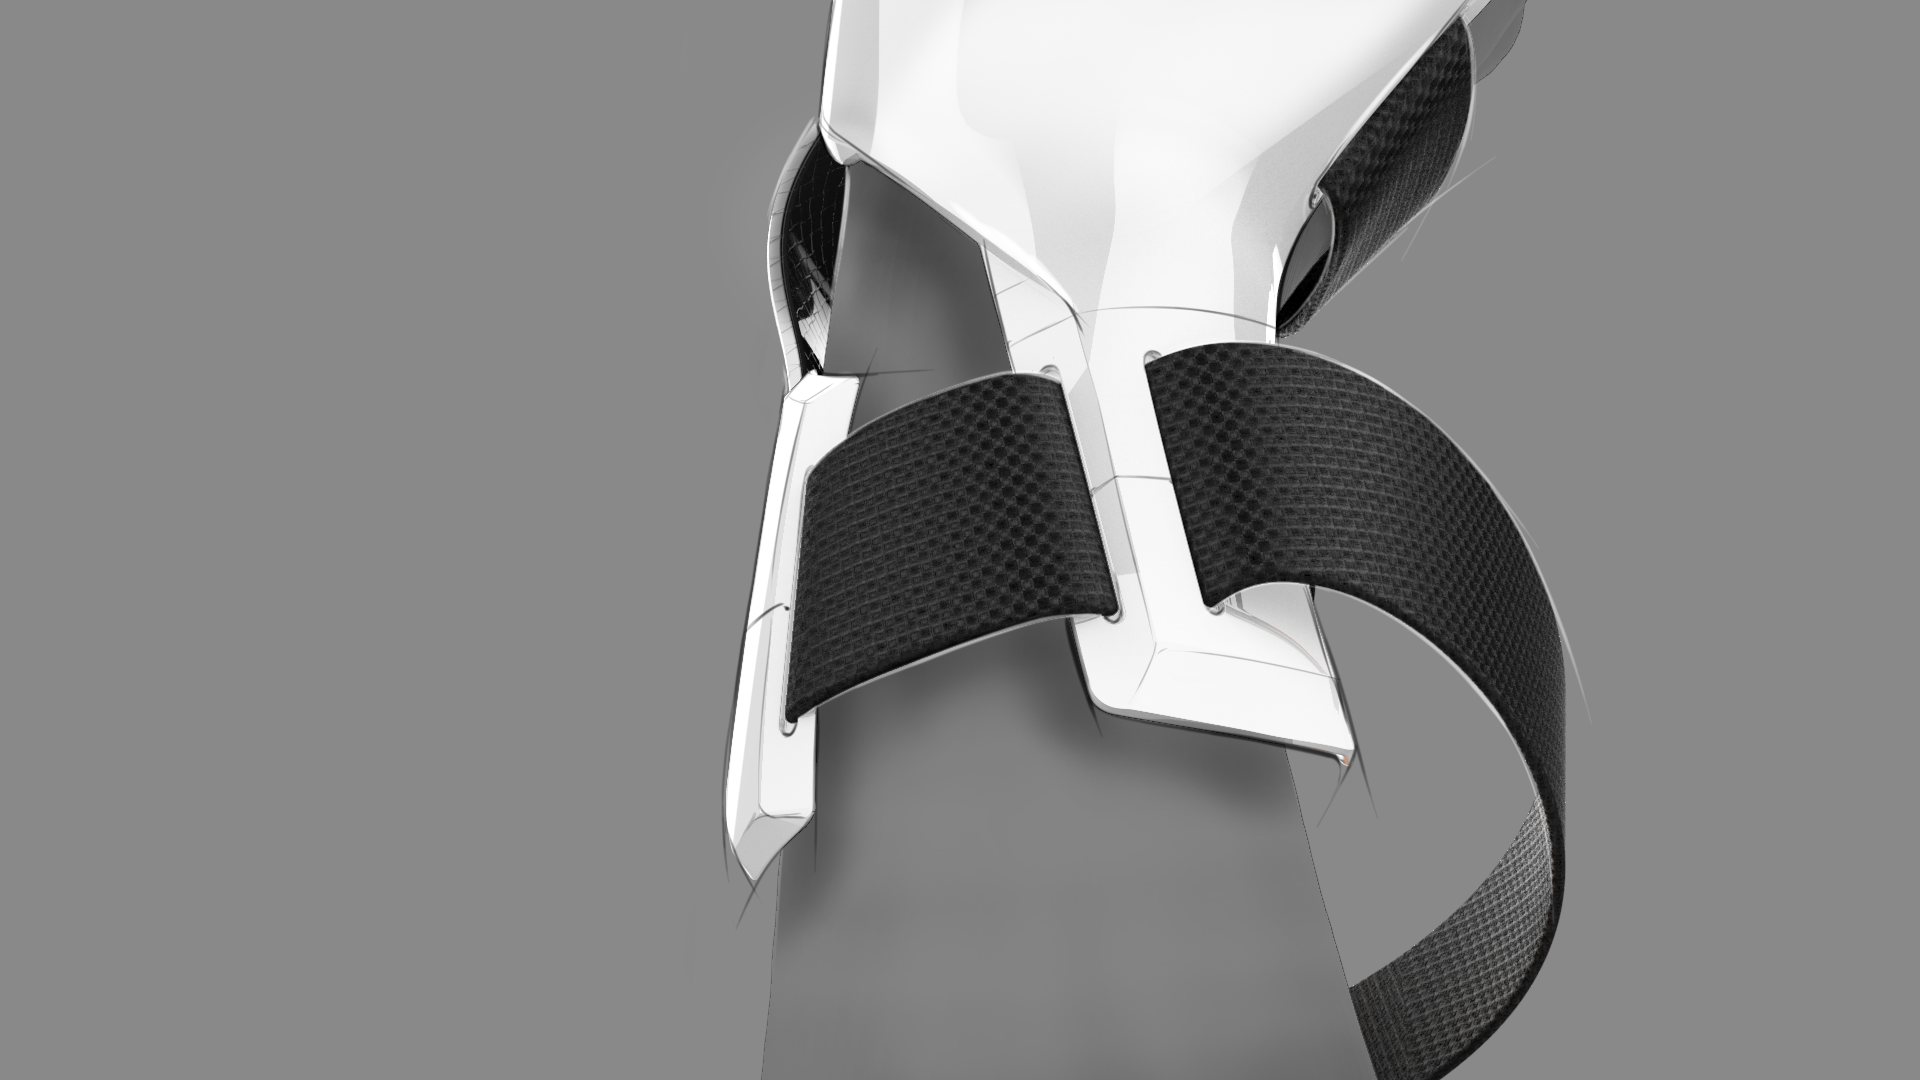
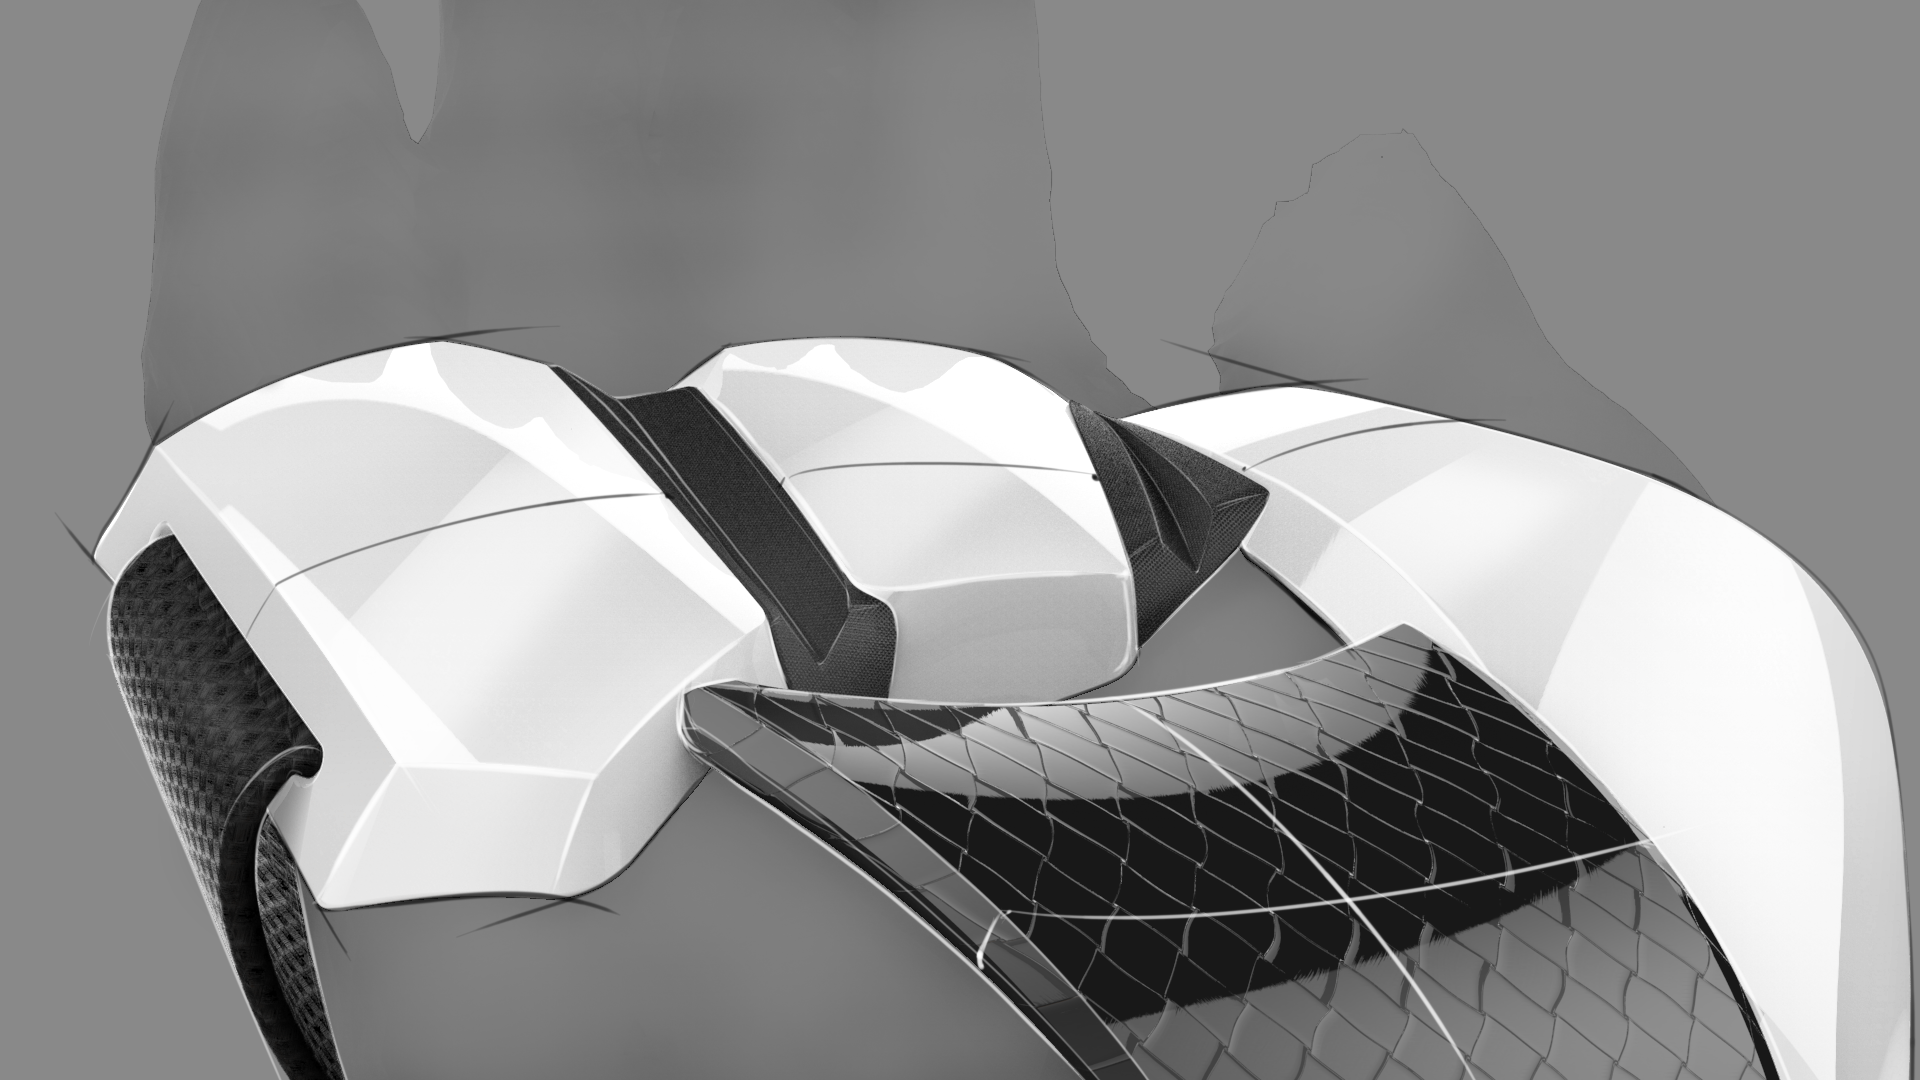
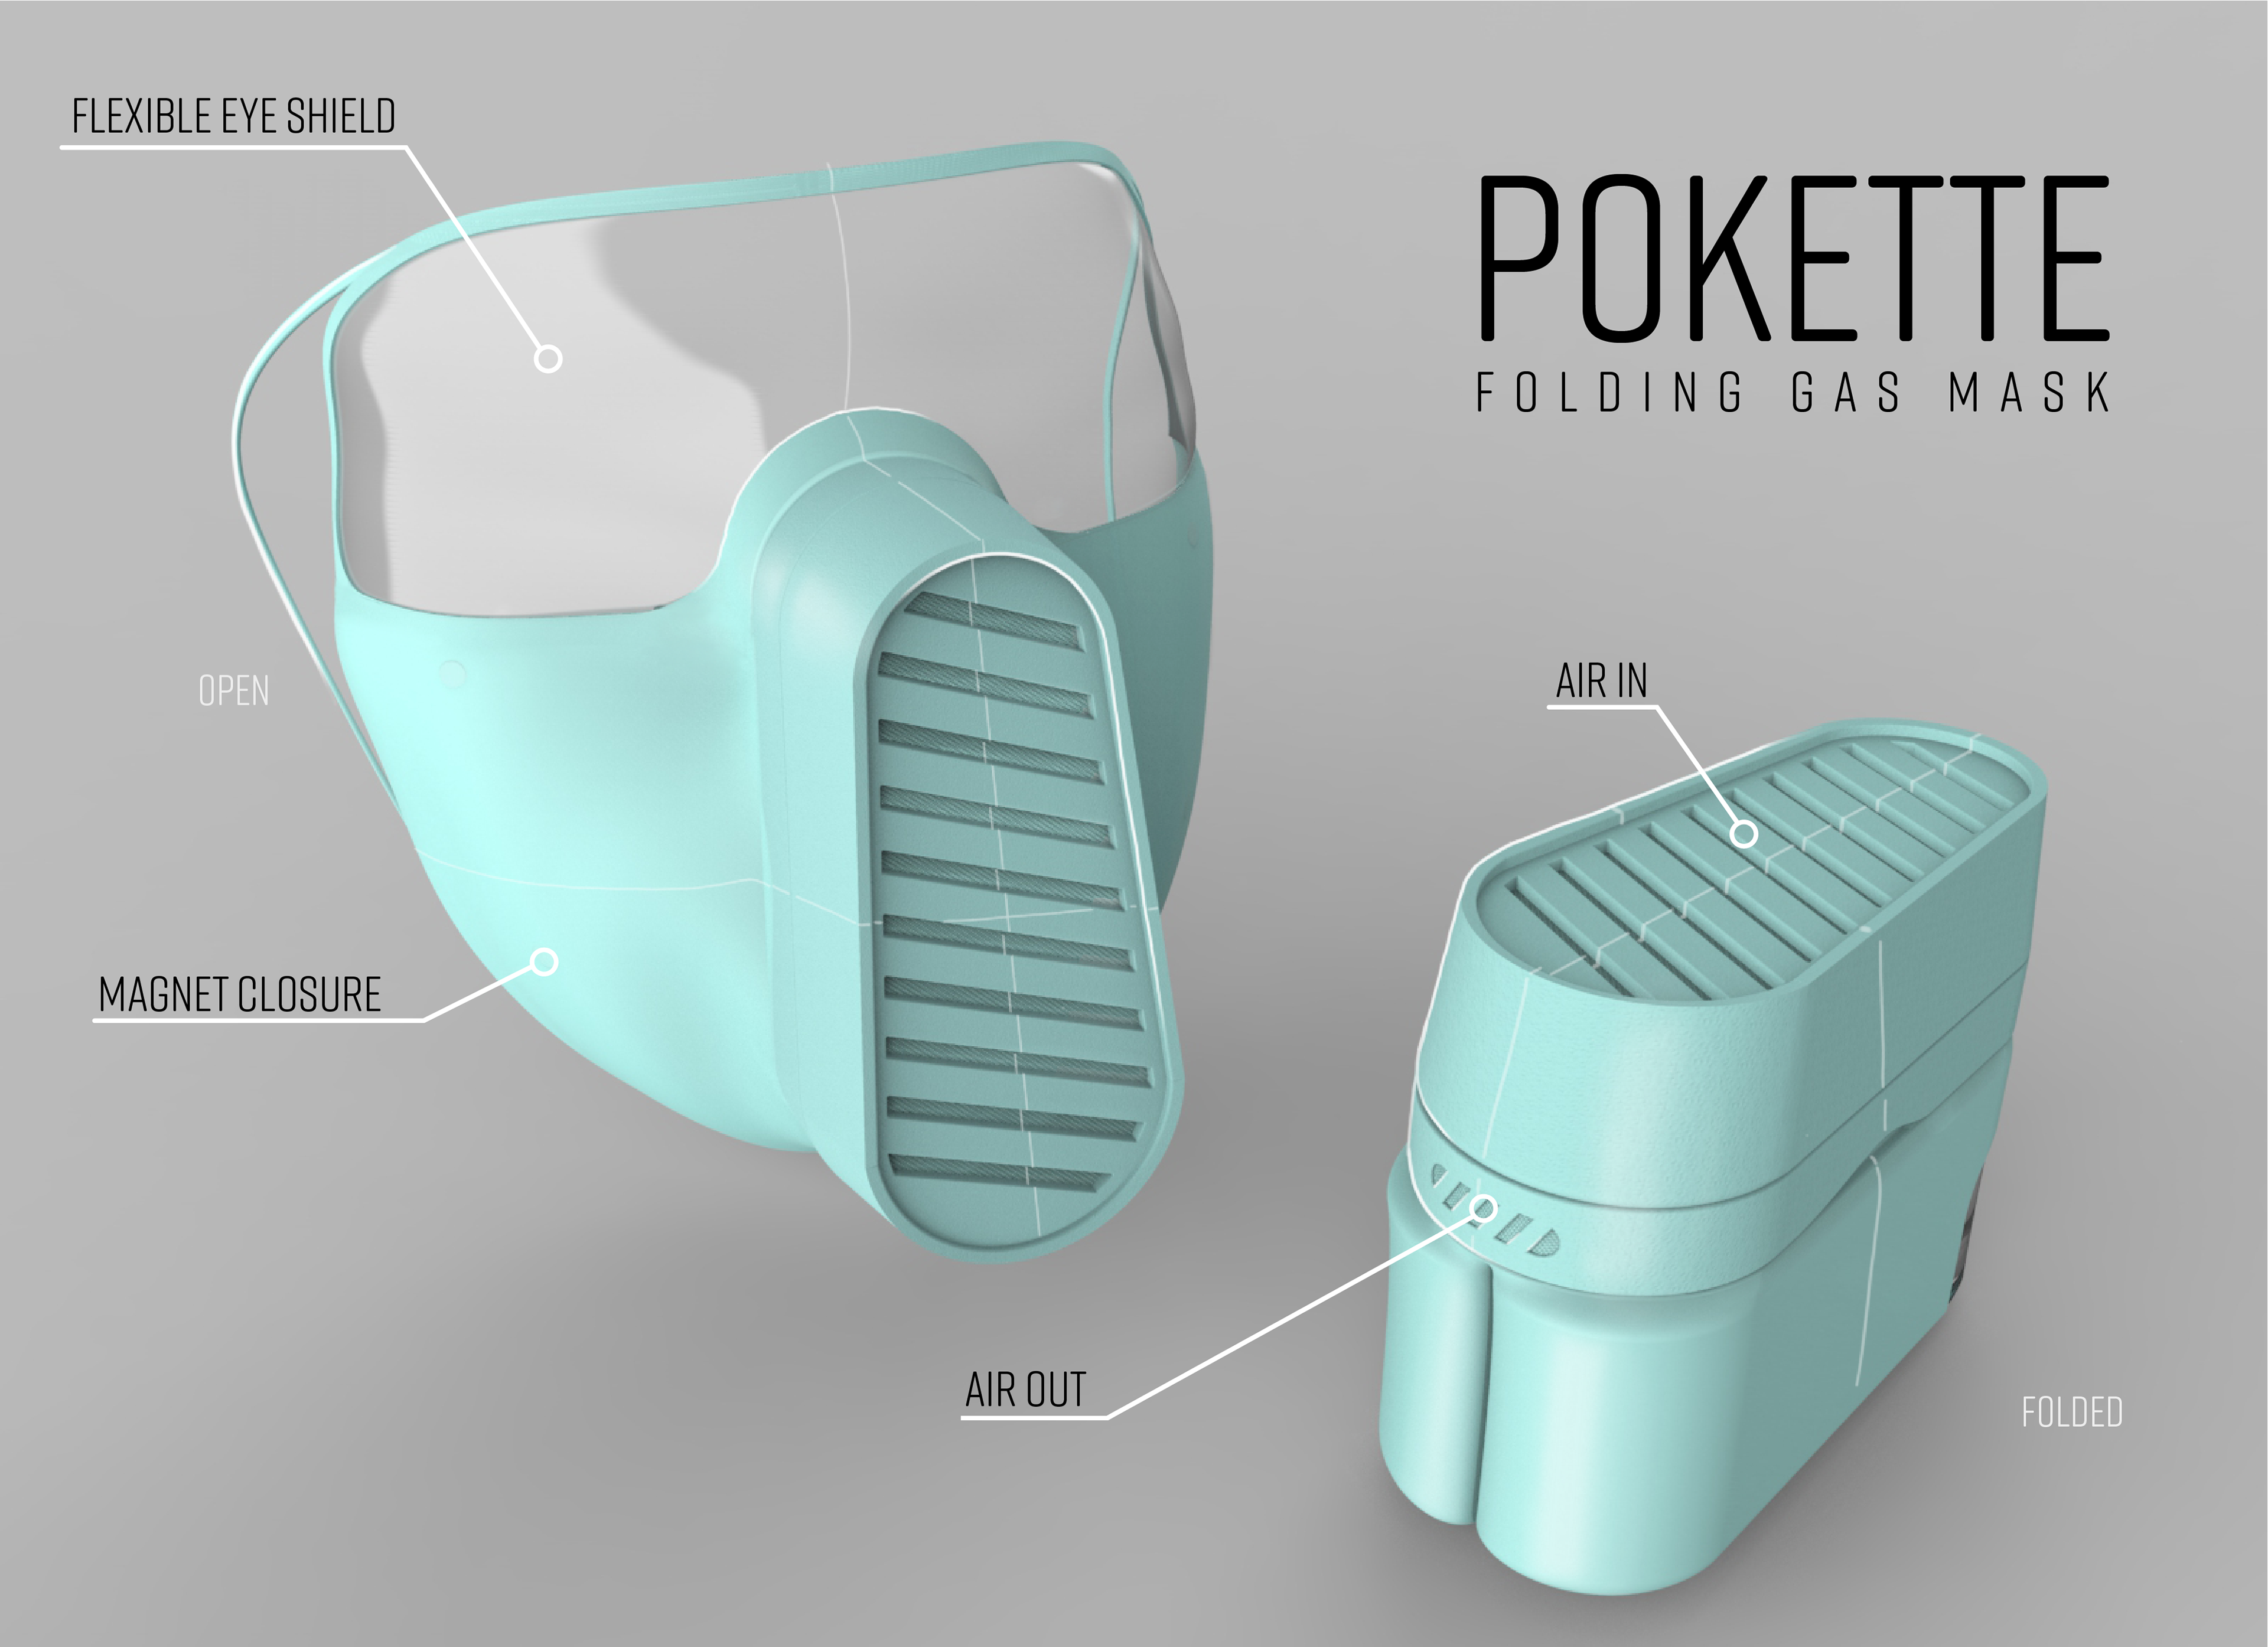
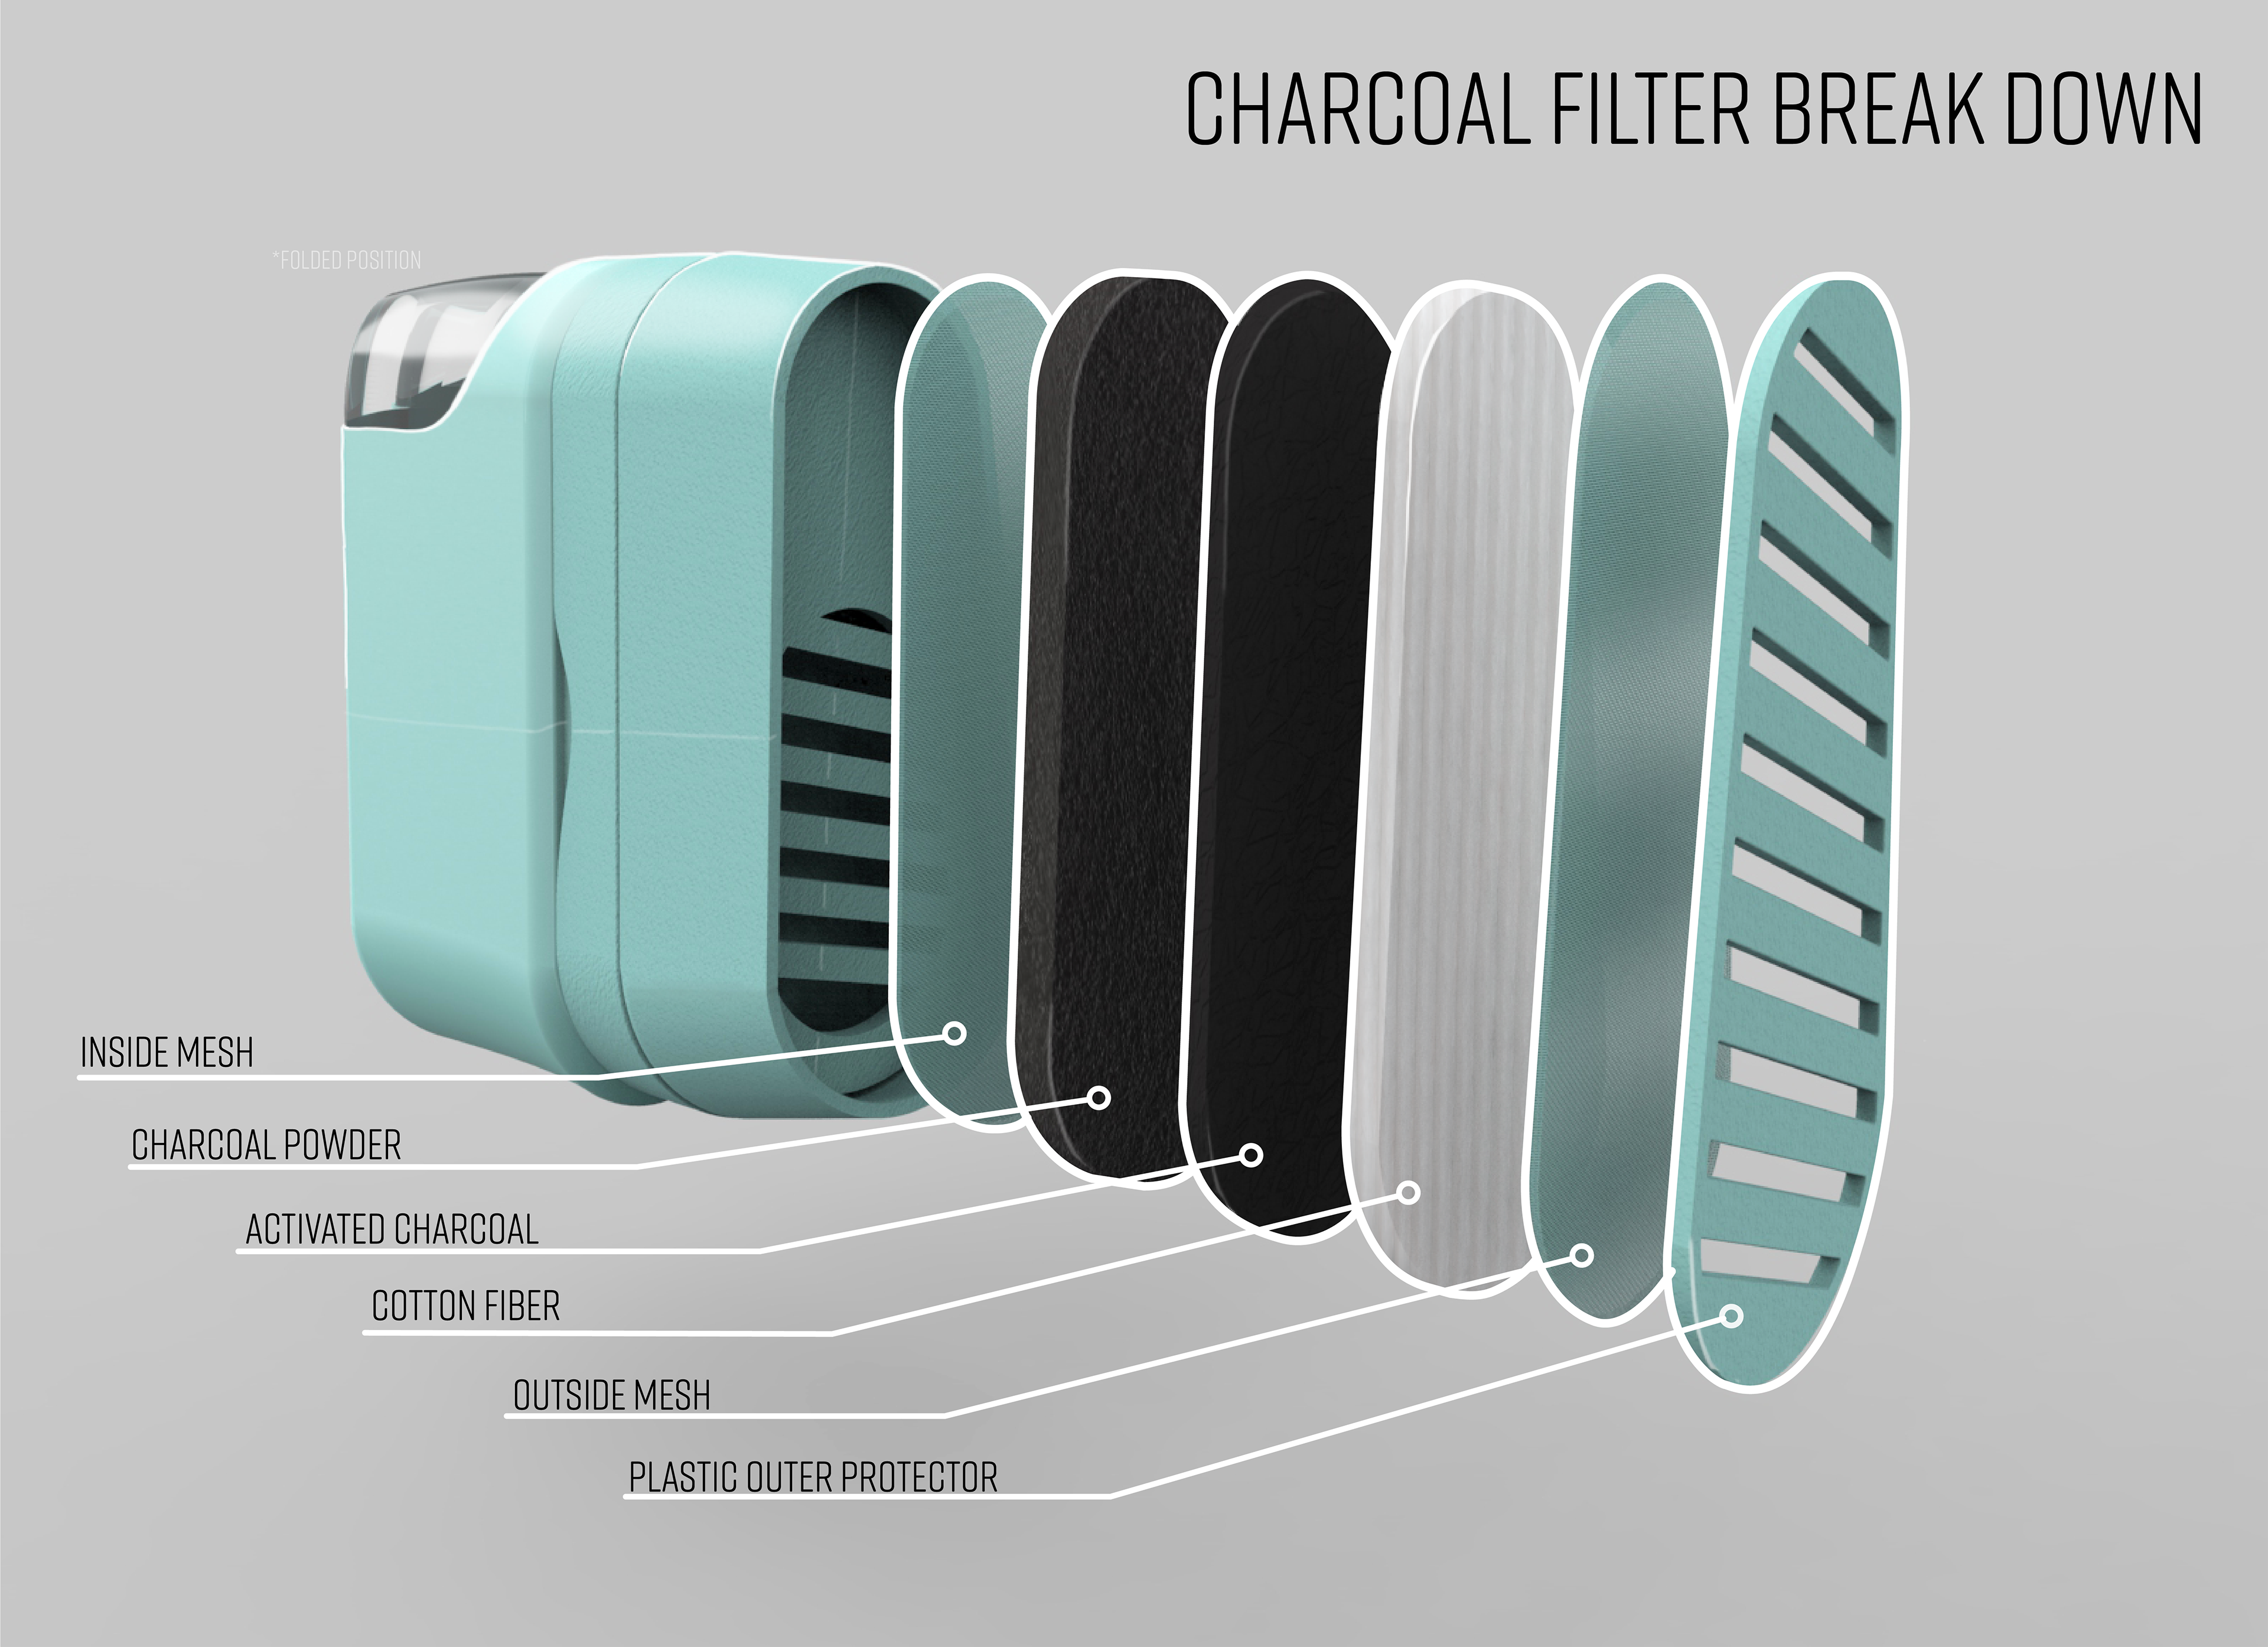
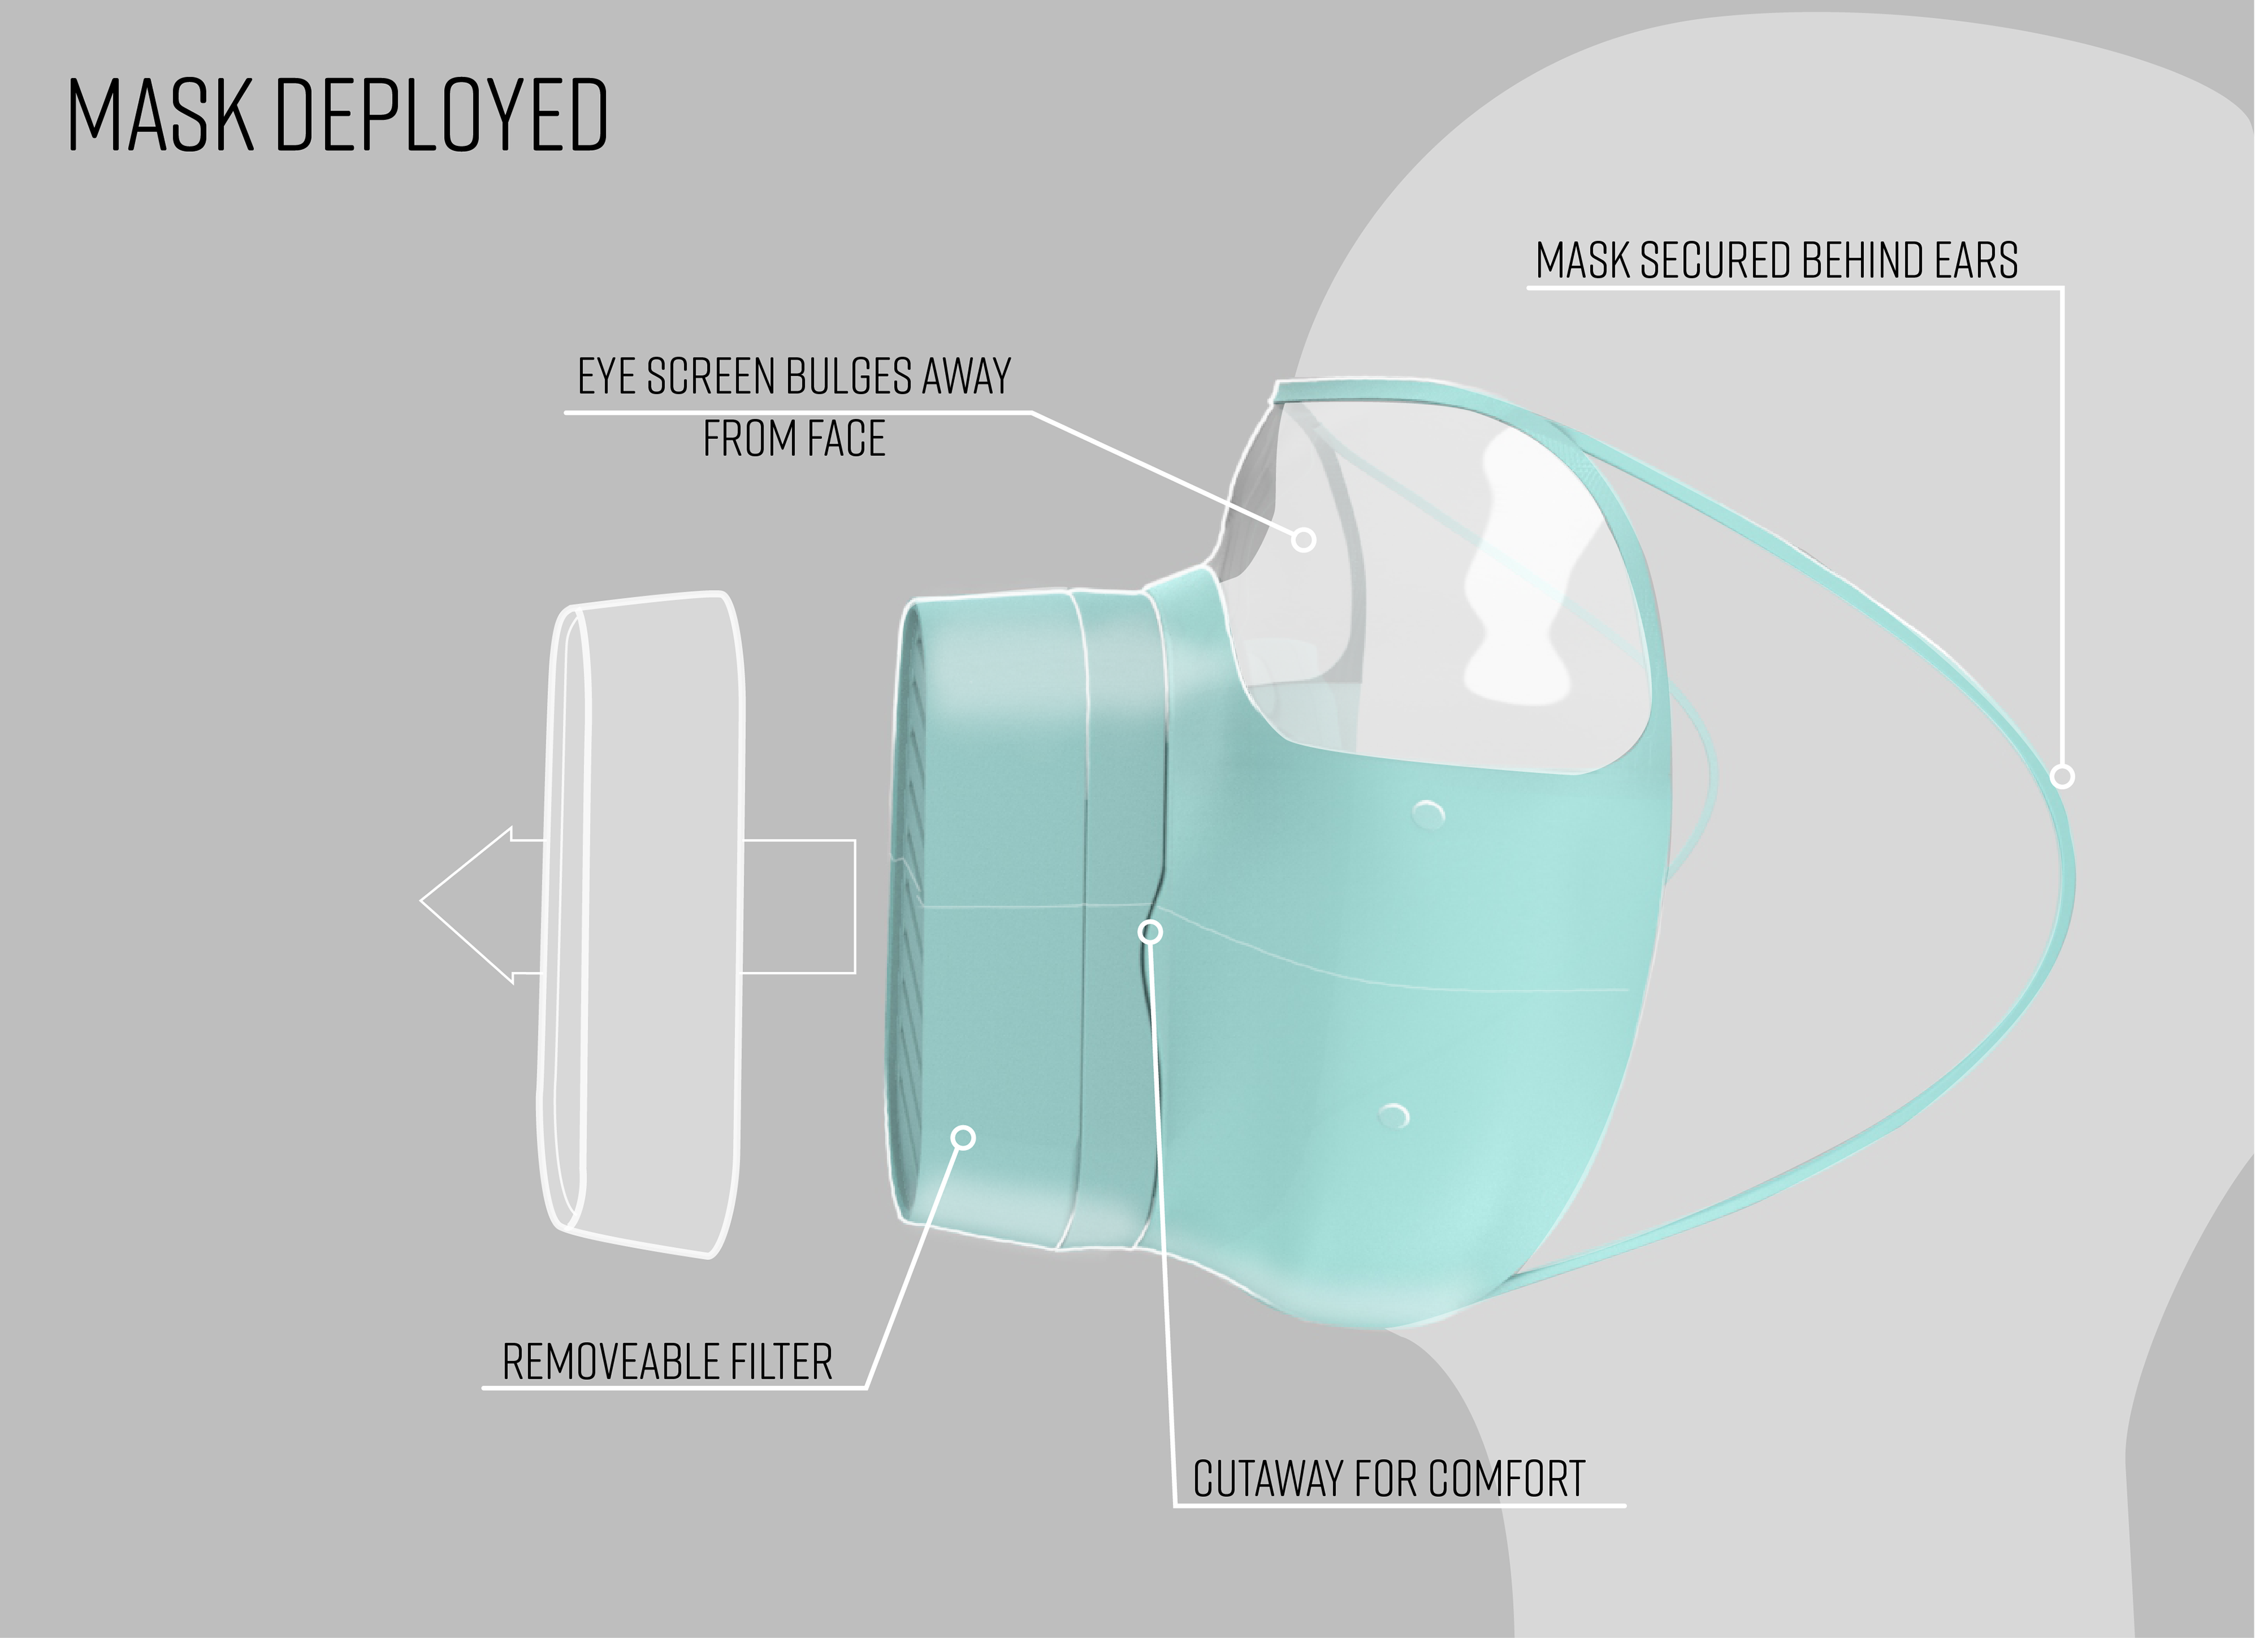
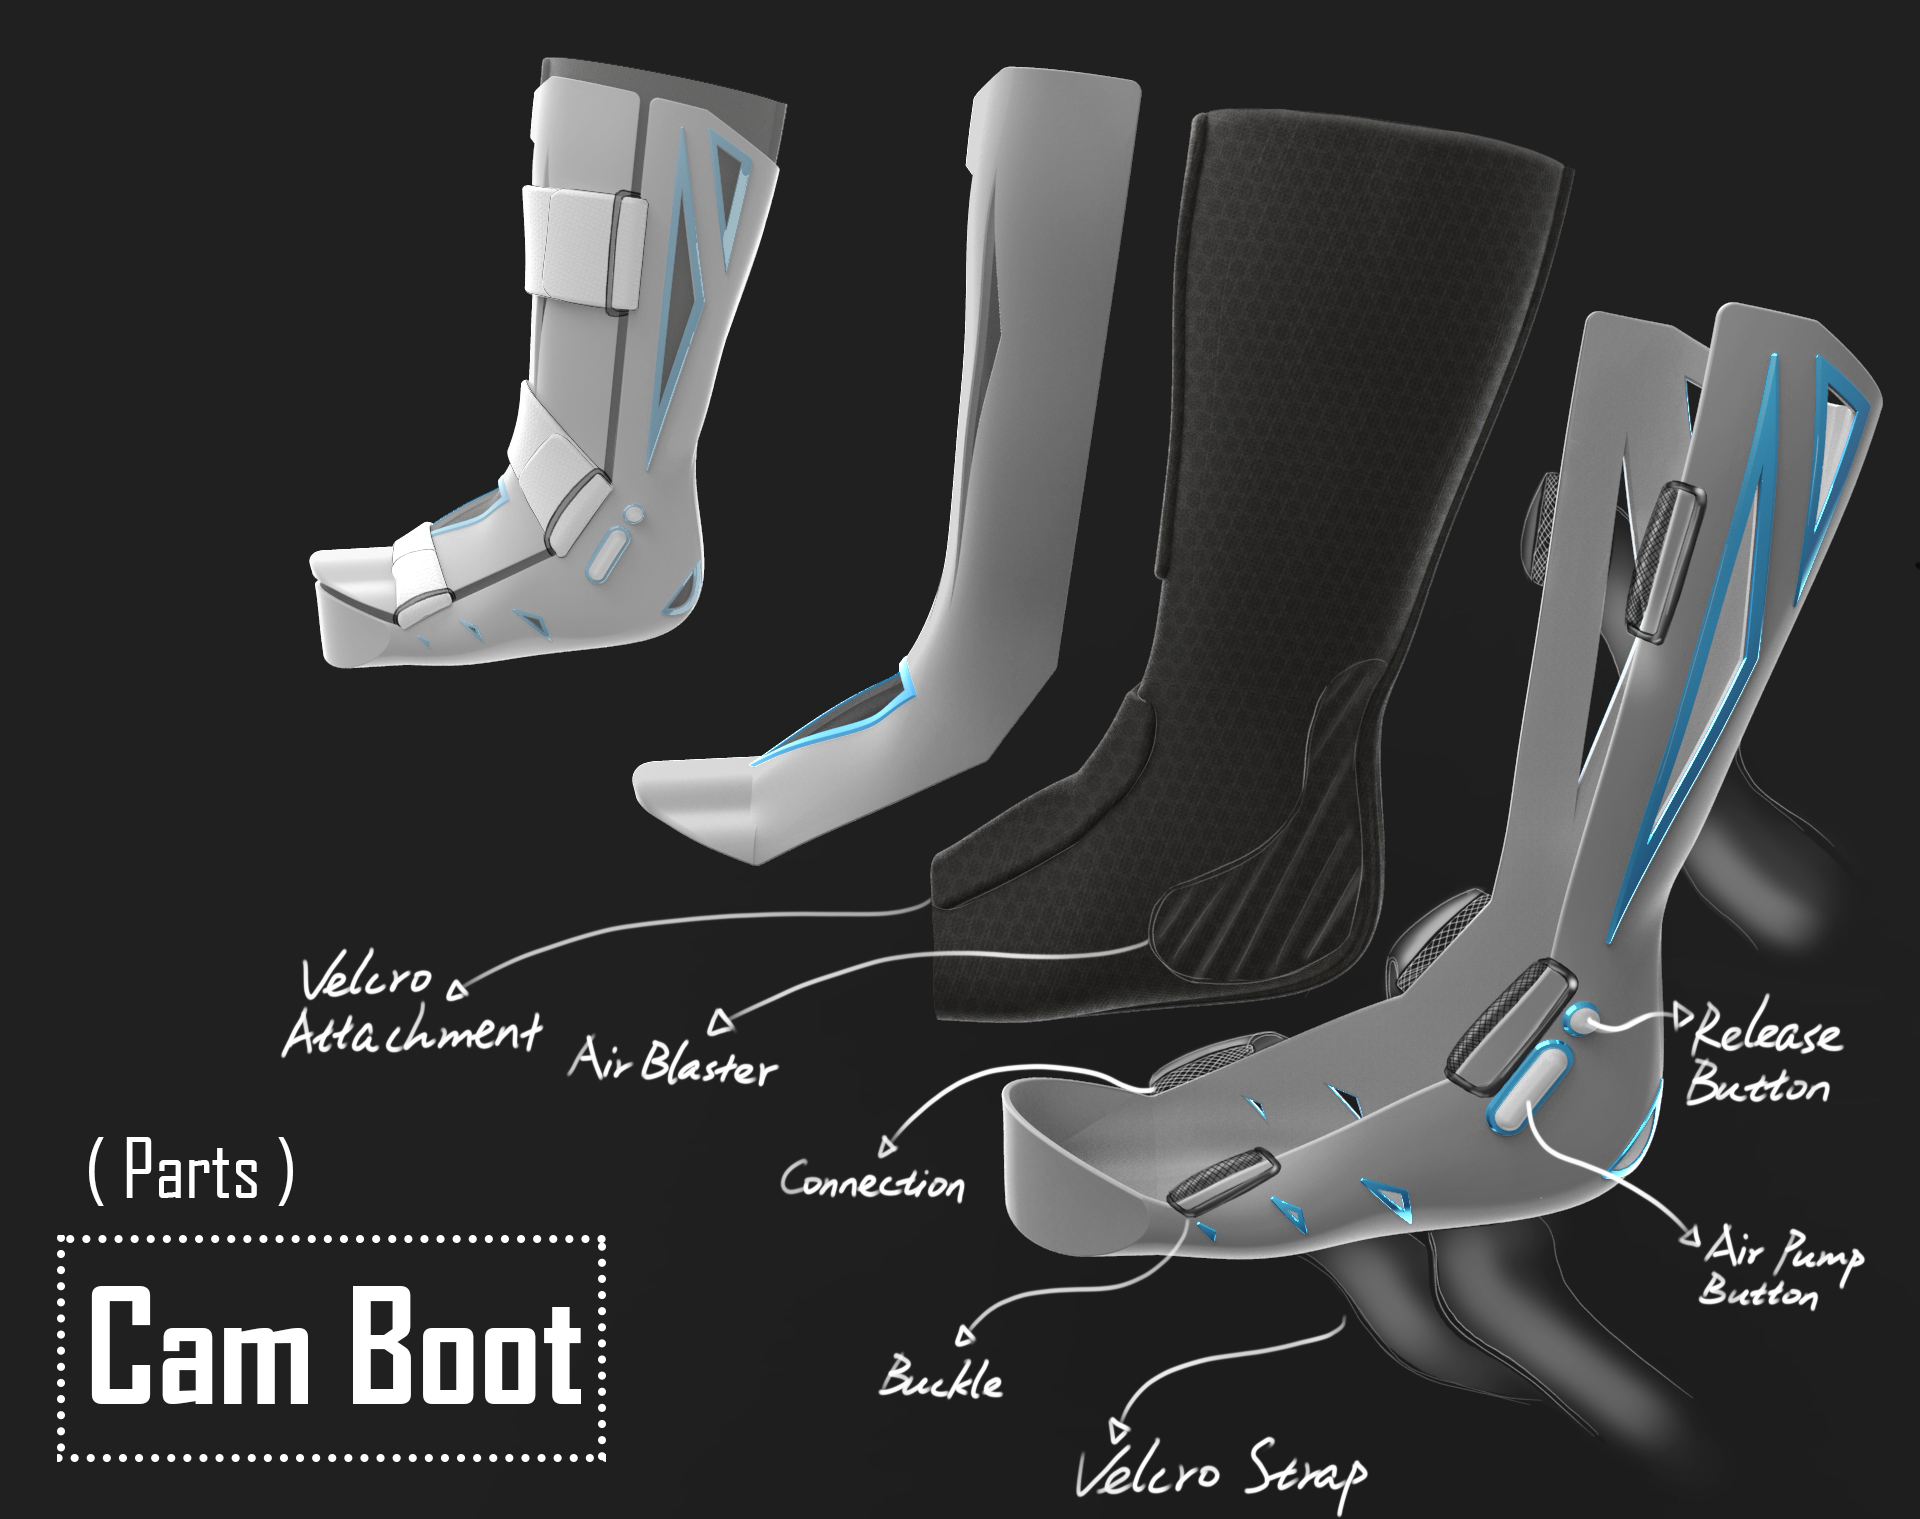
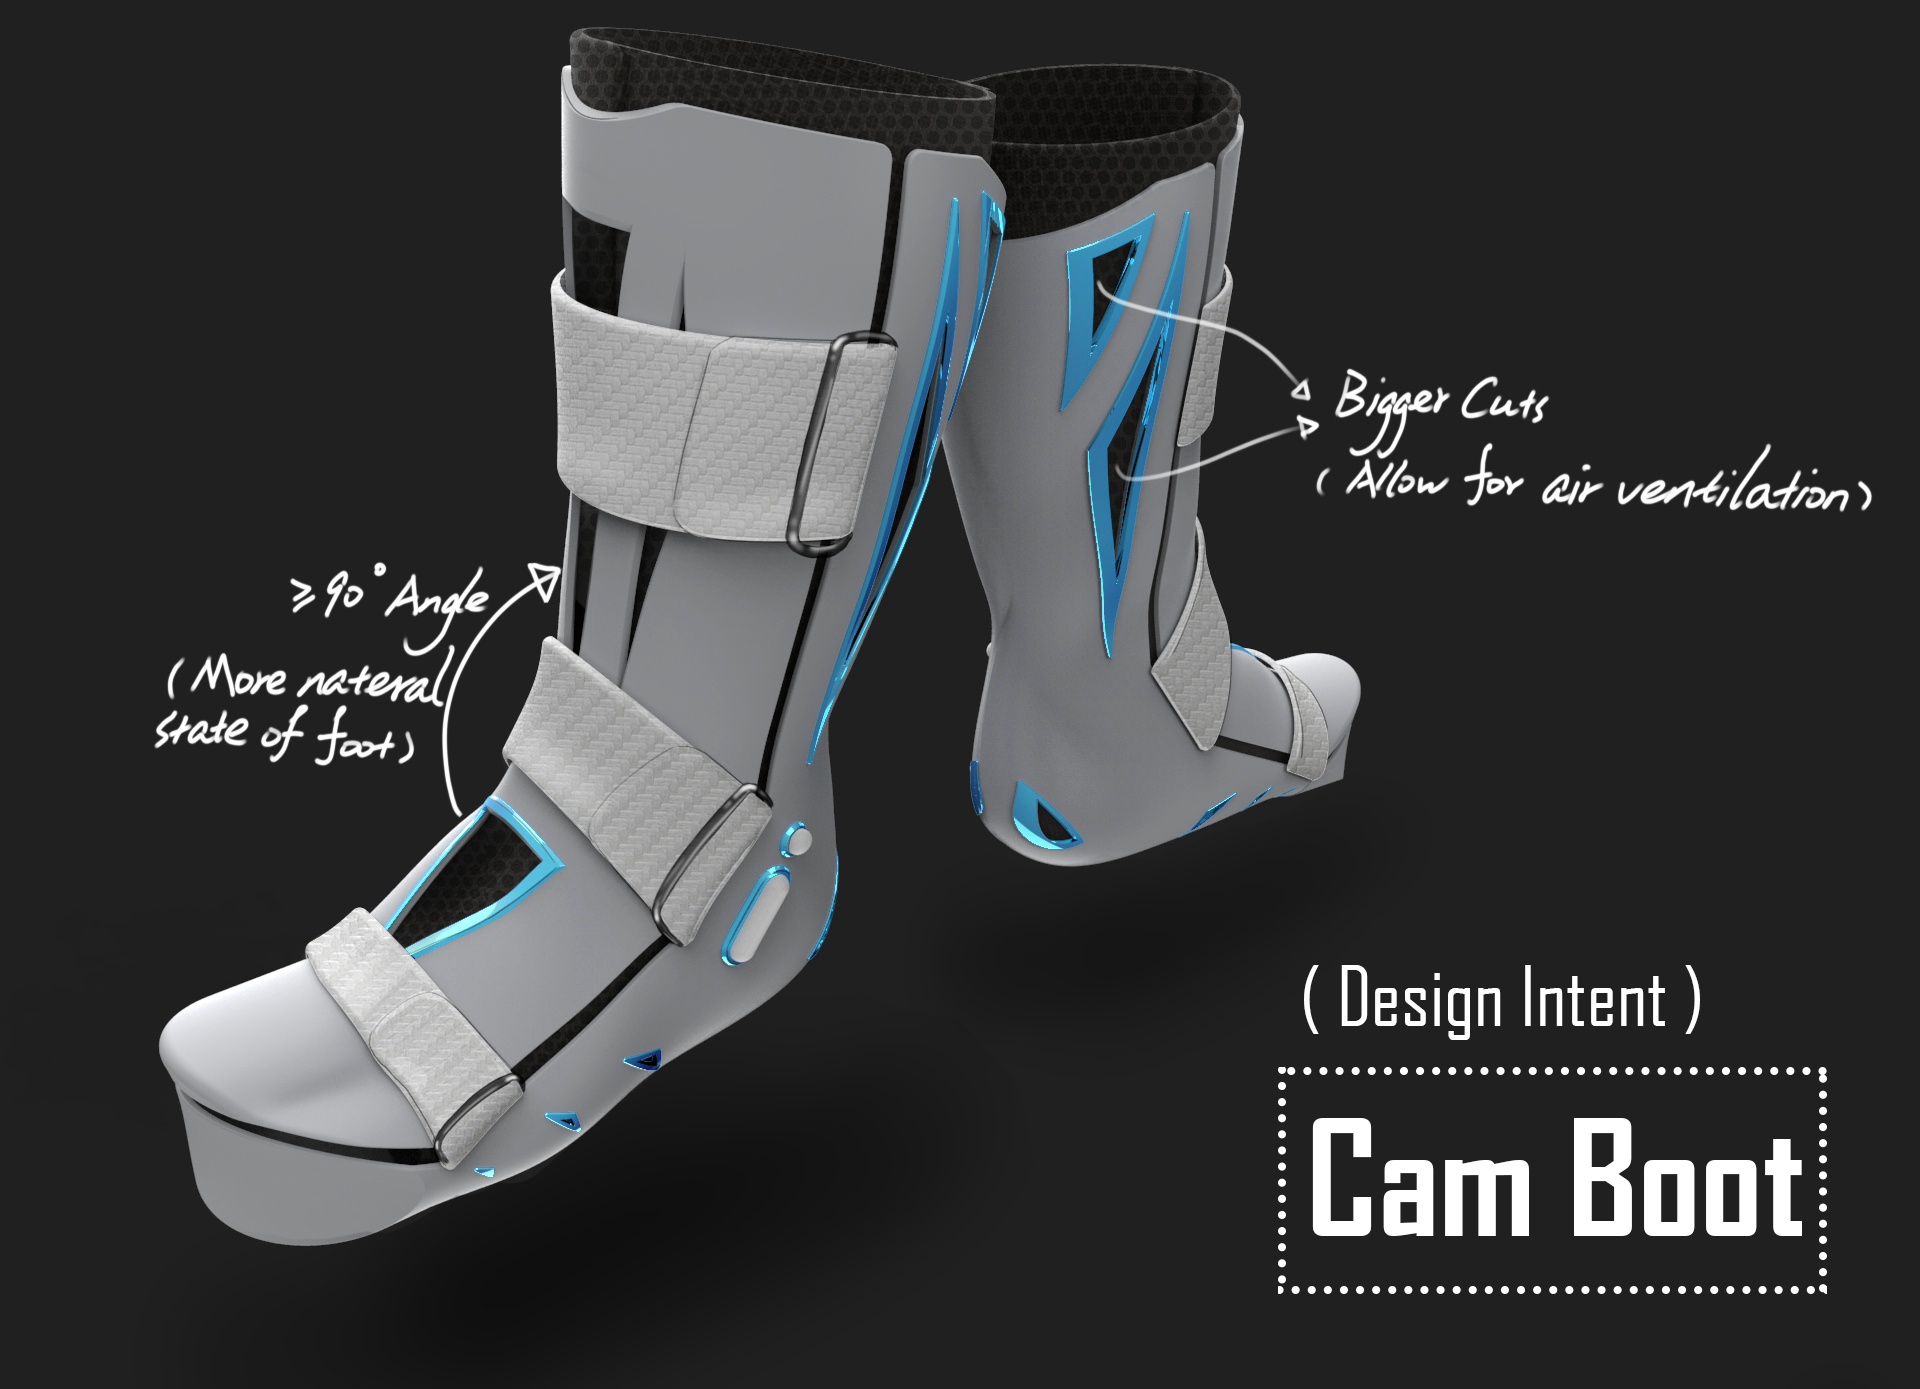
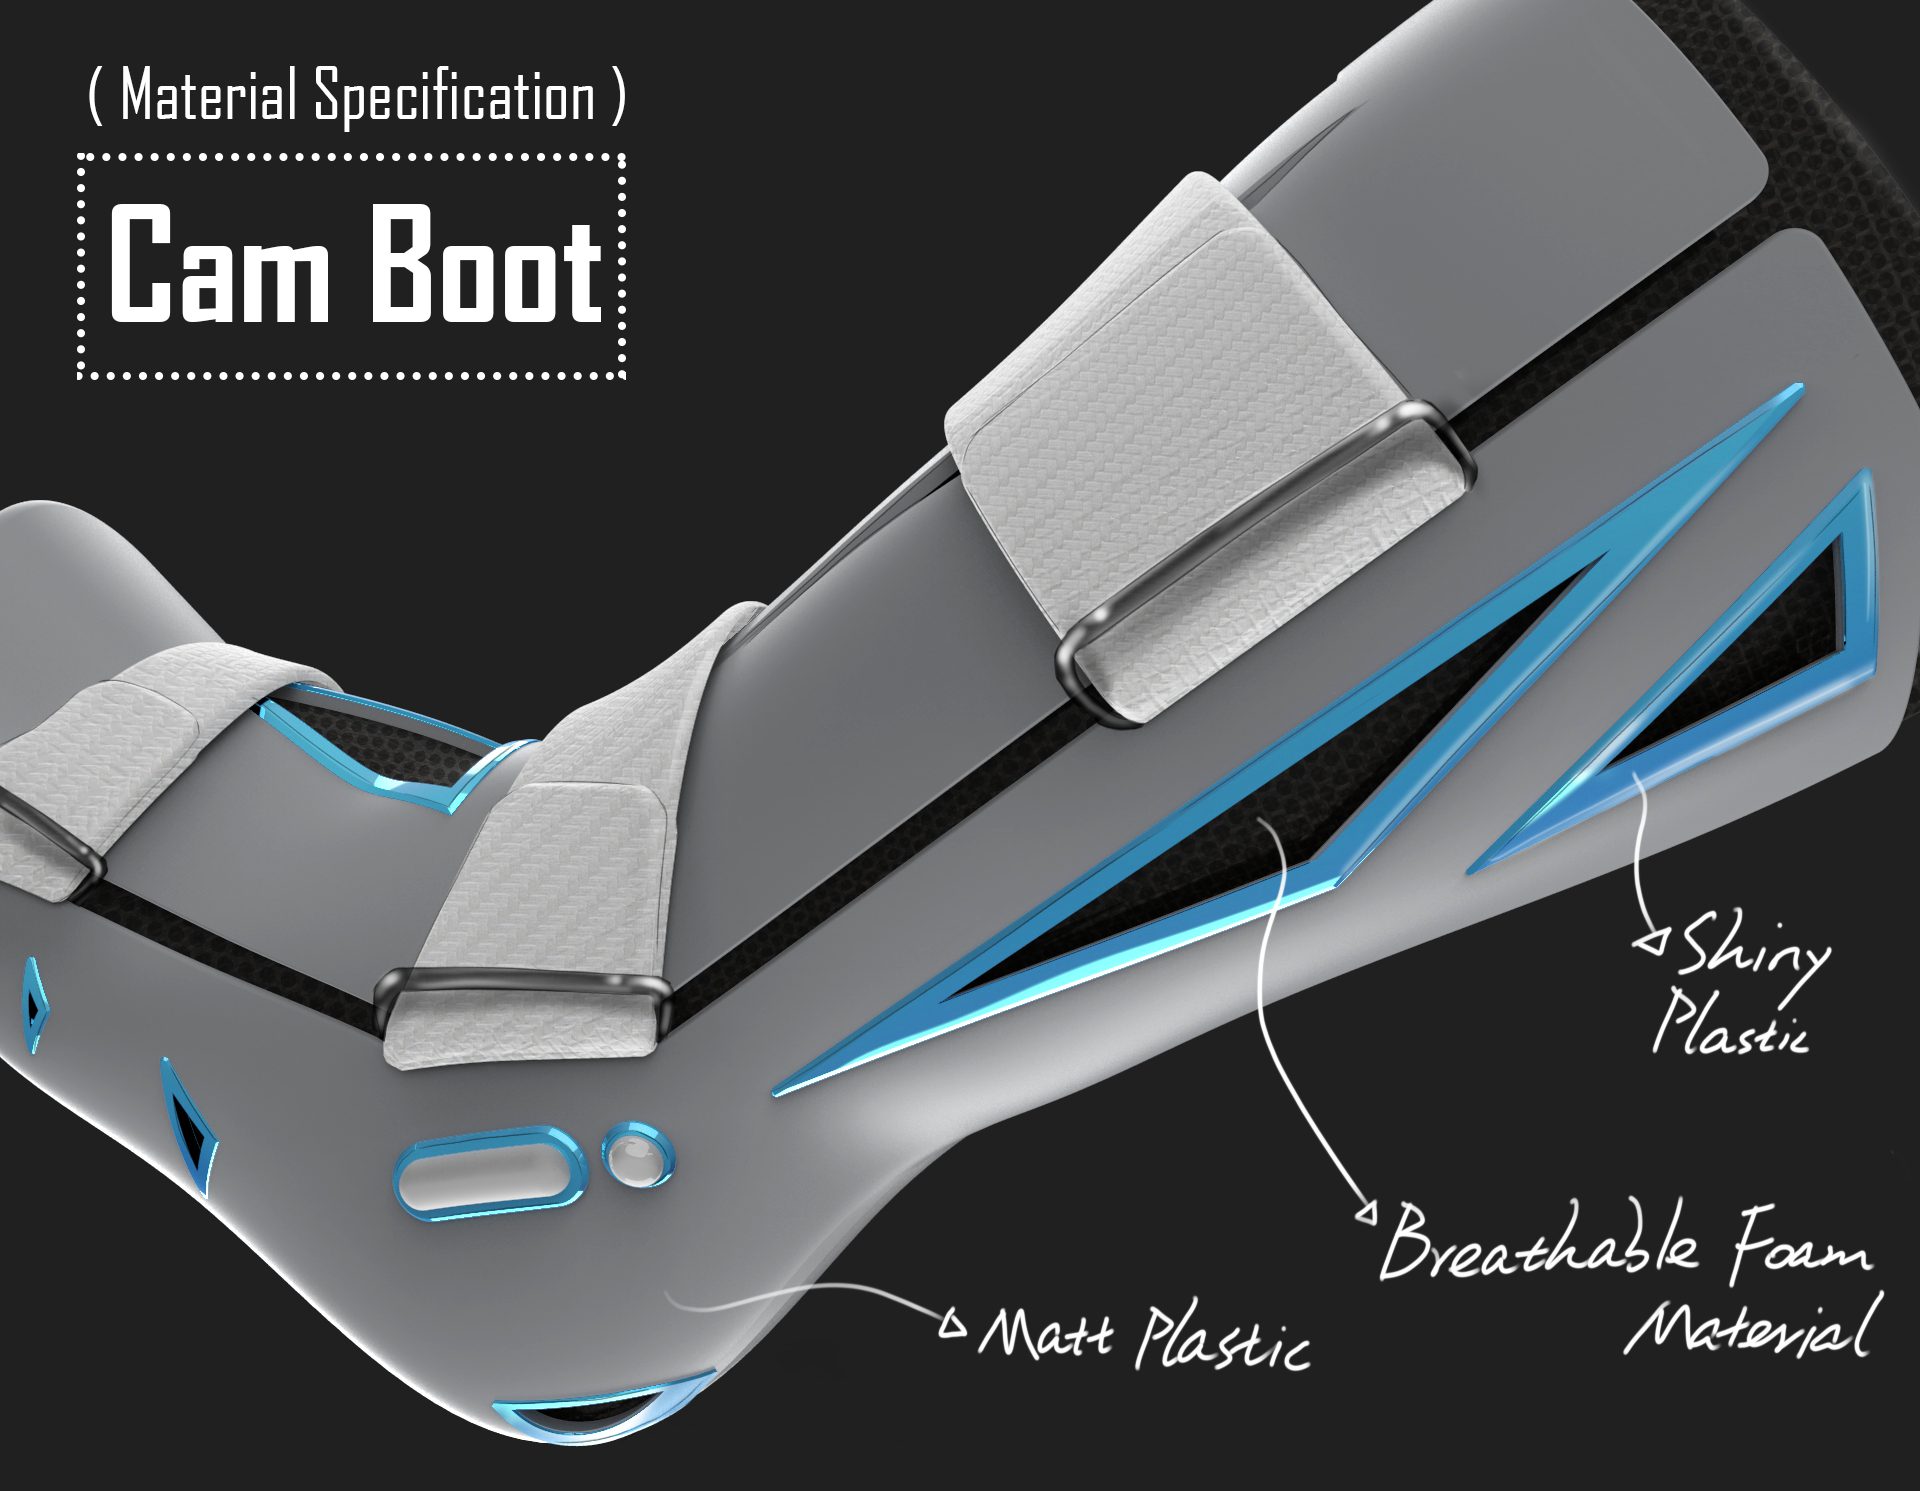
Lesson 05: Custom-Fit
The Brief: design protective gear with a "custom-fit" for a specific individual user of your choice
The Learning Objective: 3D design with a 3D scanned "real" human underlay
The Tools: 3D scanner for human mesh underlay, complex 3D surface modeling in Solidworks, rendering in Keyshot, layout and retouching in Photoshop and Illustrator
Timeline: 4 weeks
(the following are examples of student work)
Lesson 04: LEGO Animation
The Brief: create a contextually aware animation of a LEGO block assembly
The Learning Objective: 3D design for explanatory animation
The Tools: part and assembly in Solidworks, animation in Keyshot, post-process in Premier Pro / After Effects
Timeline: 2 weeks
(the following are examples of student work)
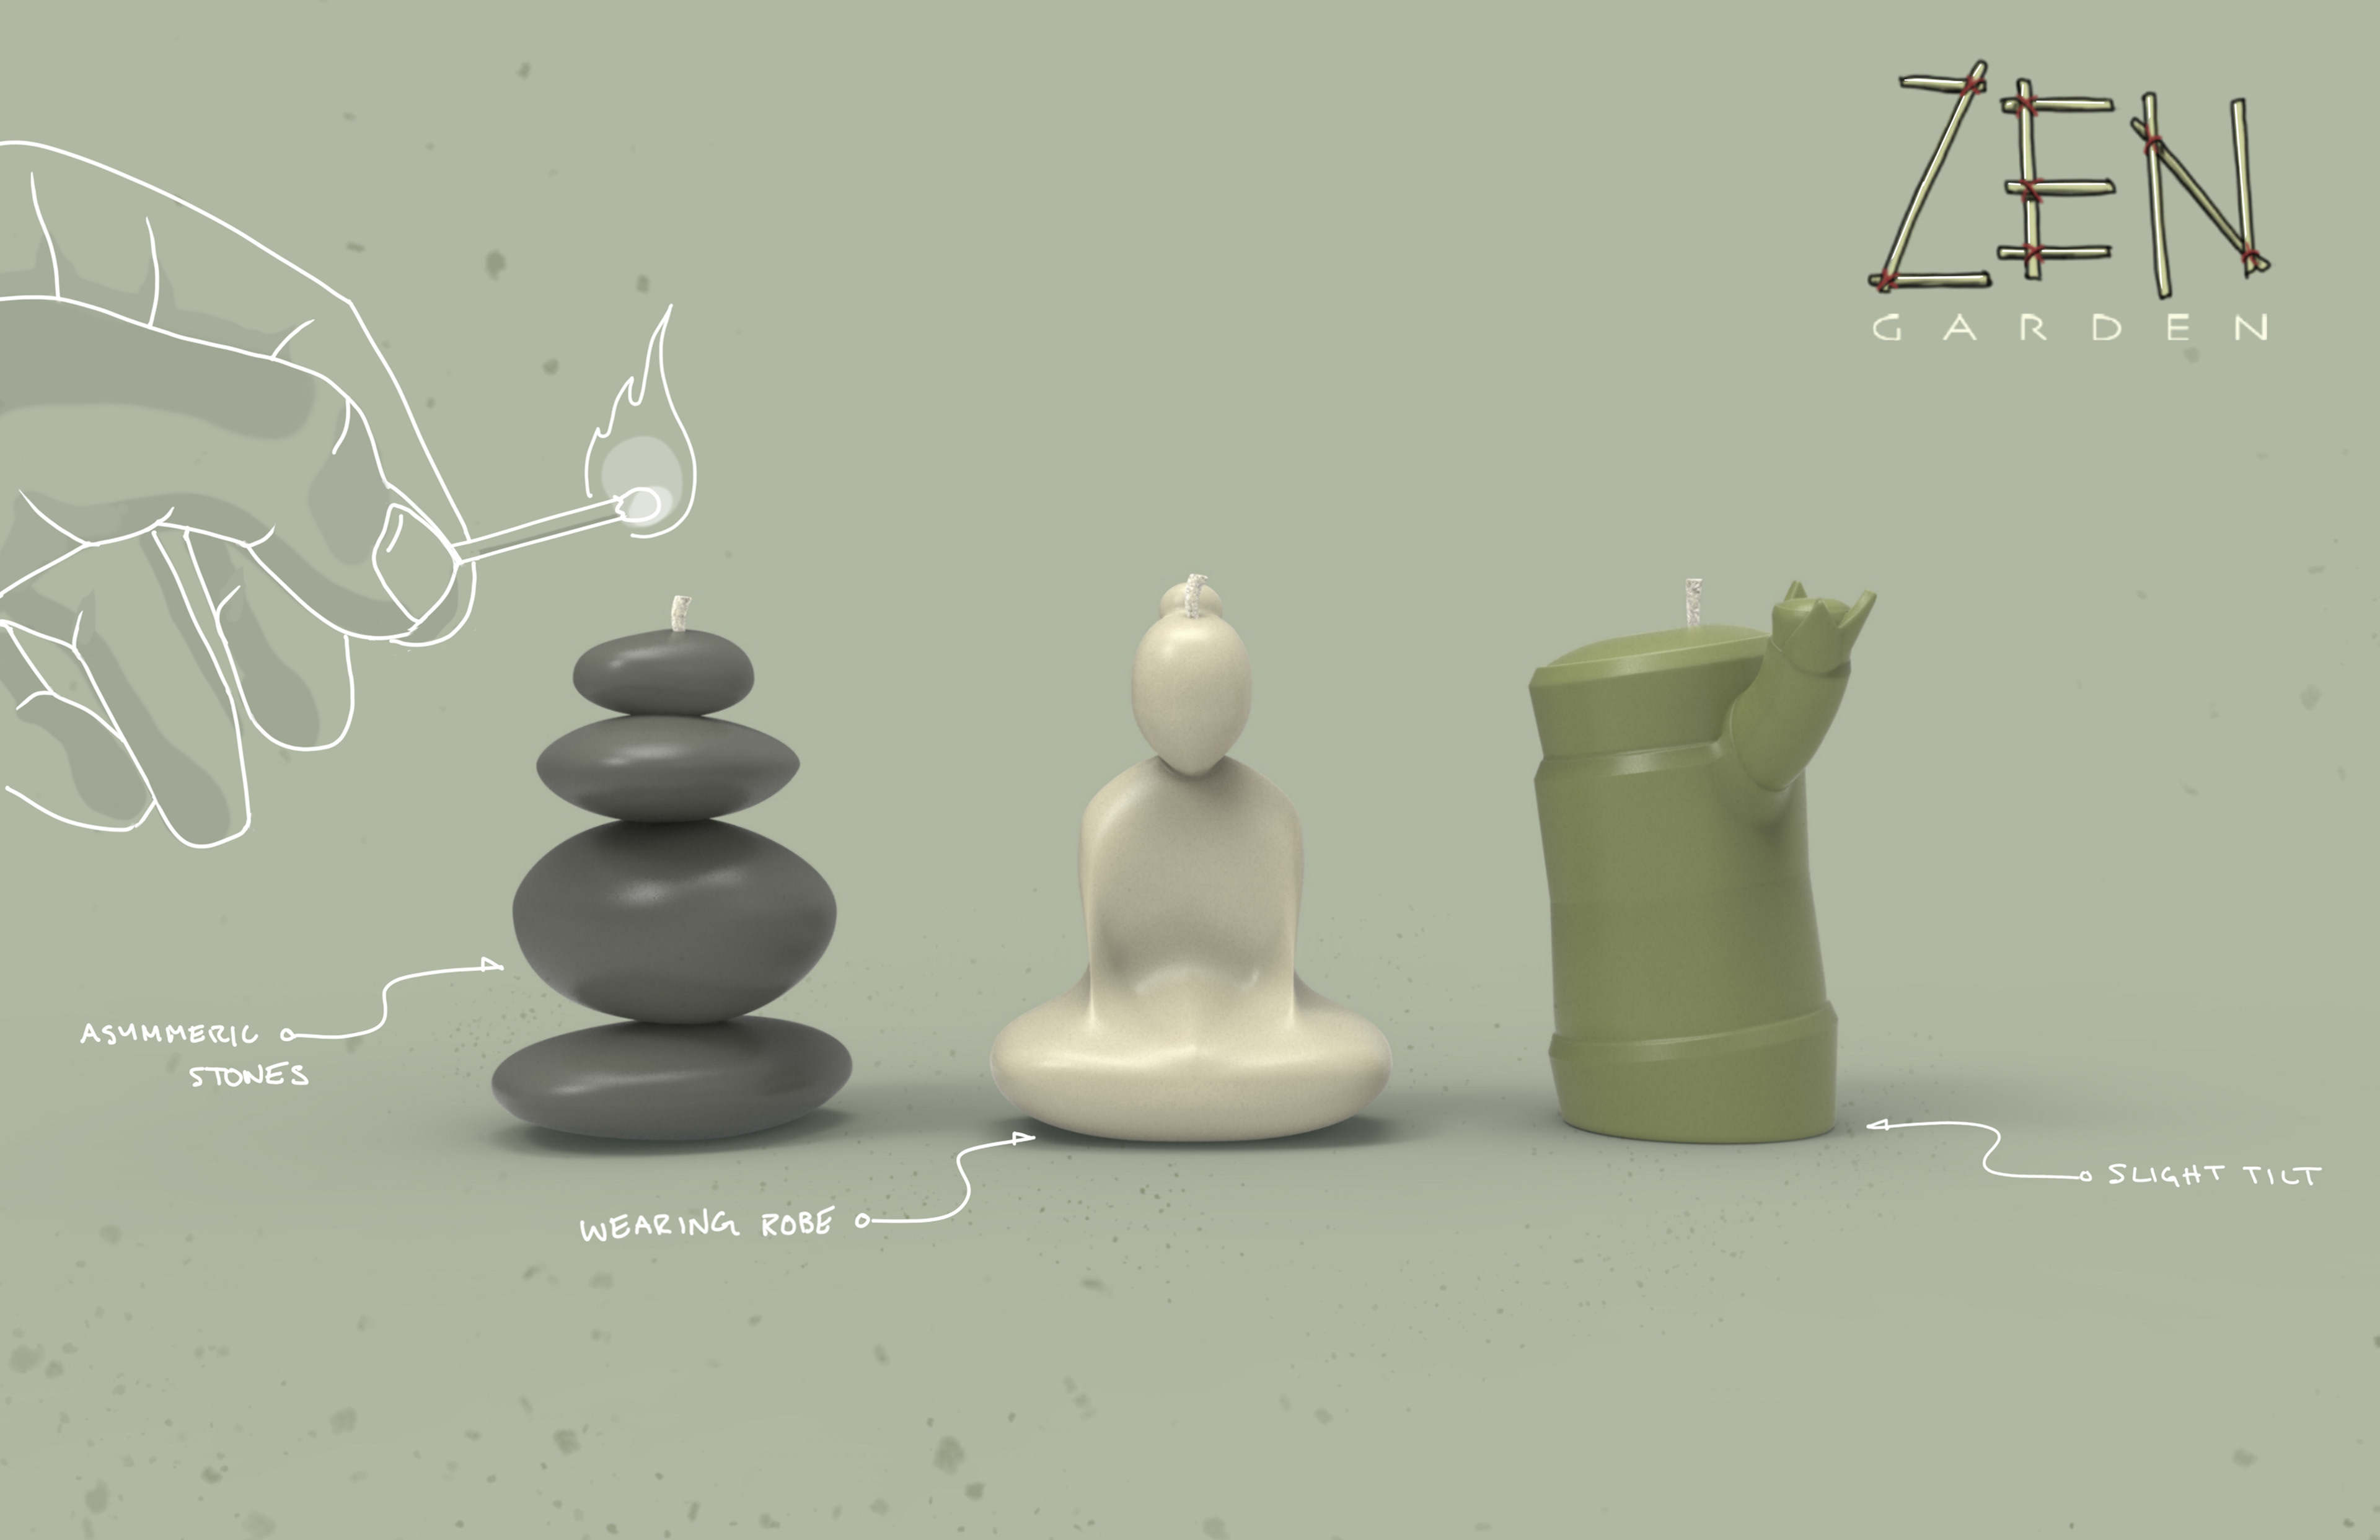
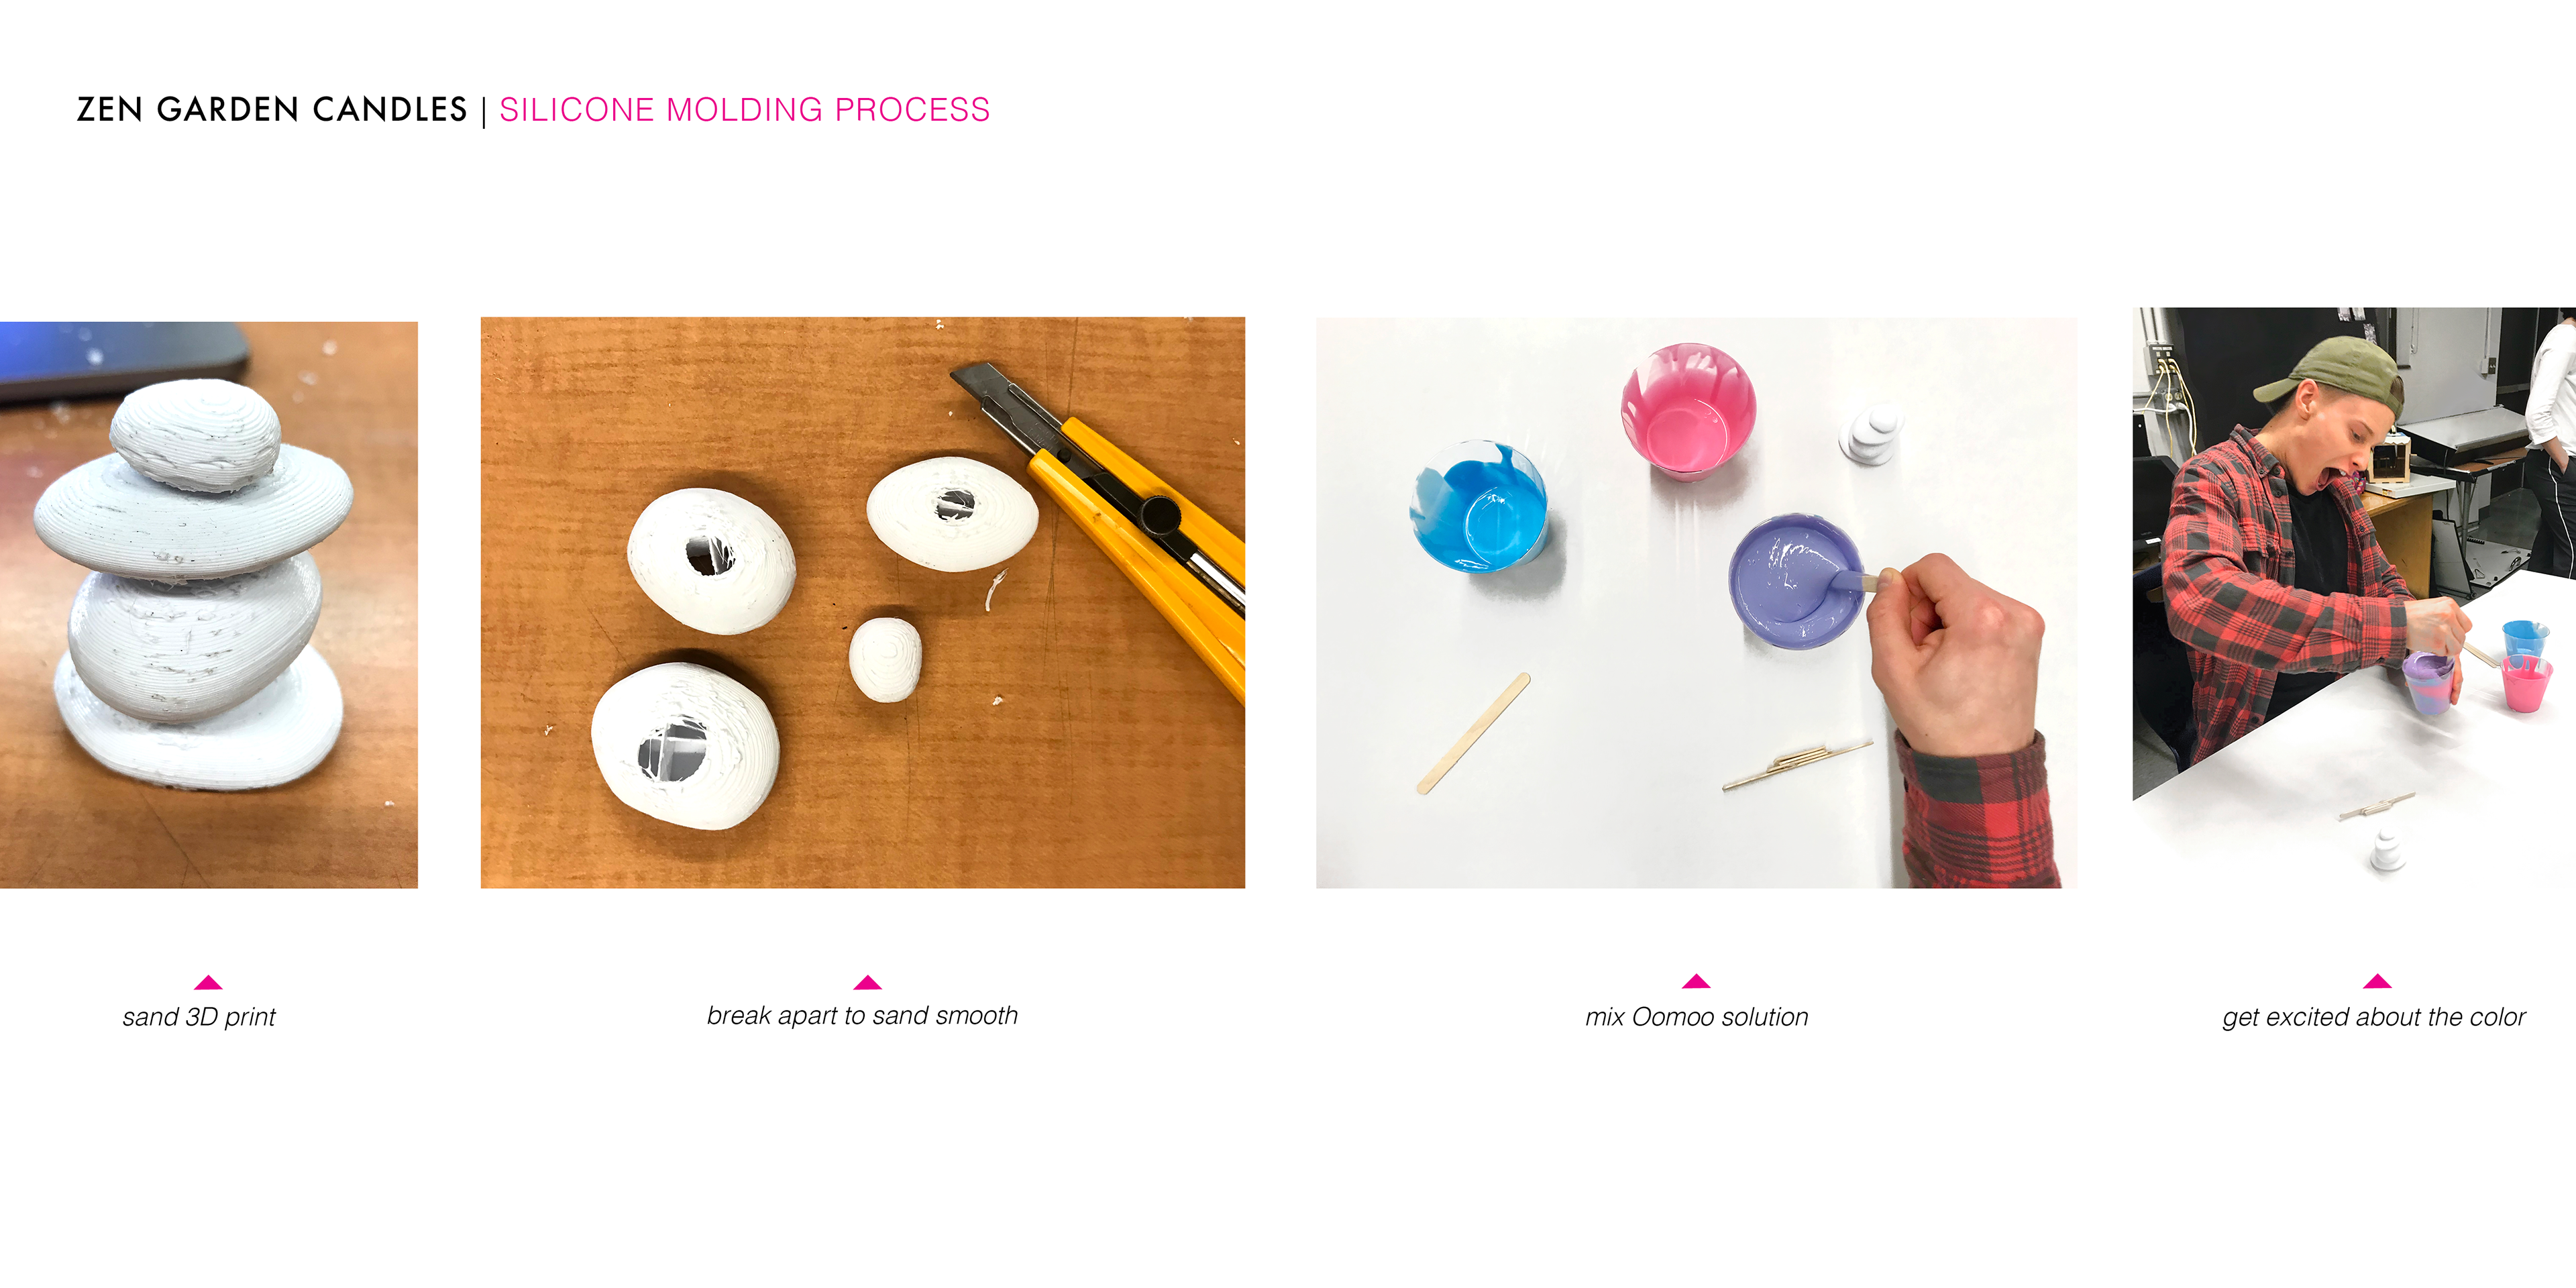
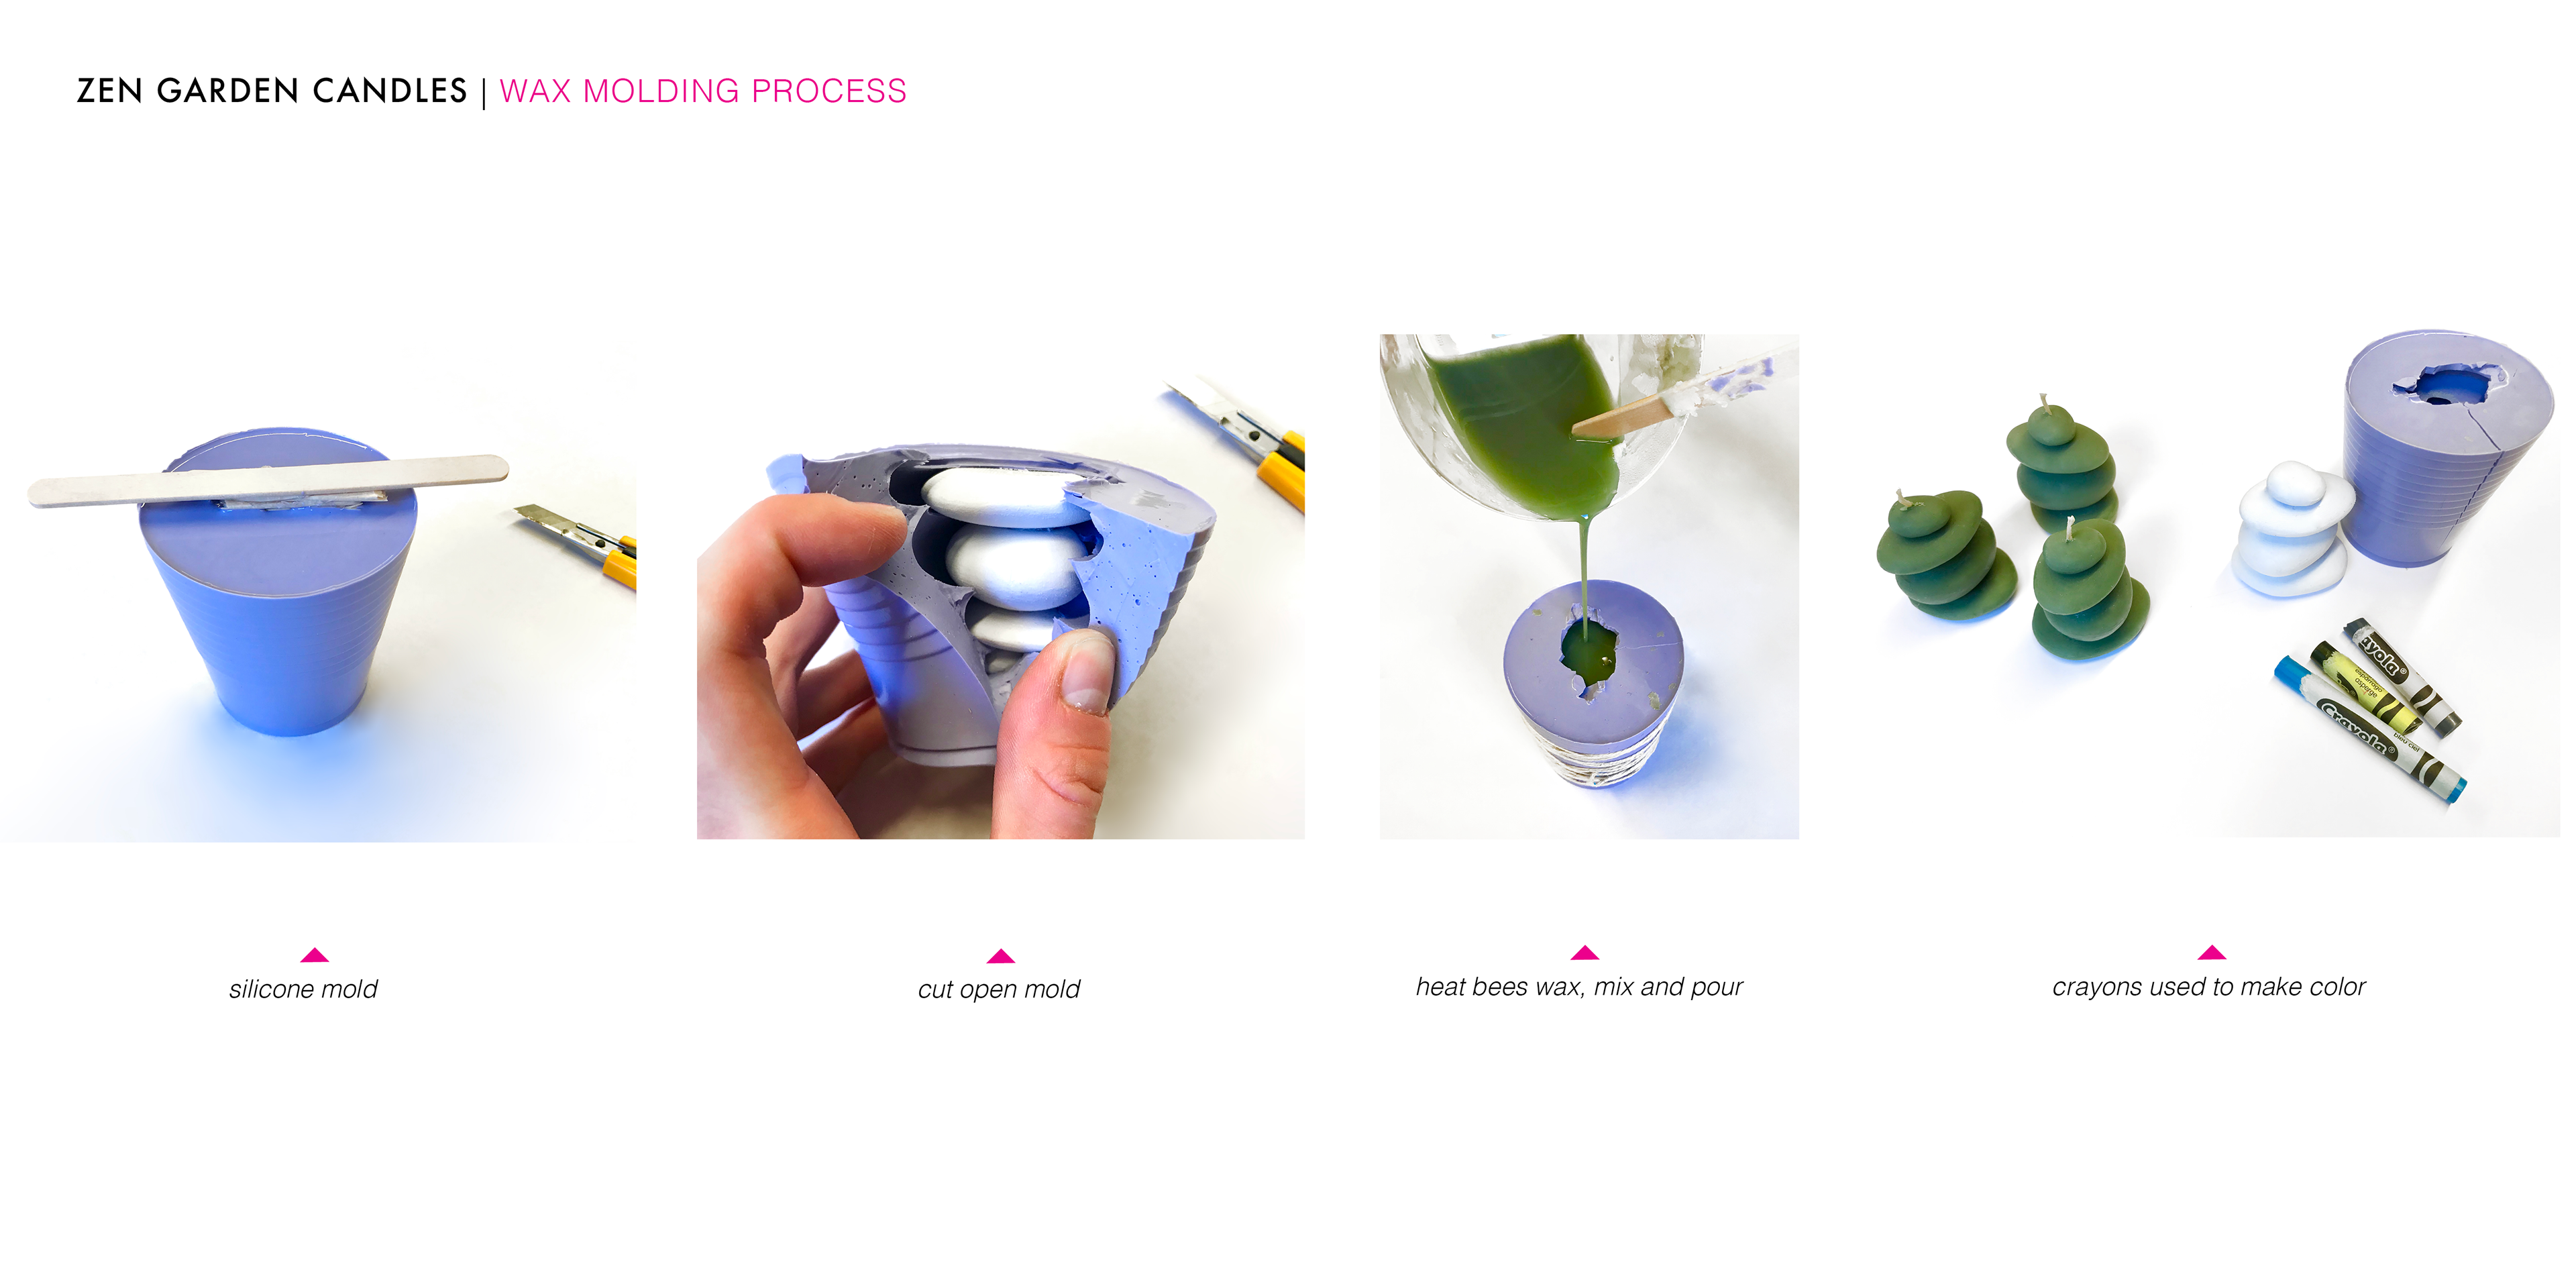
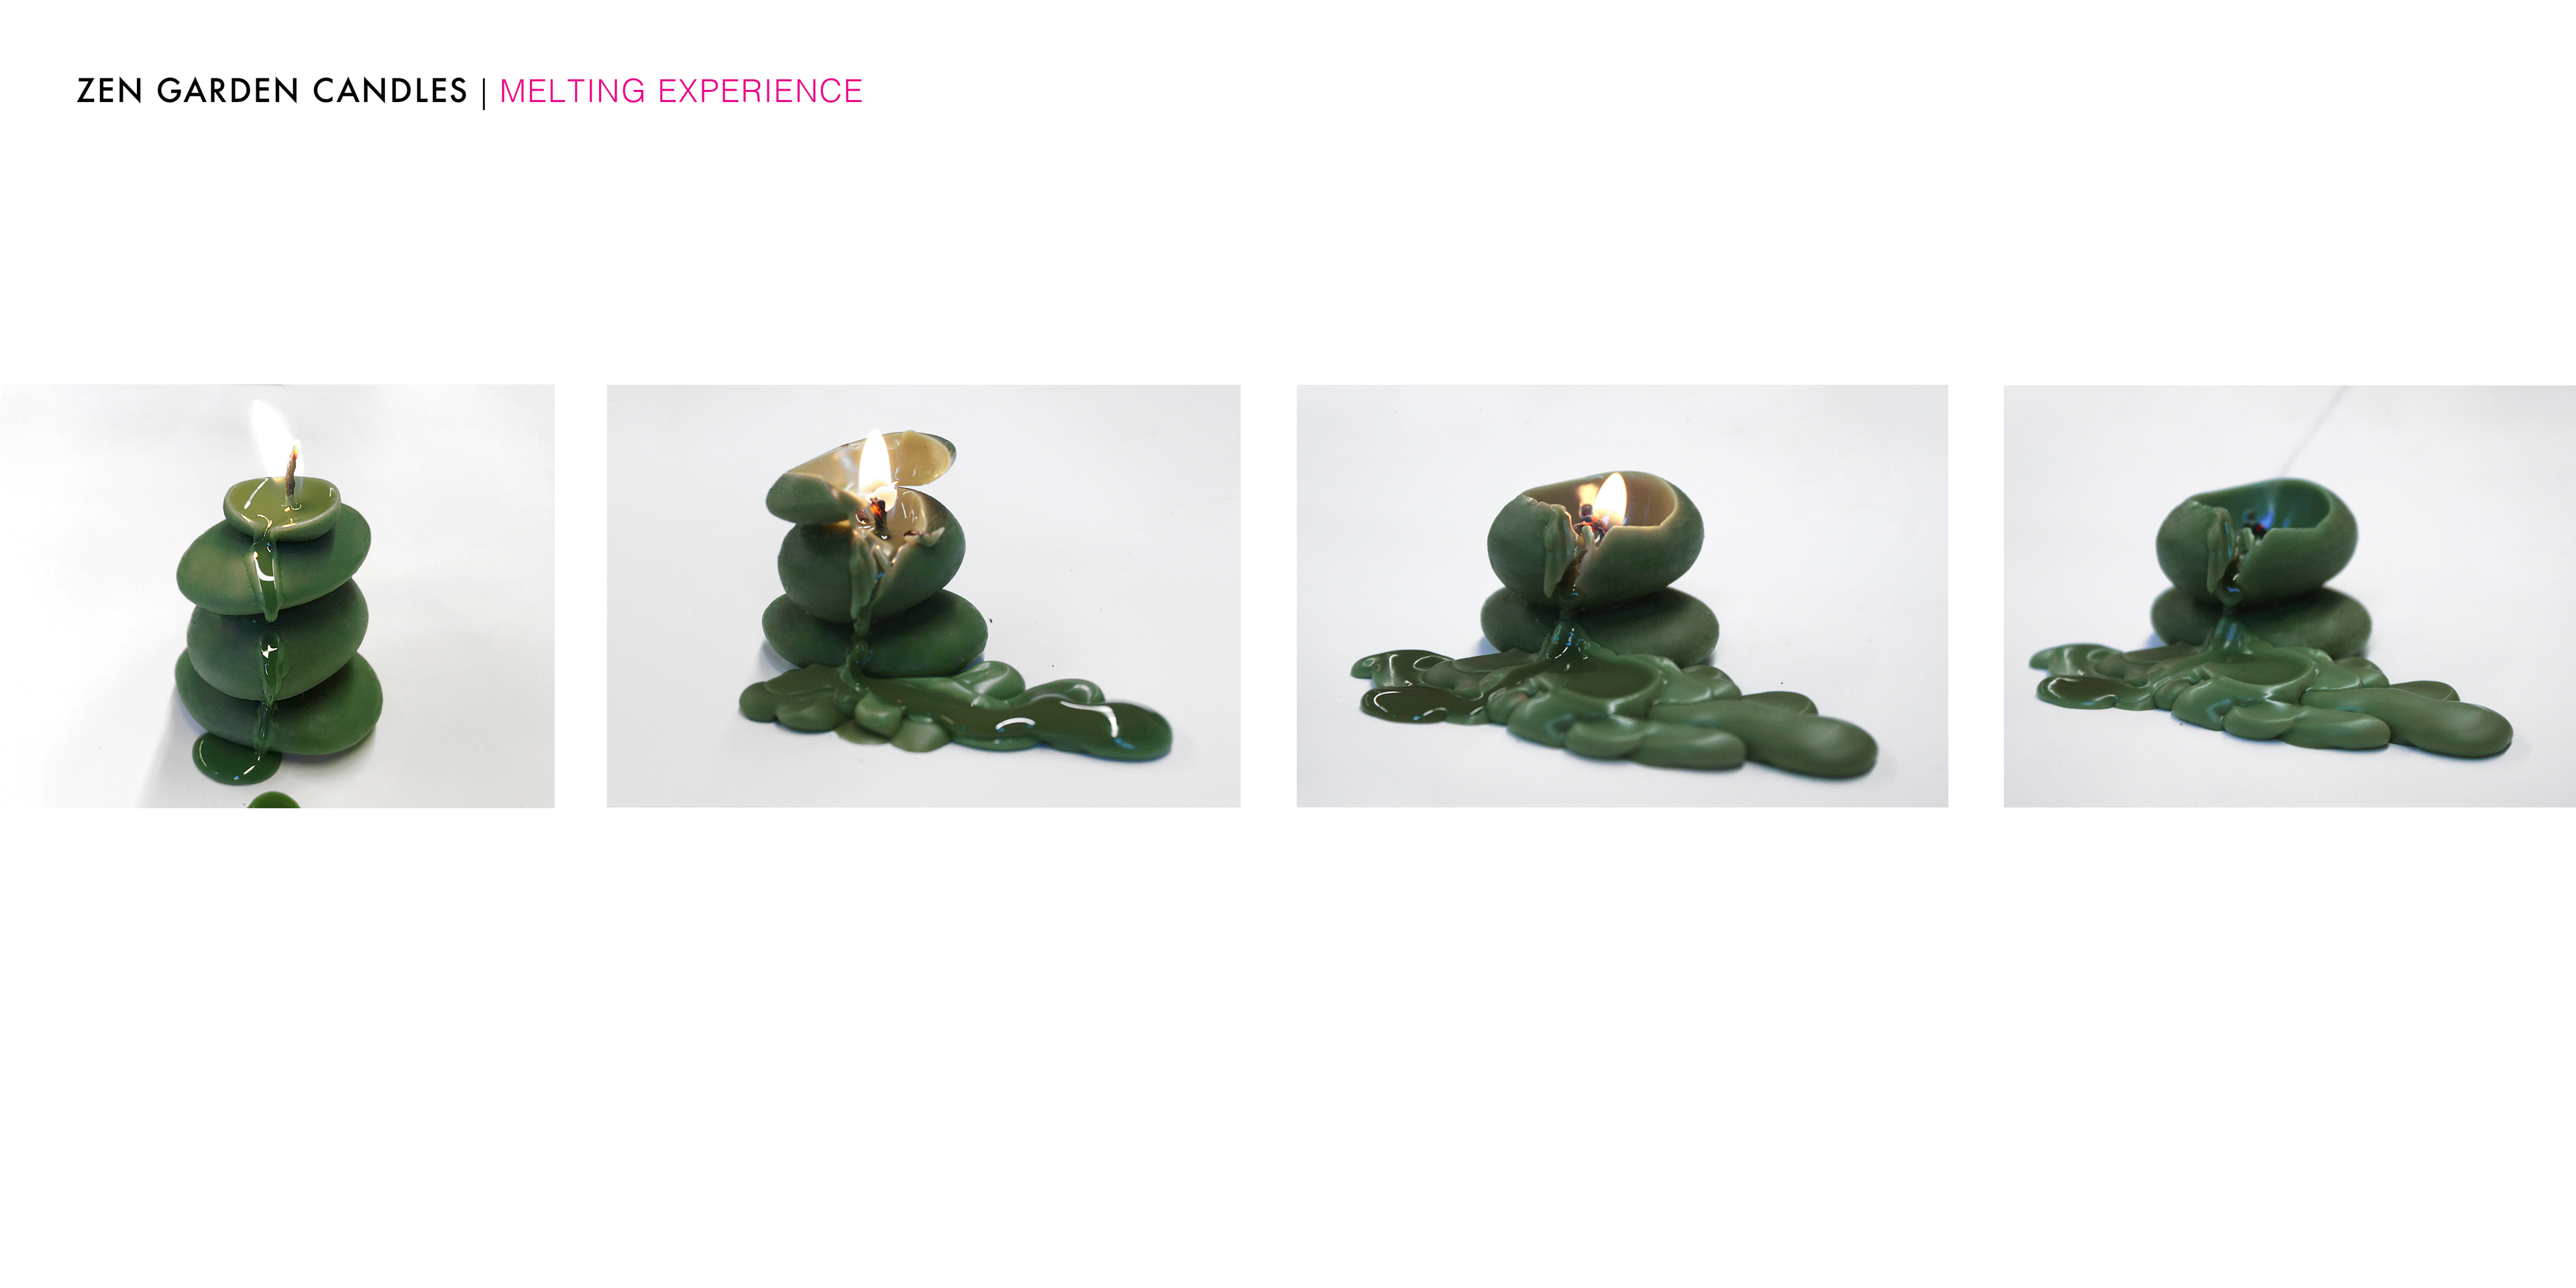
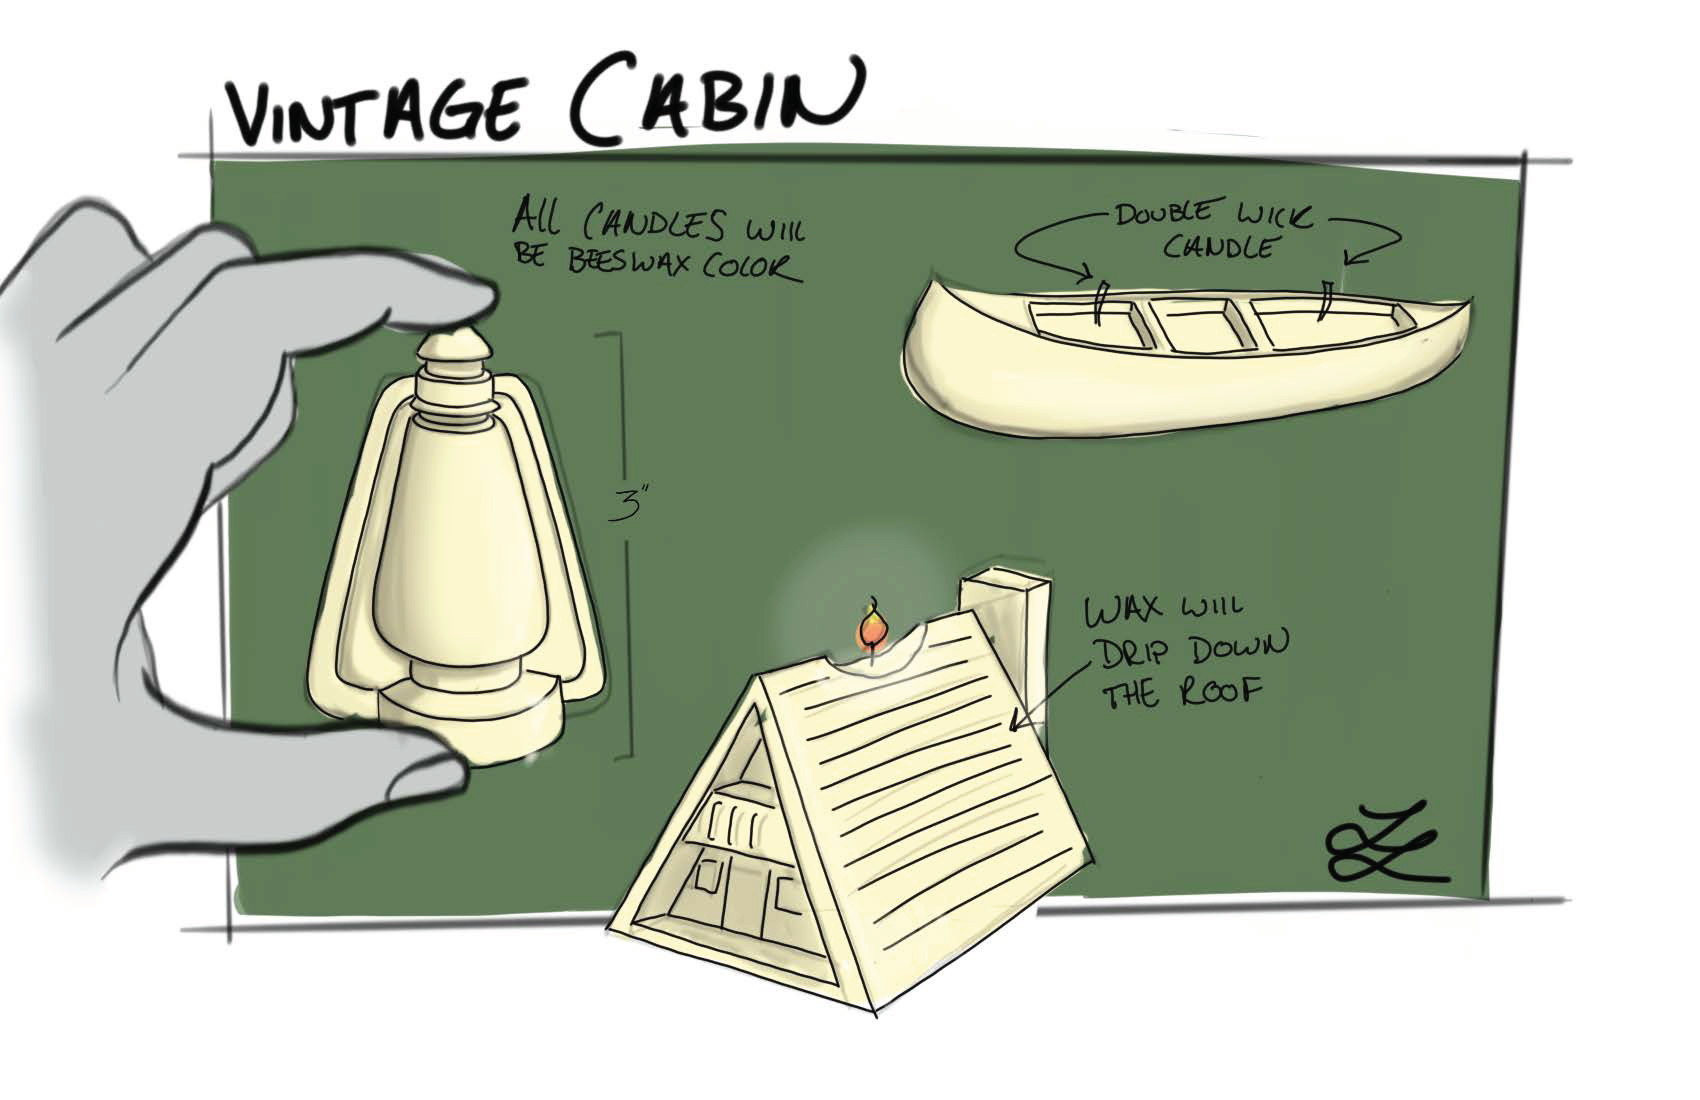
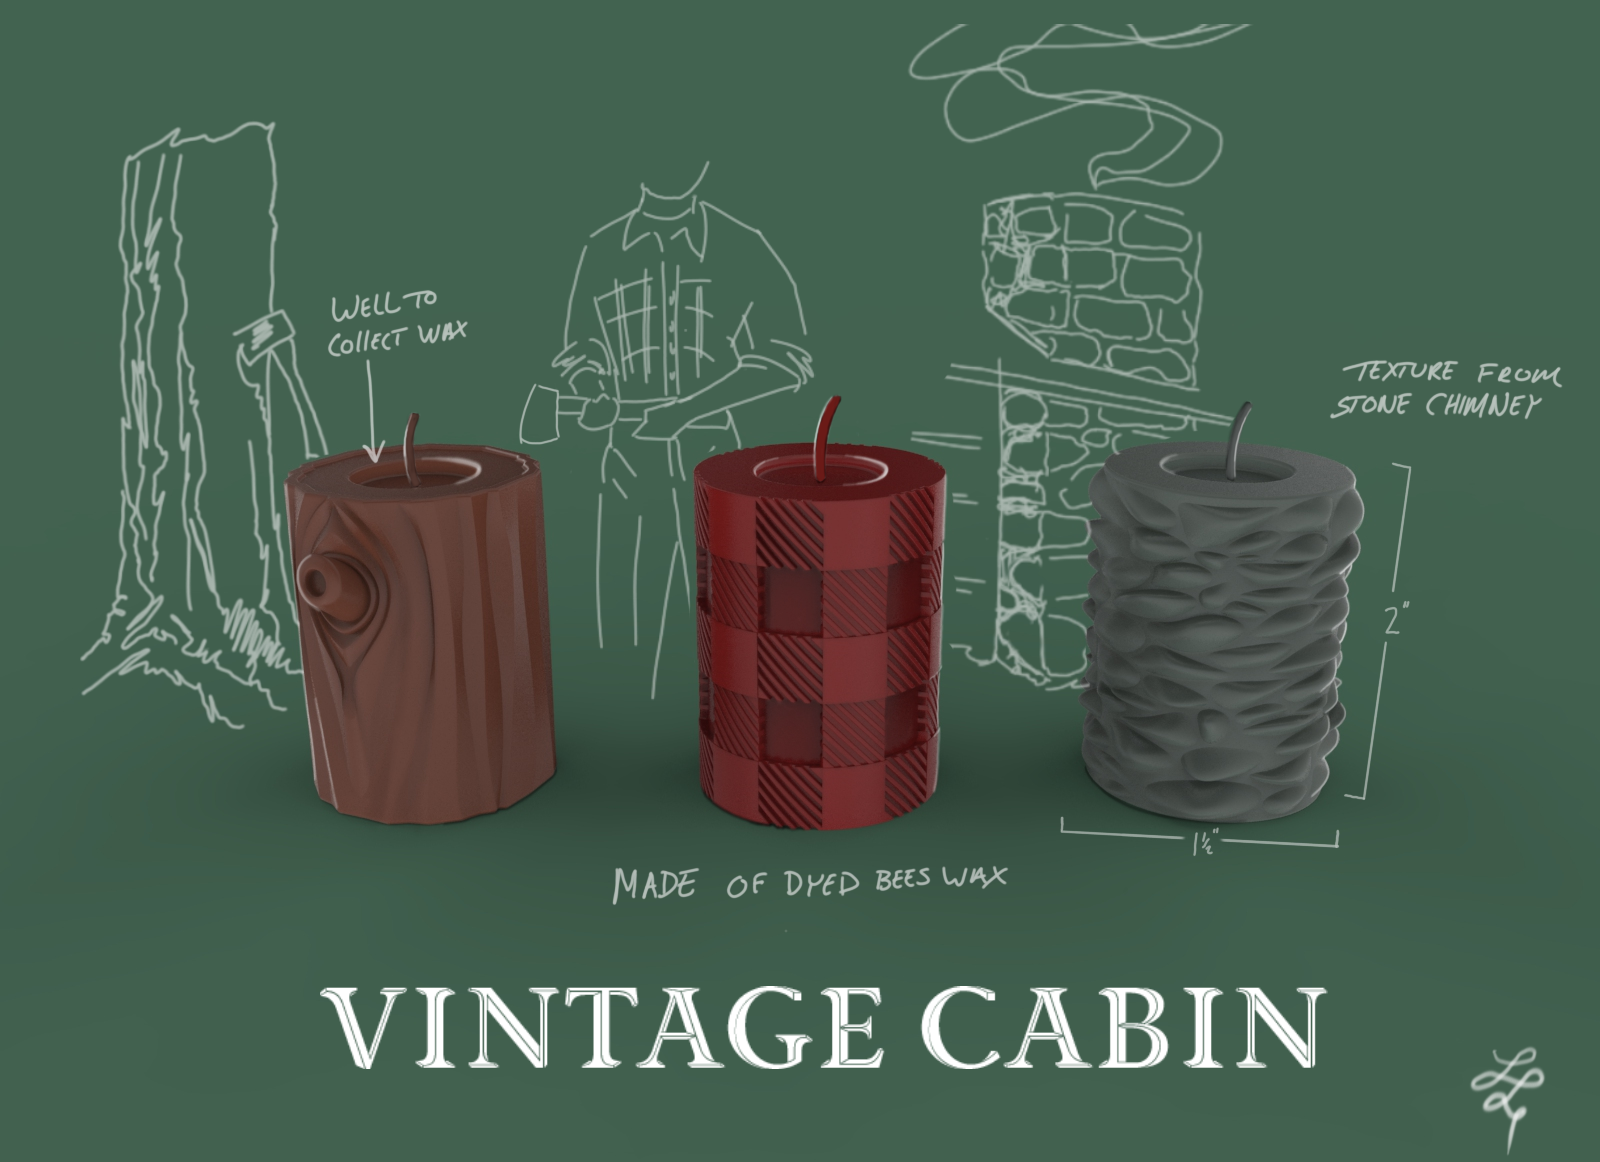
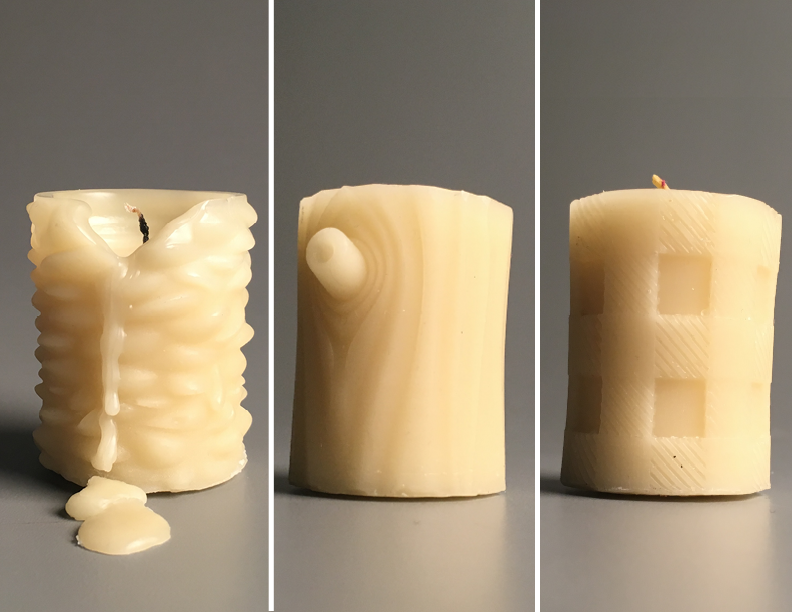
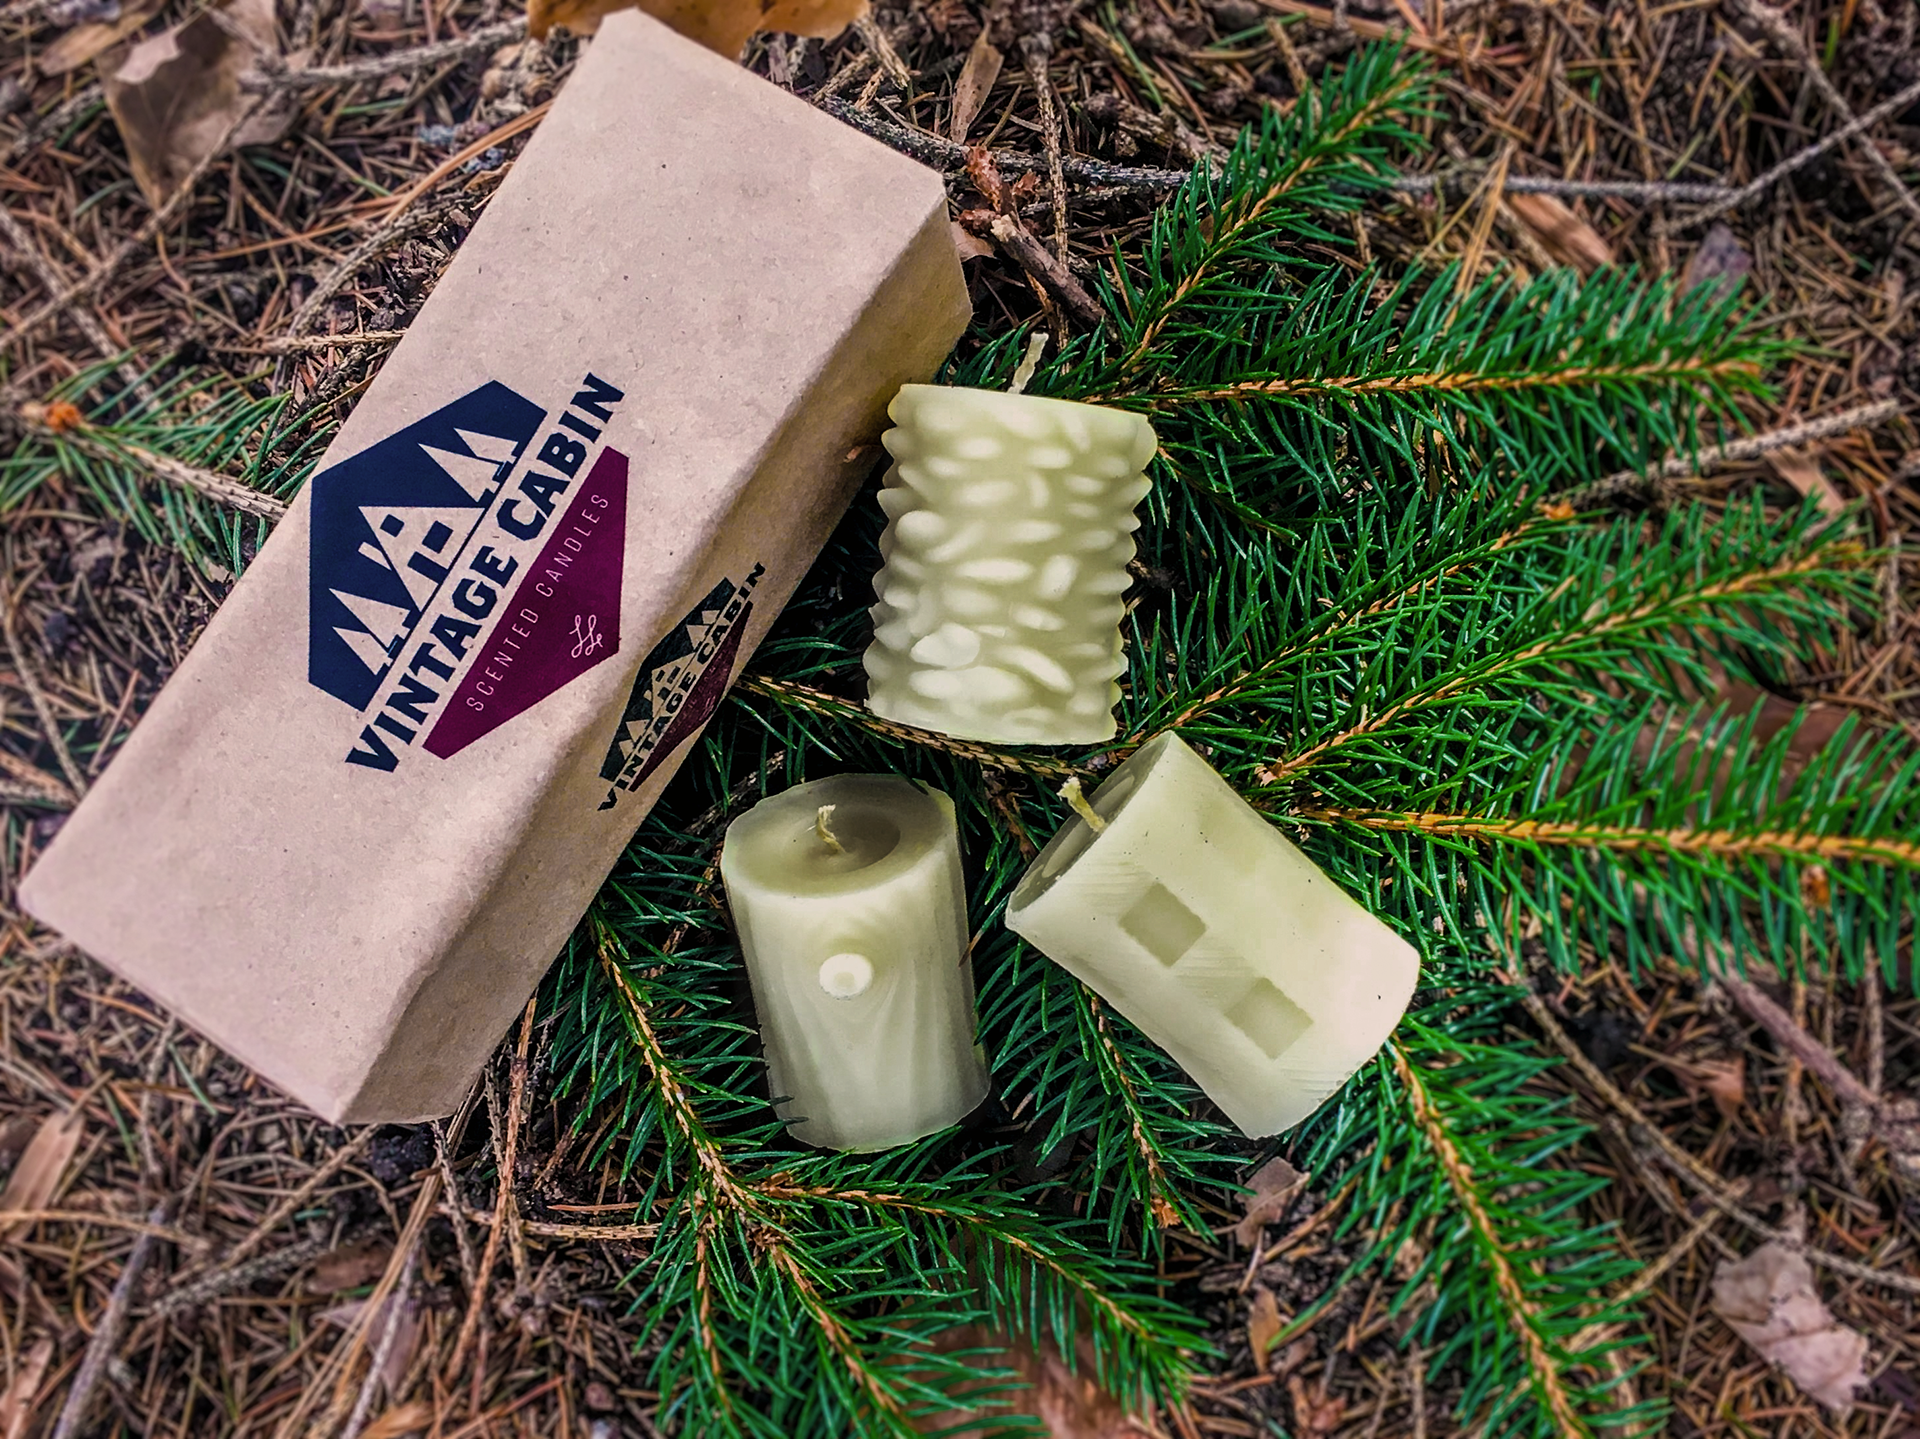
Lesson 03: Votive Candles
The Brief: design a set of votive candles for a specific scent of your choice
The Learning Objective: 3D design for small scale production using 3D printing, silicone molds and casting
The Tools: surface and solids modeling in Solidworks, 3D rendering in Keyshot, 3D printing, silicone casting, wax and wick, photography, retouching in Photoshop
Timeline: 3 weeks
(the following are examples of student work)


Lesson 02: Automata
The Brief: create a custom mechanical diorama (known as an Automata)
The Learning Objective: 3D design for mechanical assembly, laser cutting
The Tools: part and assembly in Solidworks, laser cutter, video in Premier Pro
Timeline: 4 weeks
(the following are examples of student work)
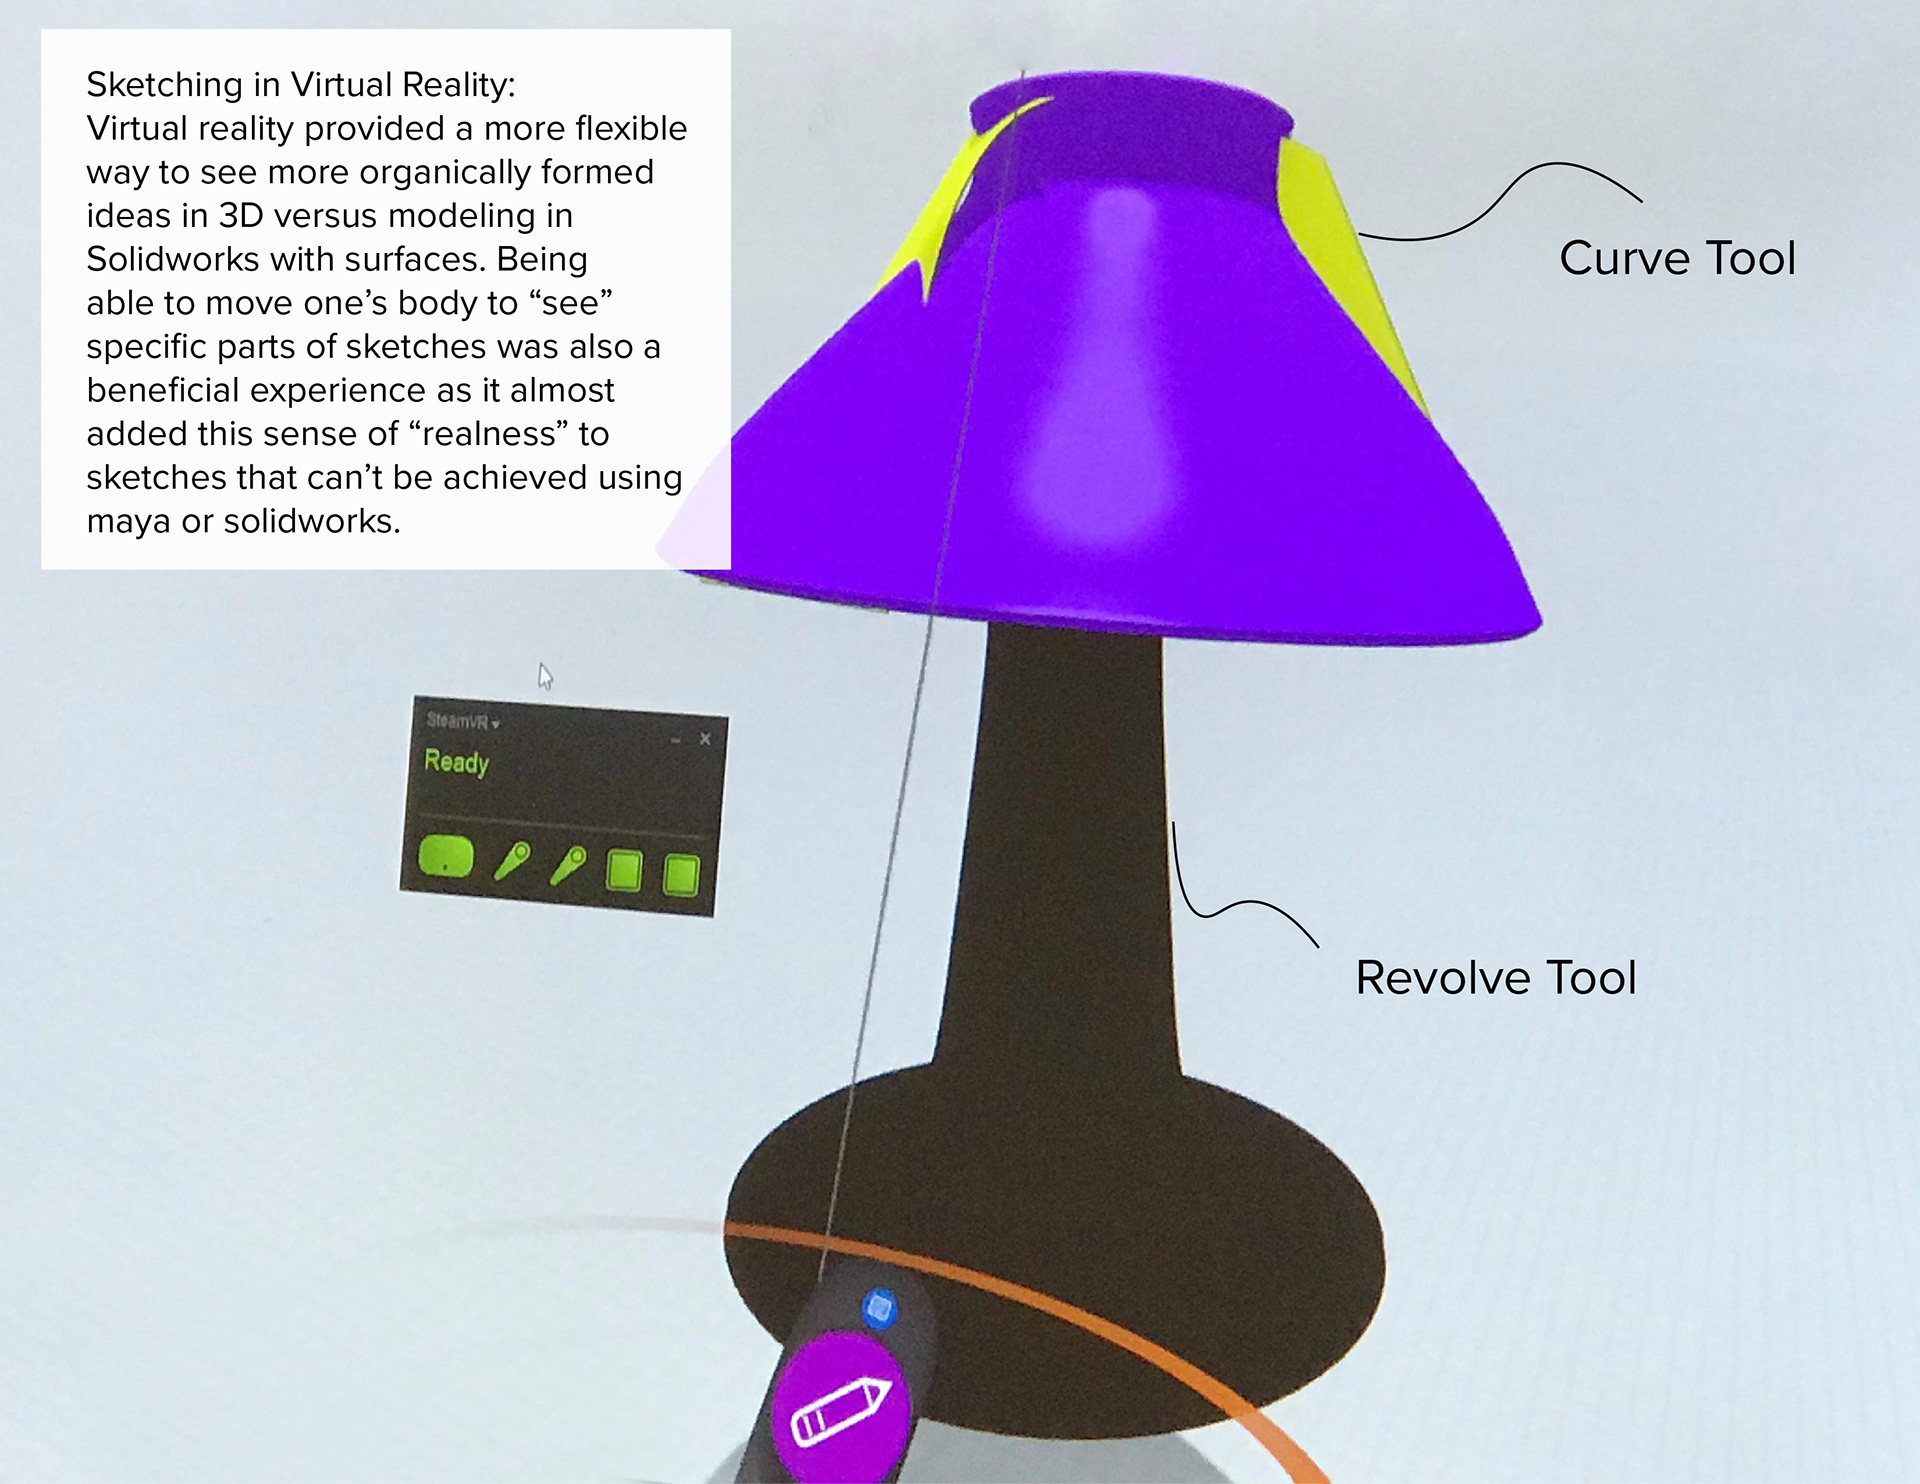
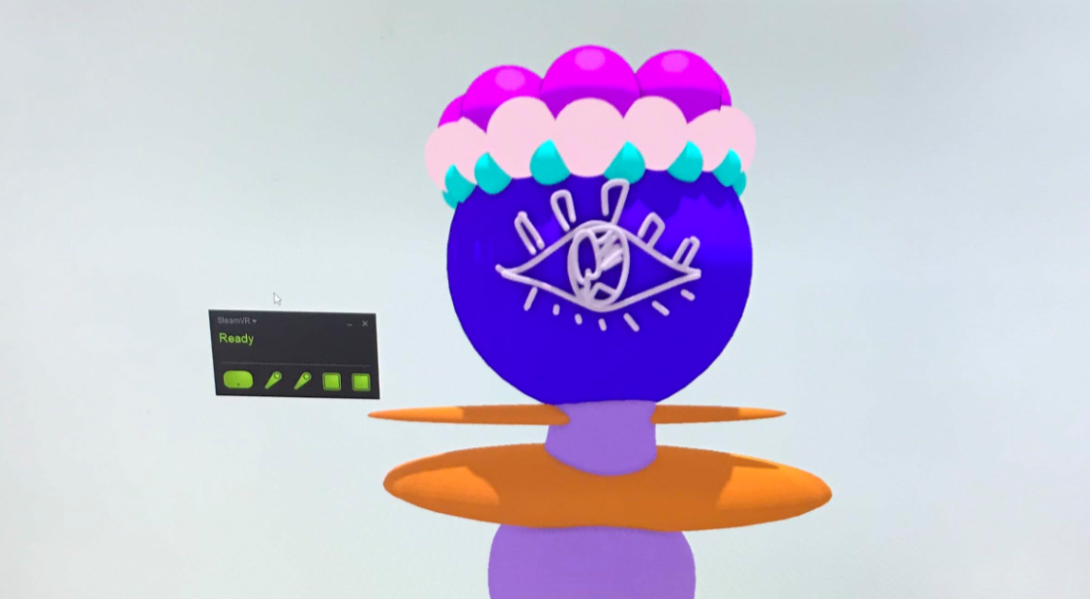
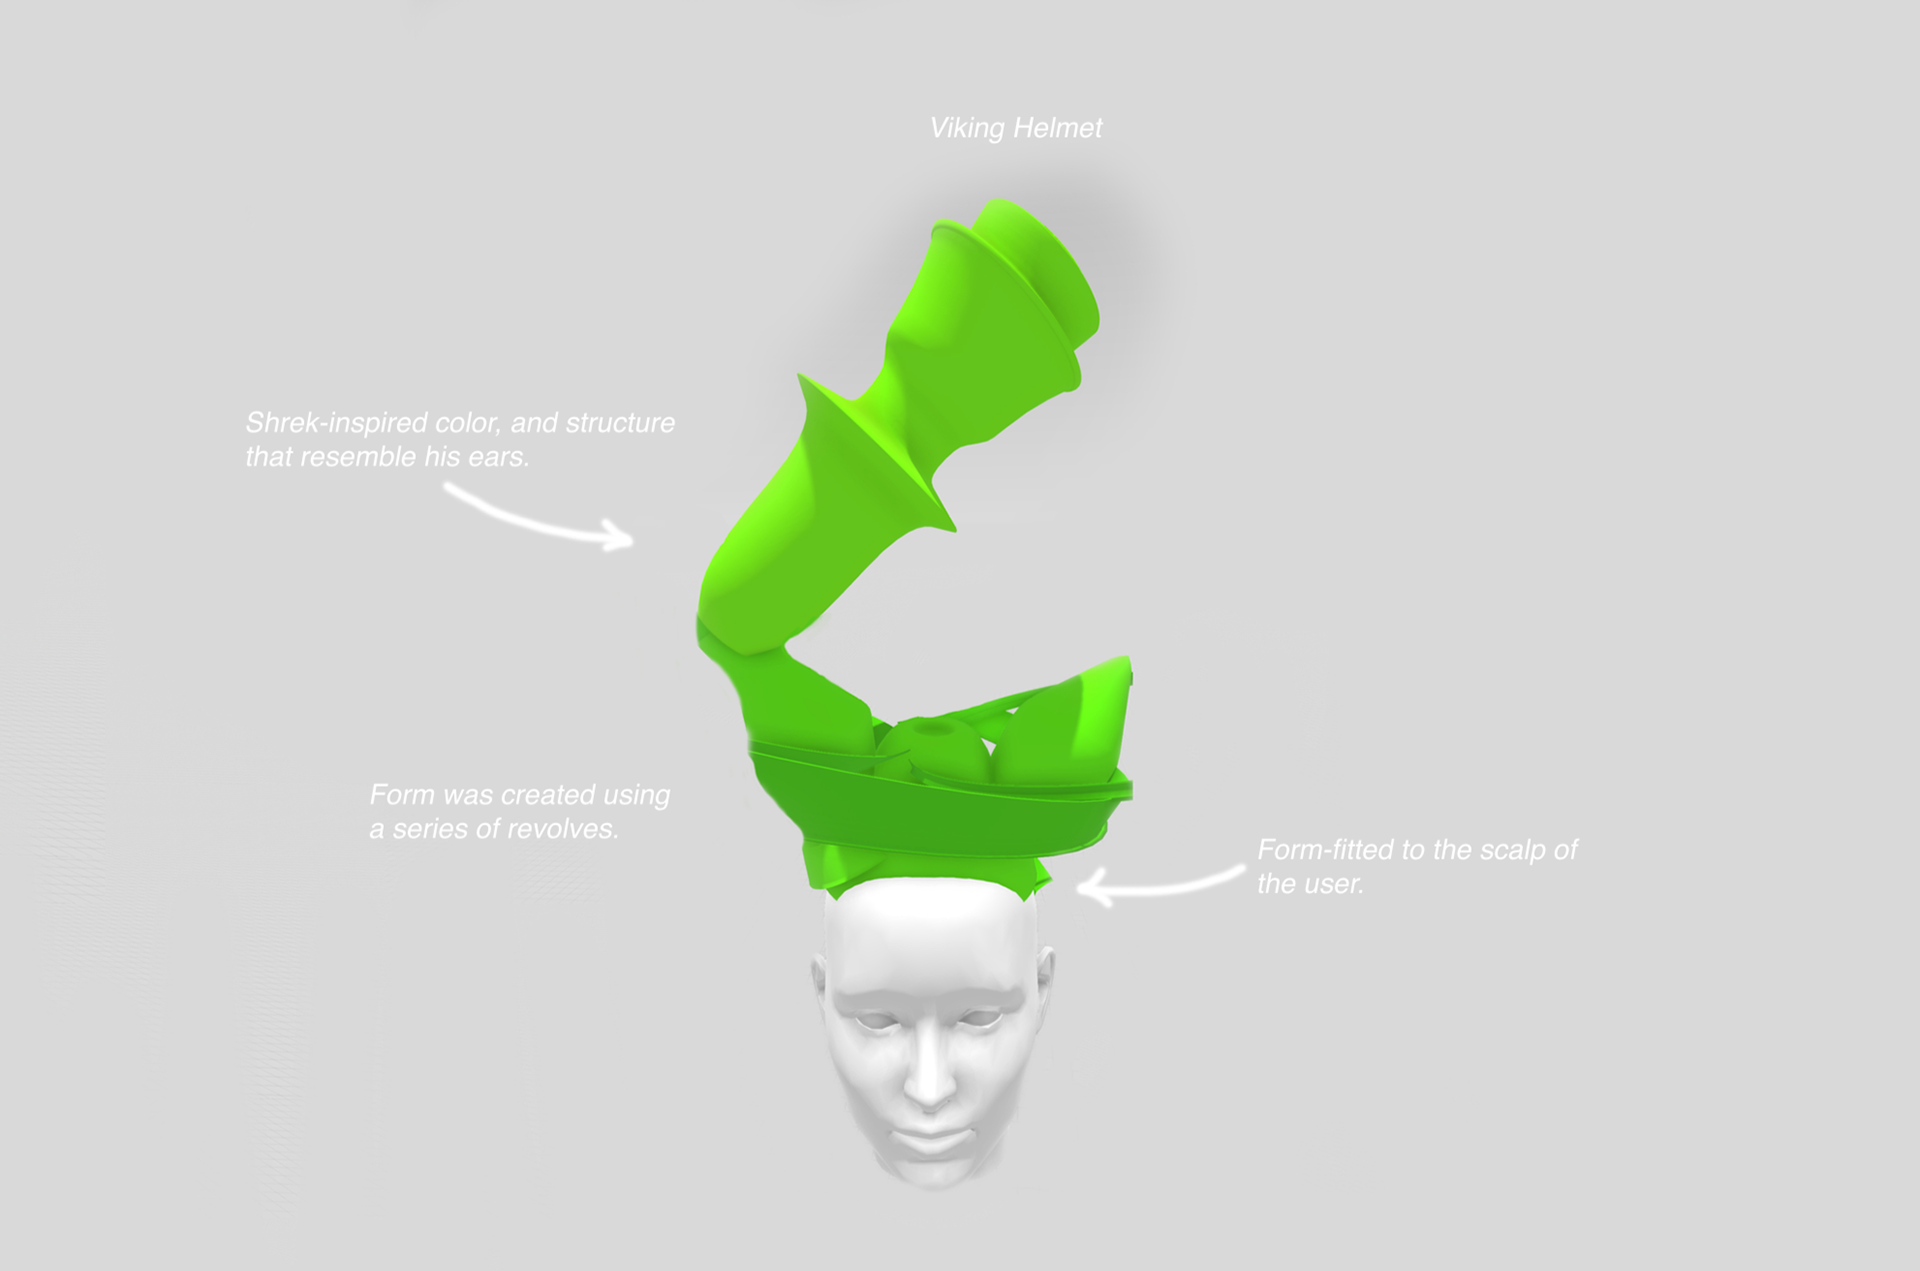
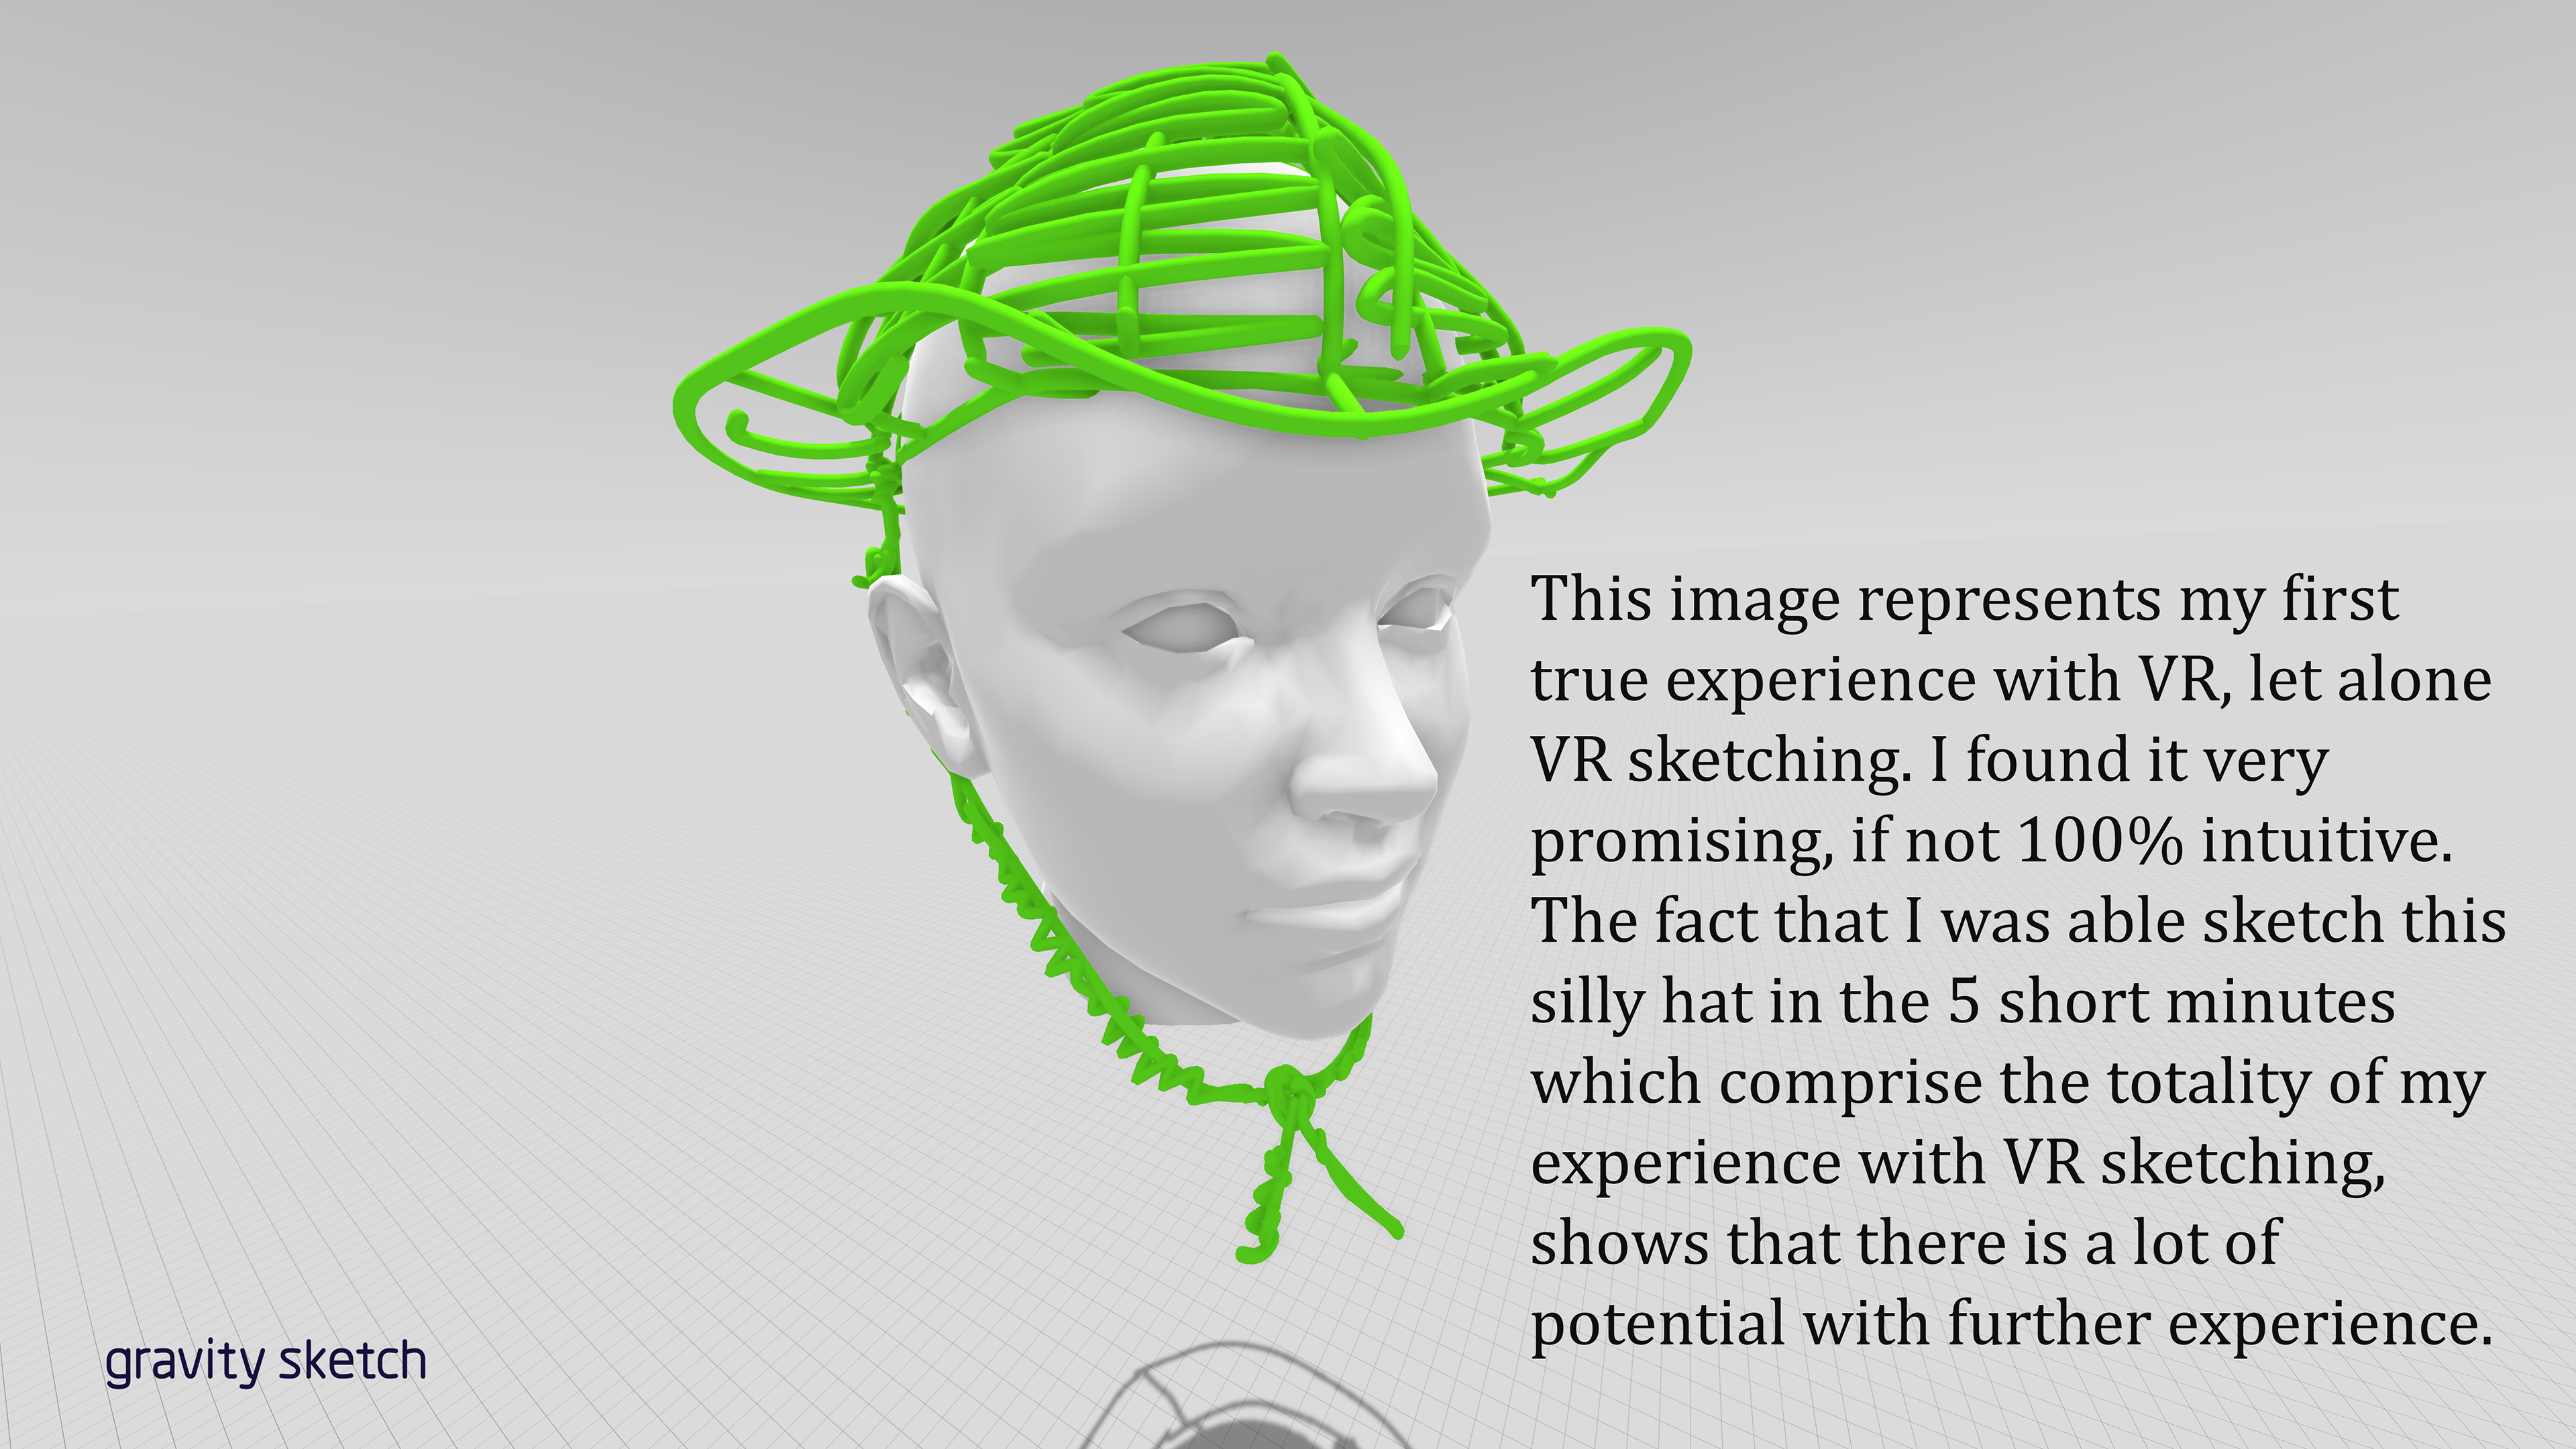
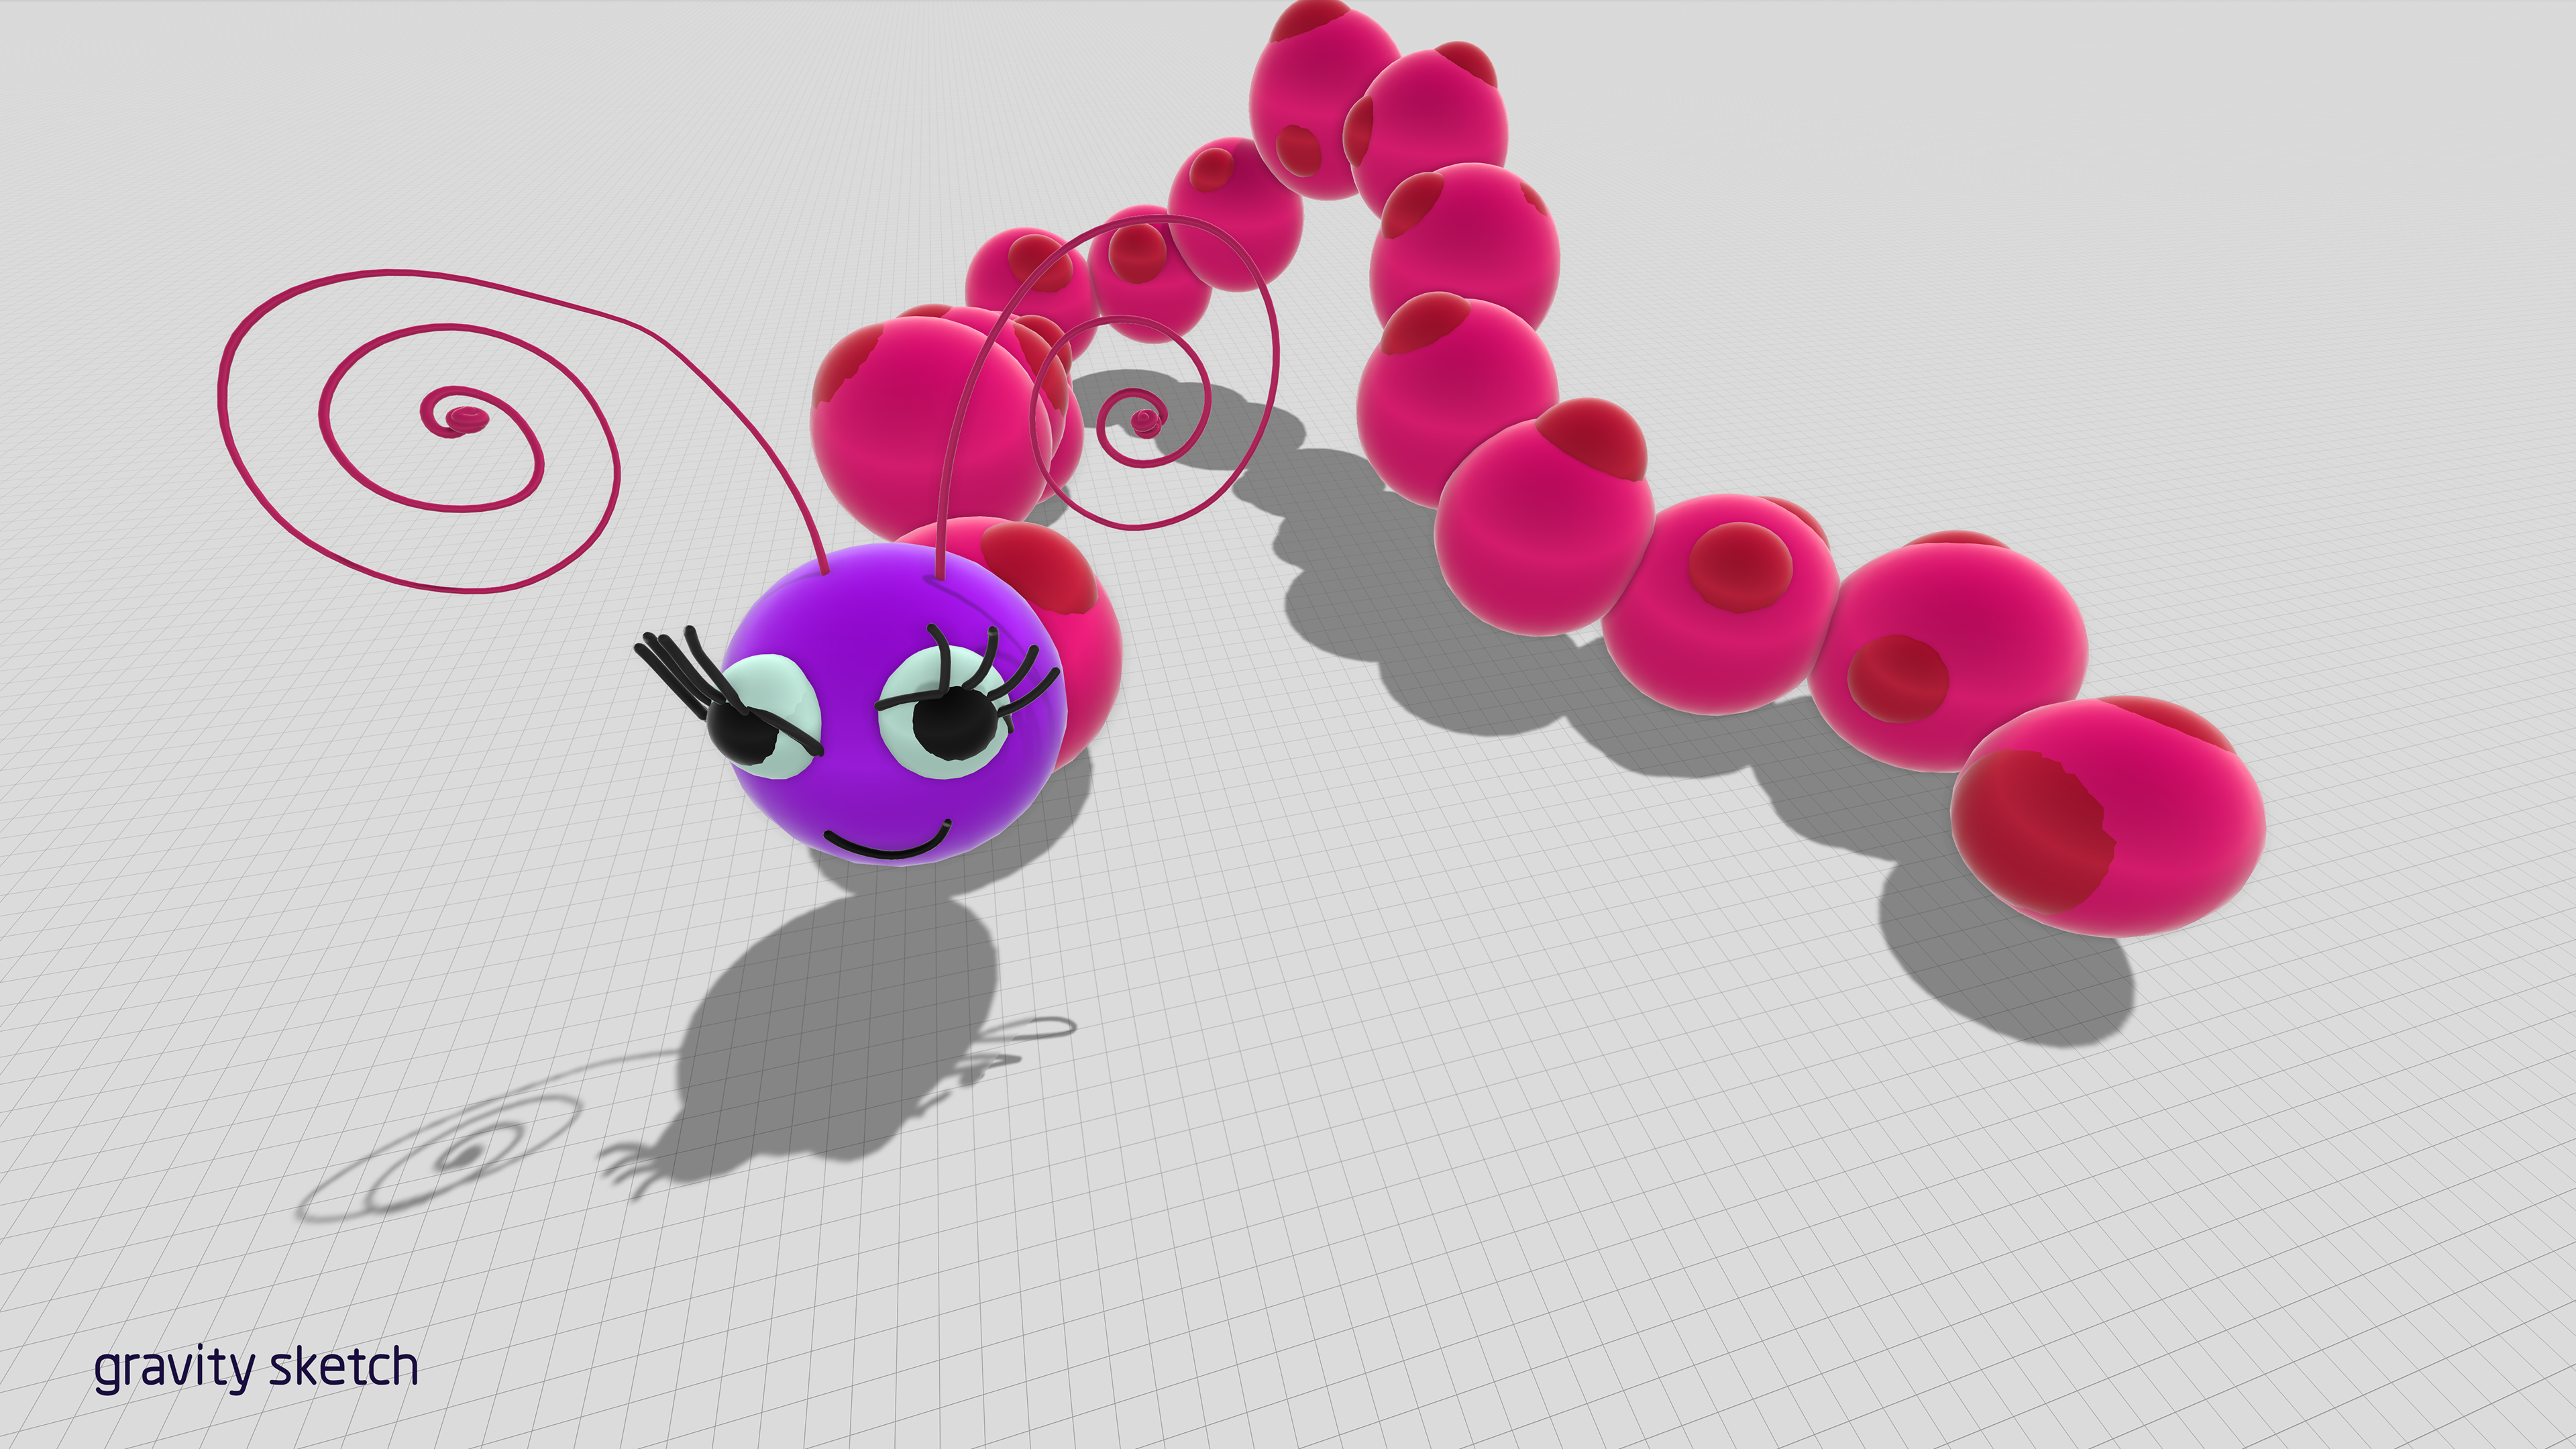
Lesson 06: Virtual Reality Sculpting
The Brief: explore VR sculpting, reflect on the future of 3D design
The Learning Objective: reflexive exploration in a new medium
The Tools: Oculus Rift (hardware), Oculus Medium (software)
Timeline: 1 class session
(the following are examples of student work)